Category Archives: groundschool

PPL Radio Exam / RT Test

The PPL Radio Exam / Practice Test is something I knew very little about before going in for it. Before you can be issued your PPL licence, you must have completed all 9 written exams, the skills test and the radio exam. Googling didn’t really find much, and the instructors and everyone I asked didn’t give much away either, just saying “you’ll be fine”!

Here’s what happened…

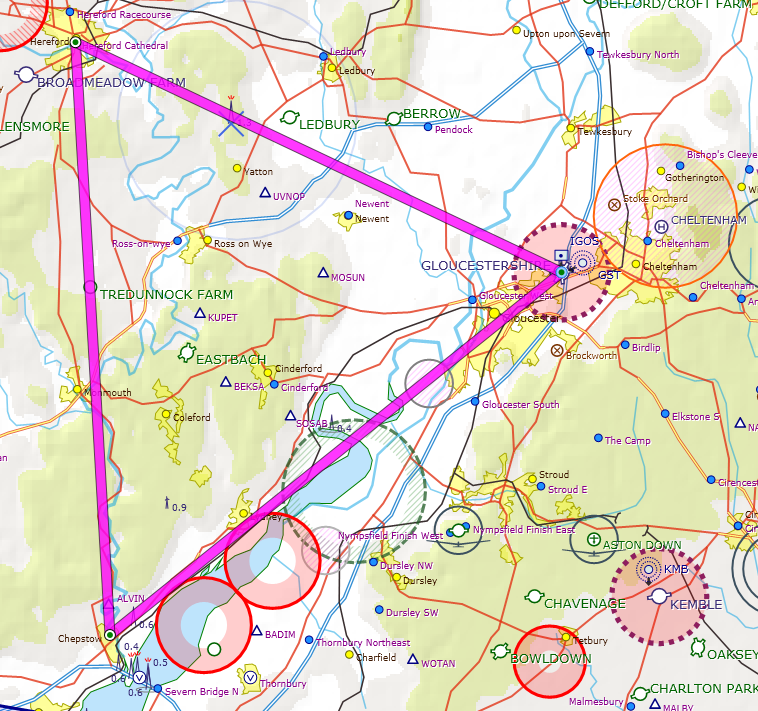
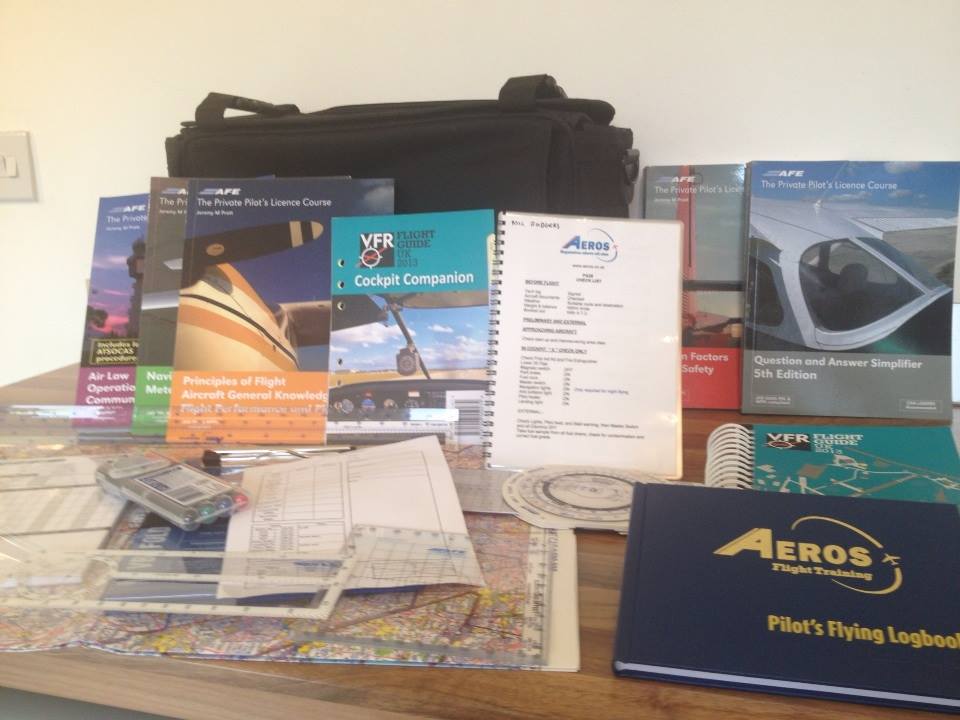
On arrival, I had a briefing with the examiner. He explained that we’d each have a laptop, with headphones and mic, and would be sat in different rooms. The laptop would show an aircraft flying along a predefined route. He gave me a couple of sheets of paper: a (made up) map showing a planned route, with airfields, danger areas, airways, CTRs, CTAs, and MATZs; a list of all the radio frequencies available that could be used along the route (airfields, LARS, MATZ penetration, FIR Information, etc); a PLOG for the ficticous route, complete with headings and estimated times; an instruction sheet, listing the sequence of events that would happen (eg, depart from airfield X, request MATZ penetration, obtain a traffic service, etc).

I then had half an hour to prepare on my own. I visualised the route and made notes of the things I’d want to do at key points along the route. As you’re allowed to make notes, I wrote a brain dump of the Urgency call order incase I became tongue-tied during the main event.

After the prep time, the examiner came back and asked if I had any questions. I didn’t, so he brought the laptop in to the room and gave me a quick demo of how it all works. On the screen is a moving map, with an aircraft. There are controls for heading and buttons to turn left and turn right. At each turning point of the route, I’d need to select the correct heading and click the turn button. This is the only control input for the flying that was necessary. He was keen to emphasise it’s not a flying test, nor is it a test of being able to accurately turn at the right places – it’s all about the radio, with the map being used as a visual aid to think about what calls are needed, and when.

The laptop used in the RT test

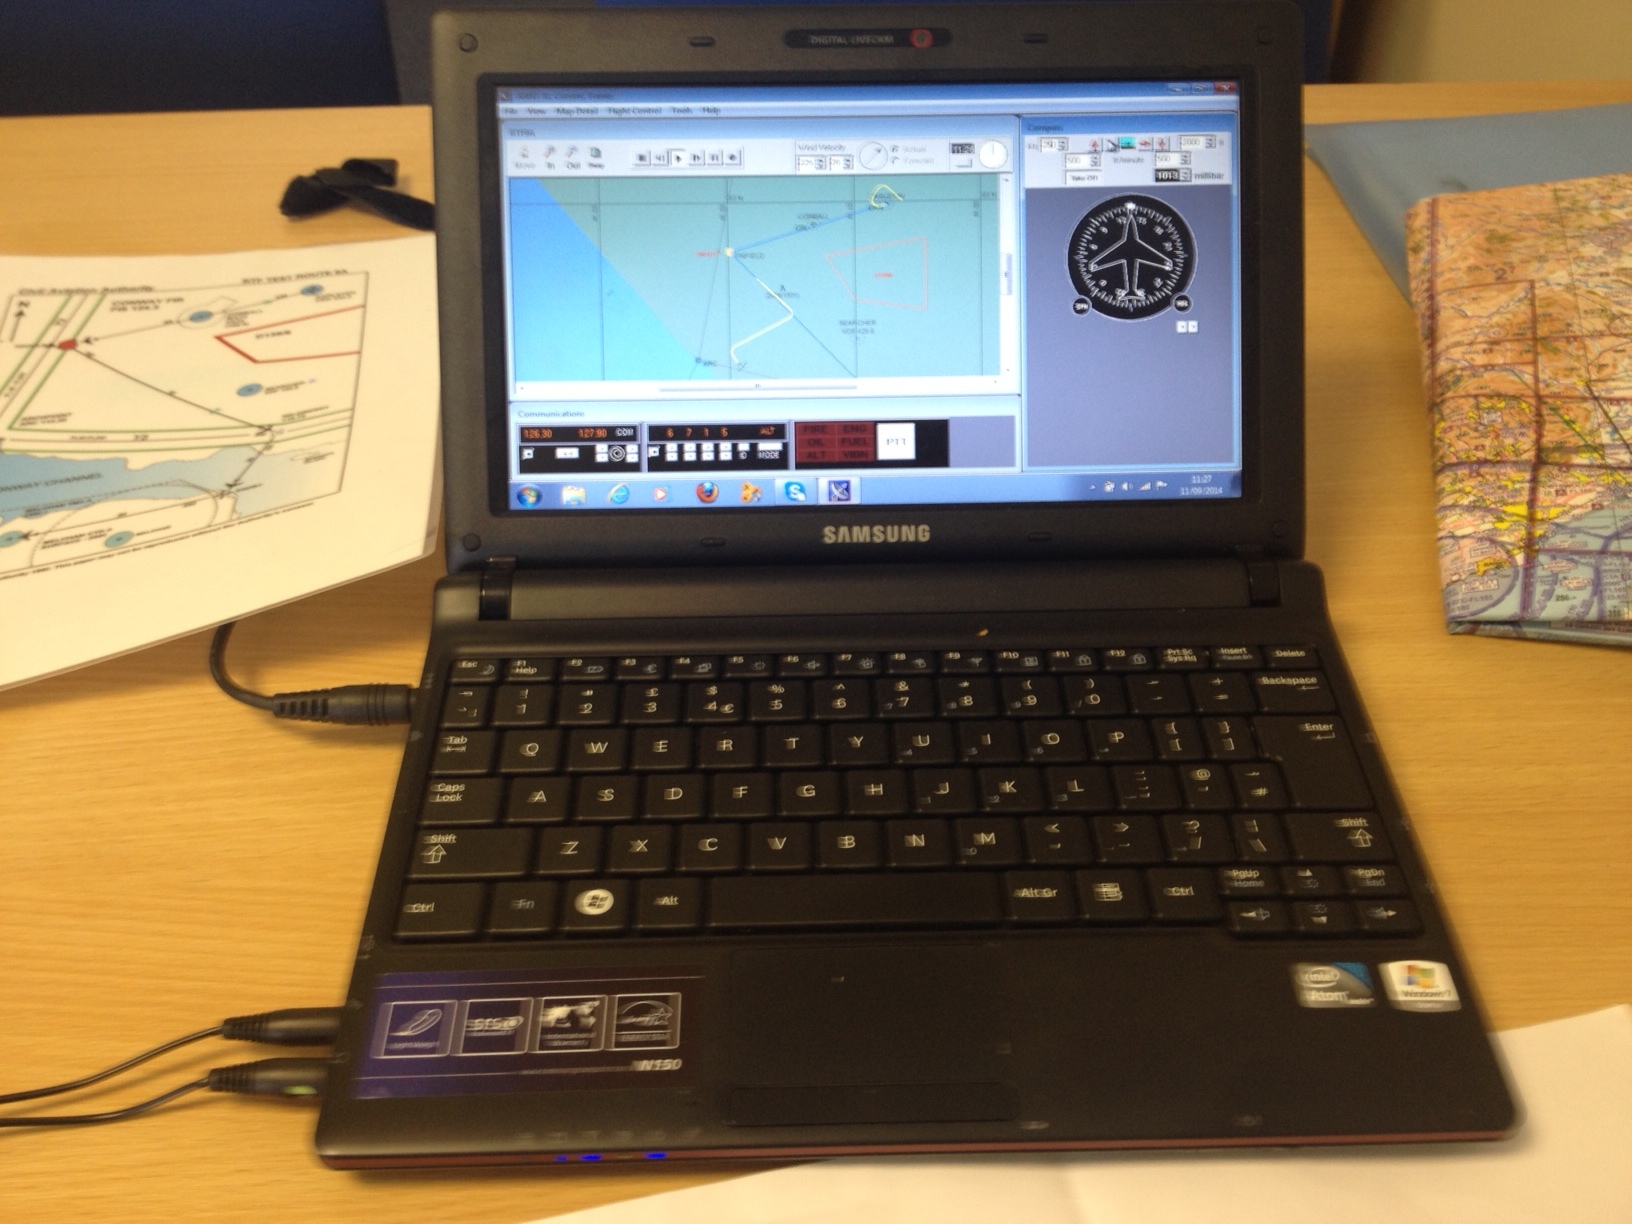
In addition to the moving map and aircraft controls, icons for transponder and radio are at the bottom of the screen. You click the knobs and the frequency/ident changes. Just like the real thing. The red/orange lights represent possible problems such as engine failure, oil pressure etc. If these light during the test then I am to report a Mayday or Pan Pan urgency situation.

I then had 10 minutes to play around with the controls and get used to it, before we started the real test. Everything seemed to work correctly and was easy enough to use, so I said I was happy to start. The examiner left the room and went next door. We did a quick test to make sure we could hear each other ok (through the headphones) and then the exam started.

  1. I started on the ground in an ATC airfield. I had been given the ATIS information. I requested radio check, then called for taxy. I then called ready for departure, but had to hold position for a landing aircraft. I was then given a “line up and wait behind” clearance, followed by a clearance to take-off.
  2. The airfield had a combined tower/approach, so no frequency change was necessary. I was given a basic service. This part of the route goes directly through a MATZ, so I had to call the MATZ Penetration service to request MATZ penetration and traffic service. I was given clearance through it, given a squawk and told to report on leaving the zone.
  3. Upon leaving, I had various traffic reports given to me, which I had to acknowledge.
  4. After turning at the first waypoint, I again had some more traffic reports. You have to be careful to listen out, as some messages are for you but some aren’t. There are lots of pre-recorded audio clips of other pilots, and the examiner (the radio controller) responds to them too, so just because you hear his voice doesn’t mean he’s talking to you!
  5. I heard a MAYDAY call that wasn’t answered, so it was up to me to relay it. I relayed it, it was acknowledged, and then shortly later the originating aircraft cancelled their mayday, which again I had to relay. Emergency over.
  6. The LARS service told me they were closing for the day, and to reset my squawk.
  7. After resetting to 7000, I called the FIR Information service for a basic service.
  8. The script at this point said that I must request a true bearing from a VDF service along the route, so I requested frequency change to them, obtained a True Bearing, then changed back to the FIR Service for a basic service.
  9. At the end of this leg, I was approaching a Class A CTA, which meant I needed to obtain a Special VFR zone transit. I requested frequency change, and passed my message, asking for a Special VFR Zone transit. Again, another squawk and shortly afterwards they had identified me and cleared me to transit their zone.
  10. Whilst in the zone, flying towards the destination airfield, I received a radio call informing me that my destination airfield had closed and would likely be closed for several hours. I acknowledged and requested to divert to their airfield, which was acknowledged. They handed me over to tower, who told me to join left base.
  11. I made the various calls during landing, and was given clearance to land.

Shortly after, the test was over and the examiner came in to tell me I had passed 🙂

He was pleased with my performance. The only thing he took issue with was me getting a basic service from the FIR for only a couple of miles, before then switching for VDF, only to switch back again.  Whilst not technically wrong, in real life the FIR service is so busy that it can be difficult to get your message in, so probably wouldn’t have been able to get the initial basic service.

Exam passed, paperwork signed, now all I need to do is the final skills test…


All written exams passed!

Completing my mock test was the final kick-up-the-backside that I needed to take my final two exams – Meteorology and Radio Communications.

Of all the nine exams, Met was the one I was dreading the most – I was never particularly great at science, and the sheer size of the PPL Met book was putting me off!

After a couple of weeks reading and re-reading it, things just weren’t sinking in. I understood the words but it just didn’t make sense. I decided I needed some extra help, and settled on the interactive course from CAE Oxford Academy. They have a range of DVDs – for each of the PPL subjects – and they are also available online. I signed up to the online version of Met, for 30 days, costing around £25. I watched the whole course (about 6 hours) over two evenings and, for the first time ever, Met finally started to make sense. The animations and diagrams brought the whole thing to life, in a way that the book never did.

I then spent a whole day watching the whole thing again, making notes, which I then revised from. Using the AFE sample question books, I took the sample tests and was getting an average of 85%. I learnt from my mistakes and was consistently getting 95-100%. I was ready for the test.

VFR Comms was a much easier one to prepare for. 2 hours reading and I was getting a consistent 100% in the sample tests. Fingers crossed.

Before my next lesson, I headed to the airfield and took Met, starting my fourth sitting. I passed with 95% – hoorah – so decided to take Comms. Another 95%. I have now passed all 9 written exams, with an average of 88%. I’m happy.

Turning overhead Chepstow

Lesson 22: Navigation introduction

After many weeks of cancellations due to the terrible weather, I finally got back up in the air recently for my first navigation lesson.  A couple of weeks before hand, because of the bad weather we decided to spend a couple of hours doing ground school in preparation for the upcoming navigation lessons. The majority of the remaining lessons focus on navigation and as you’d expect, it’s not something you’d want to be crap at.

There are so many elements of flight planning to consider before the flight. At first it can seem quite daunting. Here are just some of the things to consider:

  • Weather – at departure airfield, destination airfield and en-route
  • NOTAMs  (Notice To AirMen) – temporary notices and restrictions, you must check for any notams along your planned route
  • Royal Flights – you need to phone the royal flight information line to ensure your planned route doesn’t pass near any planned royal flight (royal flights create temporary restricted airspace you have to avoid – otherwise face an interception by an  F/16)
  • Fuel – how much fuel is required for your journey, including a contingency amount
  • Weight and balance – are you able to fly the planned route with the fuel, passengers and luggage that you are planning to take?
  • Alternatives – what airfields can you divert to if the weather turns bad?

As well as all this, you have the job of planning which route you want to take. This sounds like a fairly straightforward process – and can be – but can get very complicated very quickly if your route is surrounded by complex restricted airspace.

In principle, to plan your route, take your aeronautical VFR chart (map) and draw a straight line from your departure airfield to your destination. This will be the shortest route. Next, look along the route to see if it passes through any controlled airspace, danger areas, restricted areas, gliding sites, parachute drop zones and other potential hazards. You then need to alter your route to accommodate all these things.

Then you need to measure the distance of each part of your route, as well as the angle between each point. Once you have the distance (in nautical miles) and the true heading, you plot them in a PLOG (which is essentially your route, written down on paper). You then need to calculate the heading to fly, and the estimated time taken to each fly each leg. Both these things very much depend on the wind. To do this, you use a flight computer. A flight computer sounds very fancy and technical, but in reality is 1950’s technology – a simple slide rule.

flight calculator
The Flight Calculator – no batteries required!

The flight calculator uses the triangle of velocities to give you a ground speed and wind correction angle, given the wind speed and direction and your intended heading and air speed. You plot the heading on your PLOG, then flip the flight calculator over to calculate how long it will take to fly the distance at that speed. Write the estimated time in the PLOG. Finally, you need to convert from true heading to magnetic heading and compass heading. Magnetic heading is true direction adjusted for variation (you learn more about this when studying for the nav exam), whilst compass heading is magnetic heading adjusted for the deviation of your aircraft’s compass. Got all that? Simple.

So now we have a route, with headings to fly, distances and times for each leg. What about altitude? How do you decide how high to fly?  Firstly, you go back to your chart and  look along each leg of your route. You need to look 5nm either side of the planned track for the highest feature – terrain or obstruction – shown on the map. For example, you may see a wind turbine with an indicated altitude of 1,235ft above sea level.  Or it may be a hill that peaks at 1,354ft. Now we calculate the minimum safe altitude. Round the highest point up to the next 100ft, eg (1235 to 1300). If it’s terrain, you need to allow for a potential obstacle on the top of it (as VFR charts don’t show obstructions below 300ft). So take the rounded height and add 300ft. Finally, add 1000ft to give us our MSA.

Because the UK VFR 1:500,000 chart doesn’t depict terrain below 500ft and obstructions below 300ft, even on what appears to be a clear patch of land you have an MSA of 1,800 ft. This is because you could potentially have an obstruction of 299ft on terrain of 499ft. When rounded up, this gives us 800ft, plus the 1000ft = 1800ft.

We don’t have to fly at or above the MSA, we can safely fly below the MSA in good visibility with clear sight of the surface and of 10km or more ahead. So, why do we calculate it? It’s a safety net, there for us if we inadvertently fly in to instrument meteorological conditions (IMC) for which our licence doesn’t allow us to legally fly. This would be a bad place to get to, but it can happen. If it does, the first thing you should do is ensure that you are flying at or above your MSA. So even if you cannot see the ground or terrain, you know that you are above the highest terrain around you and therefore are not at risk of controlled flight in to terrain.

After learning all this, I planned my first route. We’d be flying in a triangle, from Gloucester down to Chepstow, up to Hereford and back down to Gloucester. Each leg is about the same distance, but with today’s wind they would take 18 minutes, 13 minutes and 11 minutes respectively.

Navigation triangle: Gloucester to Chepstow to Hereford to Gloucester


The principles of navigation rely on dead-reckoning, not GPS. It’s all about timing. Before setting off, you mark the quarter, half and three-quarter way points of each leg on your map. Then when in the plane, you start a stopwatch at the beginning of each leg. Because you have calculated an estimated time for each leg, when you have been flying for quarter of the estimated time, you look on the chart to see what you’d expect to see on the ground. Then you look on the ground and determine whether you are where you expected to be.

You could be somewhere different to where you were expecting to be for numerous reasons – the wind could be stronger, lighter or in a different direction to forecast. You may have accidentally been flying the wrong heading. There are a bunch of things you can do to make corrections but I’ll cover this in another post.

When you arrive at each waypoint in your PLOG, you’re expected to do the four T’s (in order):

  1. Turn – to your next heading
  2. Time – note the time of the turn, reset your stopwatch, update your PLOG to reflect actual and revised estimates
  3. Talk – give a position report on the radio (“Gloucester Approach, G-GFCA, Position Report, turned Chepstow time 44, 2500ft on 1019, Estimate Hereford time 55”)
  4. Task – carry out any other tasks such as changing pressure settings, FREDA checks etc

So after all that theory, time to fly. After checking the airplane (yet another element of pre-flight planning!) we were soon taxying out to the runway…

The sun was shining and the sky was clear - at long last
The sun was shining and the sky was clear – at long last…

After being cleared for take-off, as I entered the runway I had another task to add to my ATPL runway checks (Anti-Collision Light, Transponder, Pitot Heat, Landing Light) – start the stop watch! Soon we were climbing away.

My instructor introduced me to some more checks:

At 300ft – FEL checks:

  • Flaps retracted
  • Engine temperatures and pressures
  • Landing light can go off

Then at 1000ft, RAF checks:

  • Radio
  • Altimeter
  • Fuel pump off

At around 1000ft it’s time to turn to your first heading. After turning on the heading, perform a gross error check to make sure you’re flying in roughly the right direction. Look at the map and the ground to make sure you’re heading the right way.

Everything happened so quickly. Before I knew it, we were at the quarter-way time. I looked at the chart and I looked down below, and we were in the right place at the right time. Same with the half way point. Three-quarter way point was on time too. Finally we reached Chepstow with the Severn Bridges off to our left. I turned to the new heading, noted the time and filled out the ‘estimate’ time for Hereford. I then got on the radio to give my position report.

So far so good, and on it continued until Hereford. We arrived there on schedule and turned back towards Gloucester. However on this leg, we appeared to be to the right of our intended track, so I had to correct for this by turning left. Back on the ground after some reflection, I concluded that I turned too early. I could see Hereford but we were not flying above it. Looking at my GPS log, I actually turned about 2nm too early, so even though we were flying the correct heading, we ended up 2nm south of where we wanted to be. Not a biggie – and useful learning for the future. Make sure you’re overhead the place – being able to see it is not the point to turn!

I then made a standard overhead join and joined a fairly busy circuit. Landing went well.

Here’s a 30x faster video of the entire flight:

Next lesson we’ll be doing the same route, but in reverse.

Medical, another exam and lesson 10 – all in one day!

Today’s been busy. First thing this morning I had my Class 2 Medical at Gloster Aviation Medicals Ltd – a really great chap called Dr Ian Ramsay. Friends had been winding me up all week about what would be involved so I was a little nervous. Suffice to say that it was all relatively straightforward and my pants did not need to come off!

The medical covered eyesight, hearing, height/weight, family medical history (didn’t take long!), my medical history (didn’t take long!), chest/breathing checks and a urine analysis. It was all over within 30 minutes and I walked out the proud owner of a Class 2 Medical Certificate, and £84 lighter.

I had 2 hours before my lesson, so I did some last minute revision for the Human Factors & Performance Exam before sitting the real thing. Biology was my worst subject at GCSE and whilst most people seem to find this exam the easiest of the nine, throughout my revision I had found it rather hard going. Basic GCSE Biology stuff like the parts of the ear, understanding how the eye functions (rods, cones, etc.) was something that never particularly sunk in for me.

As well as the biology stuff, it also covers areas like cockpit usability/design (ideally, the undercarriage lever should look like a wheel and the flap lever should look like a flap so that you can easily distinguish between them) and other more psychology-related and managerial style topics such as understanding how decision making can be influenced by groups etc. This kind of stuff was much more my comfy, familiar territory thanks to the day job so I sailed through those parts of the syllabus.

Time came for the exam, and luckily I found it fairly easy. I passed, had a coffee and then met my instructor for today’s lesson. My previous weekday instructor is off sick with back problems, so today was my first session with my new weekday instructor. We reviewed my progress and talked through the plan for today. More circuits and practicing go-arounds.

After A-checking the plane (probably the most detailed one I’ve done yet – learnt quite a lot of gotchas to watch out for that aren’t on the checklist) we got ready for departure. I’d be responsible for all the radio and checks today, so the workload has been shifted up a notch.

After taxying to the pumps and filling her up with fuel, we were soon lining up on the runway and taking-off. We were on runway 27 again today – right hand circuits – and wind was 320 at 8 knots. I’m not entirely sure why runway 36 wasn’t active, as it meant we had a crosswind on 27. Still, a first for me and a good opportunity to learn how to deal with it.

When landing with a cross wind, on final you need to aim in to the wind, to compensate for the wind drift. This means that when you come to the level-off and flare, the nose of the plane will be pointed to one side (rather than the usual straight ahead). To compensate for this, use rudder and opposite aileron to bring everything back in to line.  Today, this meant using left rudder and right aileron.

The first circuit was a little messy whilst I got in to the swing of things, then I started to settle down and improve. Last lesson I wasn’t flaring enough, so today – conscious of this – I was trying to get the flare right, but ended up pulling back too much. Too little last lesson, too much this lesson. Hopefully I’ll be somewhere in the middle next time!

The wind died down about by the fourth circuit but I was still executing a crosswind landing even though there was nothing to correct, which made for a slightly wonky landing, but nothing too disastrous.

We did two go-arounds (we planned to – they weren’t necessary), which basically involve applying full power, moving over to the dead side of the airfield (the left, in our case today as it was right hand circuits) and climbing at the usual climb rate, then join the circuit at normal circuit height on the crosswind leg.

I forgot to run my iPhone GPS so no tracks this time. Next lesson is tomorrow morning – either more circuits or practicing Engine Failure After Take-Off and forced landings.

BUM-FFF-ICHH or pre-landing checklist

Aviation is full of acronyms and mnemonics. This one is particularly odd sounding and not particularly memorable, but it’s also one of the most important checklists to memorise.

When preparing to land, whilst downwind you should carry out the pre-landing checklist. Here’s what we need to check:

  • Brakes – parking brakes should be off, and toes clear of the toe brakes
  • Undercarriage – should be down (we’d have a big problem if it wasn’t in our fixed-gear Piper Warrior!)
  • Mixture – should be rich
  • Flaps – as required. Normally up in downwind.
  • Fuel pump – on
  • Fuel – on fullest tank, is the contents sufficient for a go-around?
  • Instruments – is suction within limits, are engine t’s and p’s green? Is QFE/QNH set? Are the compass and DI aligned?
  • Carb heat – turn on for at least 10 secs, turn off, check rpm drop within limits
  • Hatches – closed and secured?
  • Harnesses – on and tight?

Flying in the circuit and preparing to land is such a busy stage of flight that it is definitely not the time to be reading these from a written checklist. My instructor gave me a good tip for learning these. Write them on a post-it note, and stick it on the back of the sun visor in the car. When you’re nearly home, recall the checklist. When you get home, check against the list to make sure you didn’t miss any. This has been helpful for two reasons – helping to remember the content, but also the act of remembering to do the checks before getting home is similar to doing them before landing.

I feel pretty confident that I’ve memorised them now, but lets see how I get on in tomorrow’s lesson with the added pressure of flying at the same time!

Lesson 3 – cancelled

The weather was looking pretty miserable, and I was half-expecting a phone call cancelling the lesson. Sure enough, it was cancelled. It’s a very sad, miserable feeling. No doubt it’s something I will have to get very used to, as it was me who decided to start learning to fly as we approach our British Winter.

Instead of a lesson in the air, I had my first ground school lesson. I was given an introduction to radio telephony, noise abatement procedures, and some of the legal and relevant documentation involved in flying.

For radio, my instructor gave me a handy sheet with some examples of the radio communication required to get from the apron to take off. He emphasised how it’s just an example of how the dialog could go, and not to expect it to always go like that as it would be confusing for me if I heard something else. We talked about one of the most important rules of the radio: listen carefully. Just like in normal life, if we don’t pay attention whilst we’re listening, we often hear what we want to hear. The consequences of this whilst flying can be lethal. This is one of the reasons why important communication must be read-back, so that any misunderstanding can be identified.

After my first trial lesson, my instructor suggested I read CAP 413, which is the Radio Telephony Manual from the CAA. A couple of months had passed, and I had read it a few times. A lot of it didn’t make much sense (I could understand the words but not the context) but as we talked through the basics today, a lot of what I had learnt in CAP 413 started to click in to place. He told me about this supplement to CAP 413 which is a PDF with built-in audio examples of different transmissions. It’s incredibly useful and I’d highly recommend listening to it to get some practice in understanding radio speak.

Noise abatement procedures are an important part of responsible airmanship. Airfields have noise abatement procedures to help reduce the impact of the airfield on local residents, for example by avoiding certain areas so keep noise to a minimum. Gloucester airport has 4 runways (so you can take off in 8 directions). 4 of those directions have specific instructions on when and where you can go after take-off (here’s a diagram showing the noise abatement procedures at Gloucester, which we reviewed together.

Documentation, on the face of it, can seem pretty boring. However, I actually found this part of the lesson to be really interesting and useful. I was shown where the key documentation is kept (each aircraft has its own file and box) and then we looked at the documents together to understand their significance. There are a number of legal documents (such as the certificate of registration and certificate of air worthiness) as well as more operational documents like the technical log (techlog for short). The techlog is updated by the pilot of each flight, listing the duration of the flight and noting any problems with the aircraft. Every day, before the first flight, a full A-check must be carried out, to confirm the aircraft is airworthy. The person who carries out the A-check must then sign-off the check in the techlog. Subsequent flights (on the same day) have a smaller set of checks.

Before heading home, I bought my PPL starter kit – a flight case with the AFE Learning To Fly books, a 2013 VFR chart, log book, checklist, flight computer, rulers, protractors, knee board, and other bits and pieces. It weighs a tonne – I had better start reading…

My PPL starter kit
My PPL starter kit