In the days that passed following my initial failure (or partial pass!) I kept beating myself up over making such a stupid mistake as messing up the overhead join. It took about 5 days before I finally calmed down and put it behind me. It had already happened, nothing I could do could change it. The only positive really was that I am pretty unlikely to ever make the same mistake again!
I had re-booked the final part of my test twice, each time was cancelled either due to weather, or aircraft availability. Six days had passed before I was actually able to re-take my test, and as I only had to take off, fly out of the ATZ and return again, I was feeling pretty relaxed on the drive to the airfield.
My test was booked for 1pm, but I arrived around midday so that I could check the aircraft, fuel if necessary and generally relax a bit before starting. As it happened, the aircraft had already been flown a couple of times and had a decent amount of fuel in it, so I didn’t need to do anything but wait.
Soon enough, the examiner arrived and we had a quick brief. No need to recover everything that was said before, today would simply be about doing a successful departure, rejoin and landing. Although he did say that he’d like me to do a couple of circuits too. Not a problem, I thought.
The wind was favoring runway 27, the best choice of runway at Gloucester as it’s the longest and has the familiar GCHQ as a visual landmark directly to the East of the threshhold.
This time, he watched me as I checked the oil and fuel, then asked me a couple of questions about the different parts of the plane. “What’s this bit called”, and “what does this do”. That sort of thing.
Soon enough we were in the cockpit and I was obtaining the ATIS. After a short taxi, and even shorter hold, we were cleared for take off. After a slight turn to the right for noise abatement, I turned to the north and flew towards Tewksbury. Overhead Tewksbury, I called Approach and asked to re-join. “Make a standard overhead join for runway 27, right hand” they said. So that’s what I did, not making any mistakes this time, executing a nice descending turn to cross the 09 numbers at 1,000ft. Whilst descending I asked Tower for approval to do circuits, which were approved, so when calling downind it was for “downwind, touch and go”. This was to be a flapless circuit, which went well, followed by a performance landing.
Everything went well, I had nearly done it. After slowing down, the examiner took control and asked Tower if we could do an aborted takeoff. They approved, so then he asked me to proceed as if I was taking off, but then abort on his command. Now, this isn’t something I’ve ever done before so I was feeling a bit apprehensive, but thought it through and figured I’d need to throttle back and brake hard. On his command, that’s what I did, and he was happy. He took control, then said “congratulation, you’ve passed”. Hoorah!
Back in the briefing room, we spent the next hour or so filling out various forms and paperwork. By the end of it, I had an envelope full of documents ready to send to the CAA to apply for my licence. I was very excited!
It takes around 2 weeks for the CAA to process your application. During which time, you can fly solo with an instructor’s approval, but you can’t take any passengers. As soon as the licence arrives, I’ll be able to take passengers.
Luckily I’m away next week with business, so the wait wont be quite so agonising. With any luck, I’ll do a solo flight before the licence comes through, and then go on my first flight as a licenced PPL with my wife. I’ll spend the next few days thinking about where we might go.. Oh, and celebrating. Lots of celebrating to be done!
After my last lesson, my instructor said I was ready to take the final skills test. I booked my test, and eagerly awaited the big day. T
For those of you who don’t know, a PPL skills test flight normally lasts between 2 and 2.5 hours, and consists of:
1. Navigation – before the flight, you’re given three waypoints and are asked to plan and fly the route. This is about testing your ability to safely plan and fly an appropriate route, using dead reckoning. Navigation aids are not allowed.
2. Diversions – you can expect never to reach the second planned waypoint, because on that second leg at some point the examiner will ask you to divert elsewhere. Here they’re looking for your ability to plan and execute a safe diversion – considering airspace, danger zones, restricted areas, etc along the way, as well as being able to estimate the correct heading and time required to get there. Oh, and your ability to draw the diversion line on the map – not easy trying to do that whilst flying a plane! Once you’ve reached the diversion destination, the examiner will take over responsibility for navigation and radio and ask you to perform a series of exercises….
3. General handling – you’ll be asked to demonstrate a bunch of general handling manoueveures, including: 3 x stalls (in clean configuration, in base leg configuration, whilst turning in approach configuration, and with drag flap); steep turns; spiral dive recovery
4. Emergency procedures – you’ll be asked to demonstrate a forced landing (your examiner will – at some random point – will cut the engine and you have to go through the motions of having a genuine engine failure); an engine failure after take-off (usually directly after the PFL)
5. IMC flight – the screens will go up (or the foggles go on) and you pretend you’ve inadvertantly entered IMC. Demonstrate what you’d do if it happened for real – eg consider OAT, MSA, rate 1 turn, potentially ask for radar service, etc.
6. Position fixing – after the IMC stuff, you’ll be asked to use any radio navigation equipment of your choice to identify your location on the map. Eg – VOR+DME, VOR+VOR, ADF+DME etc.
7. Radio homing – you’ll then be asked to home back to the airfield, negotiating your rejoin with the ATSU.
8. Circuits – normal, flapless, glide approach, performance landing, bad weather
So in the run-up to the day of the test, I had plenty to be revising!
The night before the test, I had a chat with the examiner, and he gave me a route to plan for the navigation part of the test. The test was booked for first thing in the morning, so this meant I could do most of the planning the night before, only needing to do the final bits of the PLOG in the morning when the weather forecast was available.
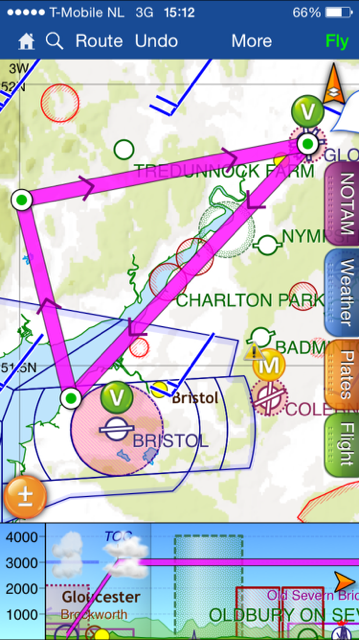
The route would be: Gloucester -> Clevedon Pier (VRP) -> Abergavenny -> Gloucester. You’re expected to use a direct route, and aren’t allowed to plan a route that would enable you to navigate by “feature crawling” – eg following a motorway or railway line. Drawing a straight line between Gloucester and Clevedon couldn’t give an easier journey, as you basically hug the shoreline all the way down. As it’s a pier, (and the first pier on the route) you would basically just keep going until you see the pier.
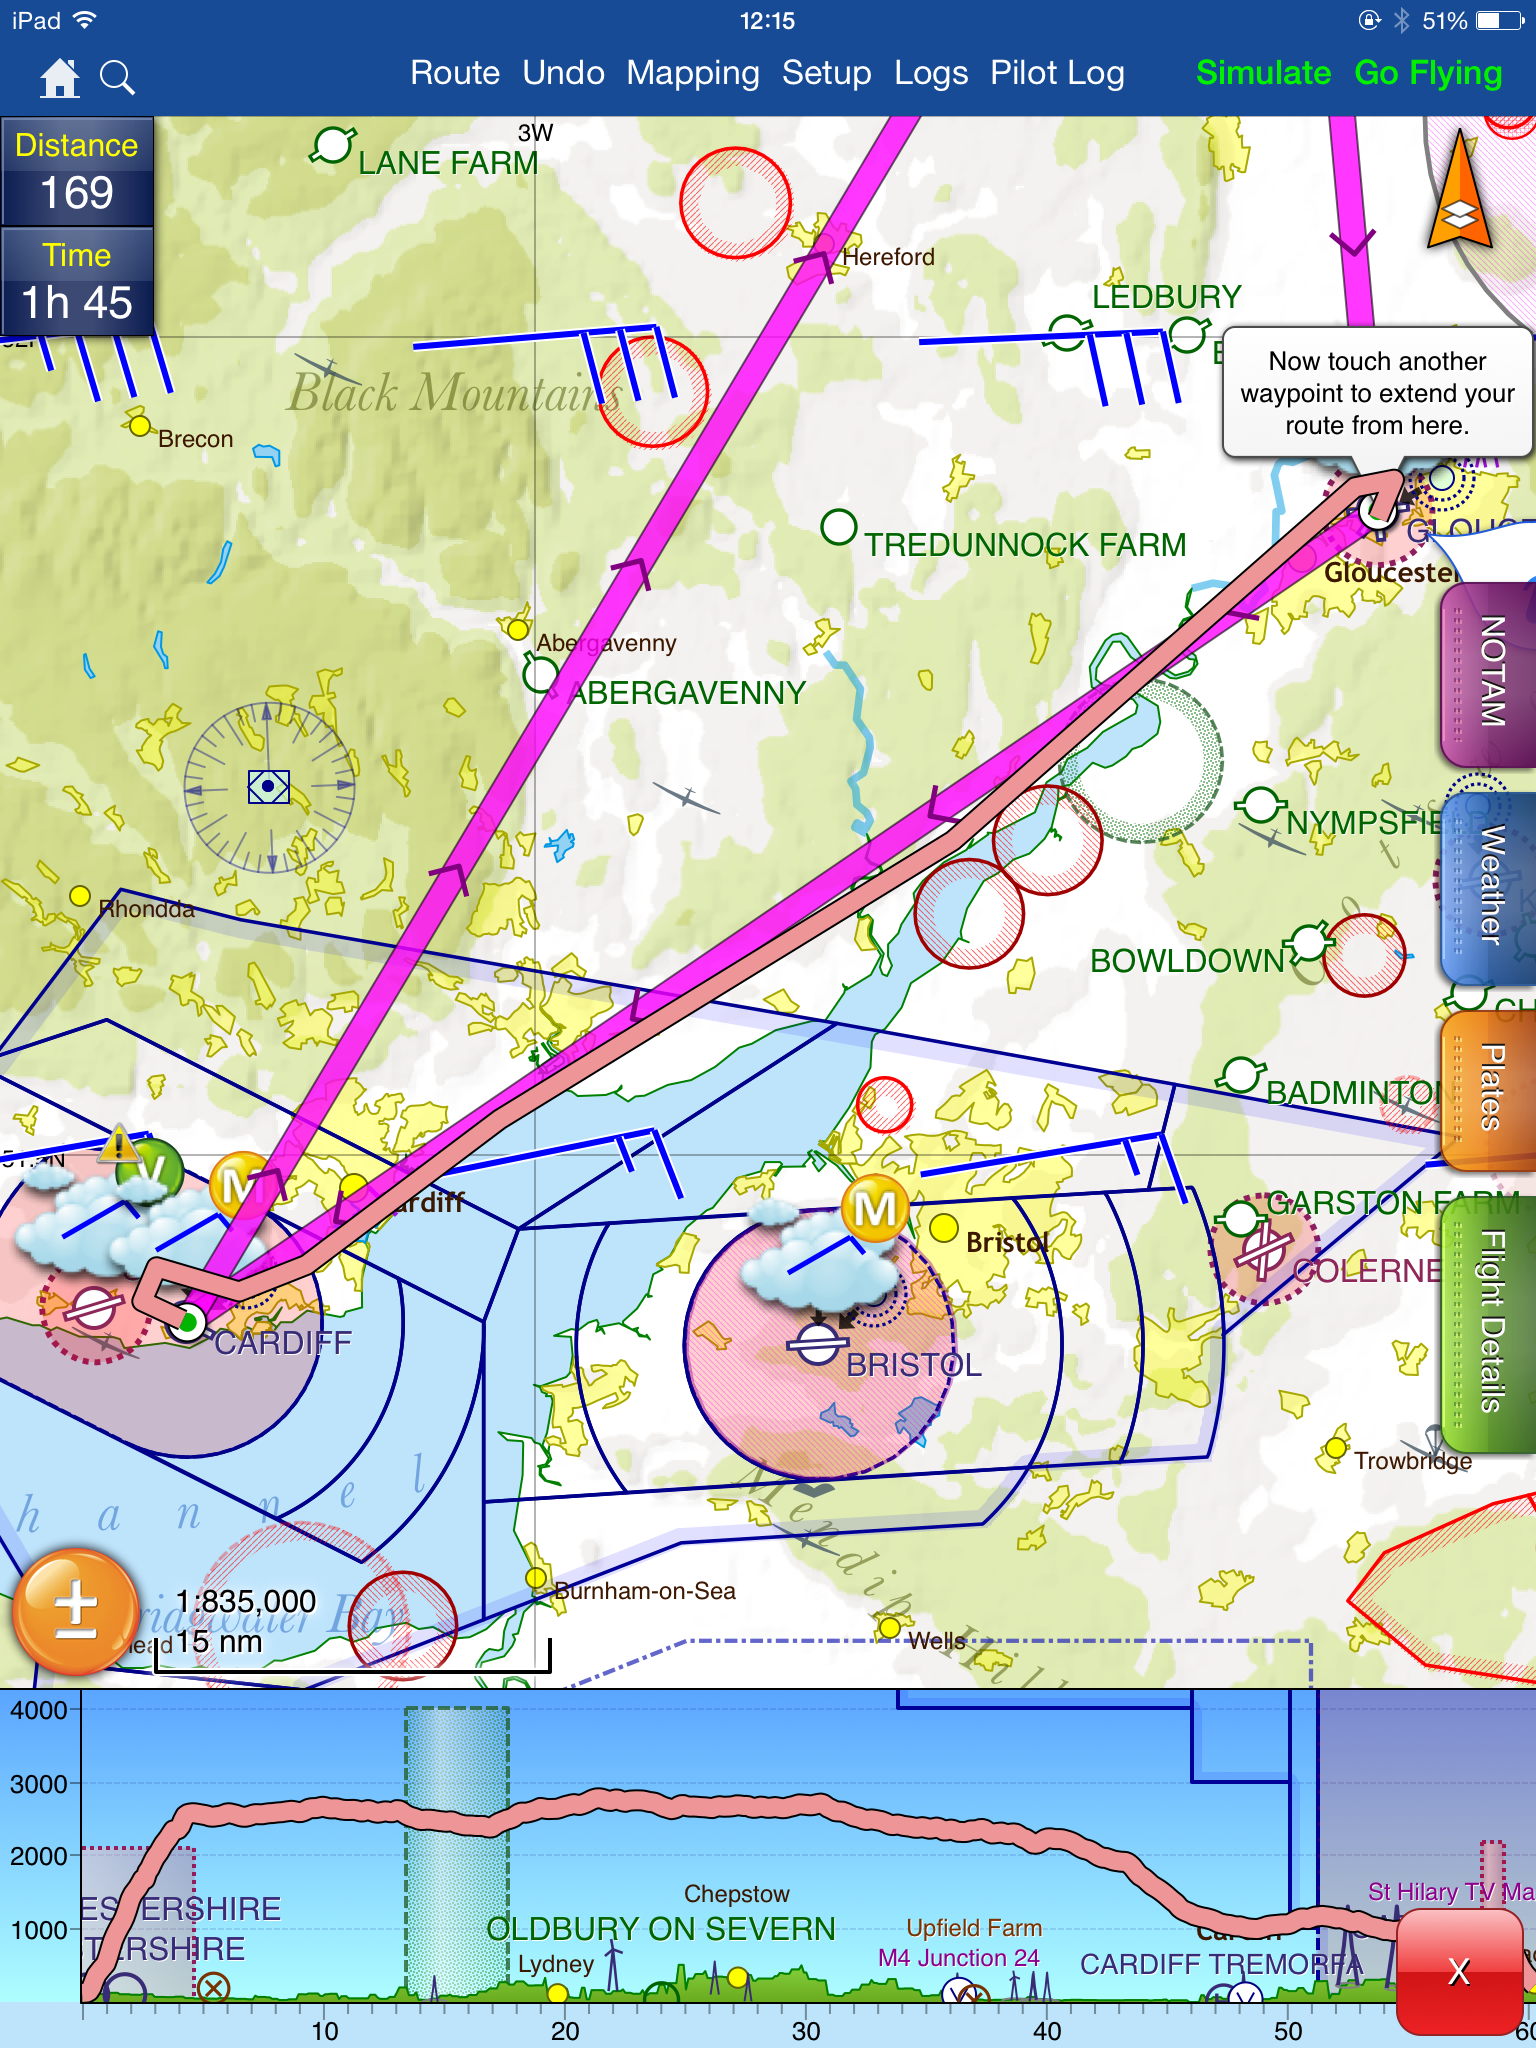
The direct route – notice how it goes straight through the bird sanctuary
Alas, life is not that easy, because the direct route happens to cut directly through a bird sanctuary. Legally speaking, pilots don’t have to avoid these areas, but common decency and good airmanship would suggest you give them a wide birth, so I planned to divert around it.
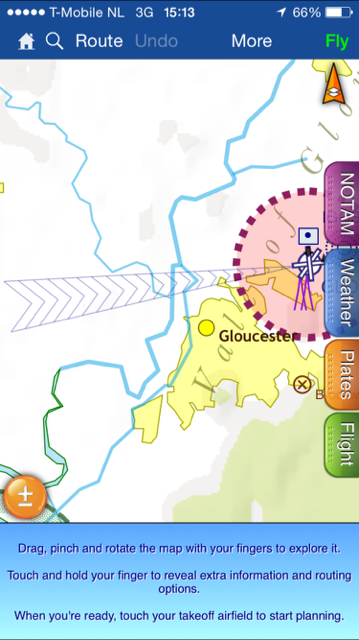
Routing around the bird sanctuary
I chose to divert to the west of the bird sanctuary. Partly because there is less in the way of restricted airspace and airfields, and partly because I was more familiar with that side of the estuary as I’d already done a lot of flying in the area whilst doing my navigation lessons. So, fly from Gloucester SSW to Cinderford, then fly direct to Clevedon. The first two thirds of the leg to Cinderford basically tracks above a railway line too, which would be useful to visually confirm I was on track (or enable me to make corrections to get back on track). And no, that doesn’t count as feature crawling!
Clevedon sits below the Bristol CTA (class D airspace), which starts at 1,500ft. So it would be critical for me to ensure I remained below their airspace, avoiding an incursion and a mandatory failure.
The Clevedon to Abergavenny leg has some nice ground features along the way, including the M4 J24 VRP and the reservoir to the north west. This leg is pretty much my home terriorty and I felt fairly comfortable about finding my way.
I didn’t spend much time planning or preparing for the third leg, as I knew we would have diverted by then. Instead, I tried to second-guess where I might be asked to divert from and to, thinking through the various scenarios. It’s fairly safe to assume you’ll be diverting back towards the airfield rather than away from it, so that narrows it down somewhat.
To prepare for the route, I did a bit of research using Google Earth. You can ‘fly’ the route, which is really useful as it helps you to identify visual clues on the ground with the chart. I also flew the route using Xplane, which was unnecessary but helped keep my mind occupied during the run-up to the big day!
The morning of the exam, and the weather forecast was looking ok. High enough cloud base, and 10km visbility, with no frontal systems to worry about. However, by the time I arrived at the airfield, I could see the weather wasn’t as good as had been forecast. Visibility was poor, with lots of mist. I met my examiner, we had a quick friendly chat before going in to ‘test mode’. First, we had the pre-flight briefing. I talked him through the planned route, my PLOG, the weather forecast, the fuel planning, flight performance figures for take-off and landing distance as well as the NOTAMs and temporary airways. He seemed happy that I had decided to avoid the bird sanctuary and was happy with everything I’d planned.
Next, he asked me some questions. Firstly, he asked me to explain the meaning of this symbol on the chart:
I answered “it shows the extended centreline of runway 09”, which clearly was only a small part of the answer he was looking for. So I said “but let me just double-check the legend and I’ll confirm whether it has any other significance too.” He was happy for me to do that, and soon enough I told him it signified an instrument approach procedure in uncontrolled airspace. So yes, whilst it was the extended centreline, this was the more significant answer, and the one he was looking for. Next question…
<points to the big blue numbers on the chart> – “what does this mean?”, he asked. “Well”, I said, “that’s the Maximum Elevantion figure for that section – it gives you a quick and easy way to see the highest point, which you can add 1,000ft if you’re in a hurry to to get an MSA”. We talked about it some more, and he was happy – he said he was looking to make sure I knew that it wasn’t the MSA, but the maximum height, which you can then use to calculate the MSA.. So, another right answer.. So far, so good..
He then talked through what would happen in the flight, and read out a series of statements that described what would and wouldn’t happen, and what to expect in various situations – for example, no emergencies are planned on the navgation part of the route, so if something does happen, proceed as if it is a genuine emergency.
He then gave me an hour to prepare the airplane (it needed an A-check) and fuel it, so I set off and checked everything over. I taxied down to the pumps and filled up with fuel, then got back to the apron. In the ten minutes I’d gone, the apron had filled up with planes – busier than I’d ever seen it – and I was only just able to park up clear of the line. Luckily some chaps were about to give me a hand moving everything around, making space and then finally helping me turn my aircraft around so I’d be pointing the right way at the start of the test. Worked up a bit of a sweat!
Whilst all this had been happening, I hadn’t noticed the weather had taken a turn for the worse. Before, whilst hazy, I could see May Hill to the West of the airfield, which is 10nm away. By now, I couldn’t see it at all – everything was suddenly very hazy, and there was no visible horizon. Doh.
I went back inside and talked with a couple of guys who had just landed. “Poor visibility”, they reported, “and it seems to be getting worse”. We weren’t in any rush, so my examiner was happy to wait and see if things improved. After an hour, things were worse, and there was no sign of things getting better. I said (ultimately it was my decision, they can not tell you whether to fly or not based on the weather – that’s part of what they’re testing you on!) that we’d have to call it a day and reschedule, and the examiner seemed pleased that I’d made the right decision. Really annoying, but what can you do!?
Several days of high pressure and slow wind didn’t do much to change the situation, before finally the forecast showed there could be a gap in a couple of days. I phoned the examiner – he was available – and we re-booked the test.
On the day, this time the weather stayed good, and as we had already completed most of the pre-briefing stuff last time, we had a quick recap before I went out to A-check the plane. (It was already full). We were on.
Sat in the left hand seat, I was working through my checklist as normal. At the “pasenger safety brief” item, I asked the examiner if he’d like it, and he said yes. The checklist has a standard paragraph that covers it, so I read it out (for the first time) and he was happy, so I carried on as usual. So far so good.
I obtained the ATIS and called Gloucester Tower to request taxi. The examiner booked us out using his callsign (Aeros 56) with Tango at the end to signify test, so today we were Aeros 56 Tango. Runway 04 was active – I’d only ever departed from this once – so I started the long taxi down to the holding point, where I stopped to run through the power and pre-take-off vital checks. “Ready for departure”, I said, followed by clearance to take off. This was it – here we go!
After passing Staverton village (for noise abatement), I made a climbing left turn to get on our initial heading. As we passed abeam the runway, I hit start on the stopwatch and filled out the ETA column on the PLOG. Gross error checks suggested we were heading in the right direction, and I could see the railway line so I knew we were on track.
I levelled off at at 2,300ft to stay clear of the cloud base. Top of climb FREDA check complete, then just a couple of minutes until we were overhead Cinderford, our first turning point. Everything was going to plan.
We were now heading directly towards the Pier, albeit with about 20minutes before we got there – so no sign of it yet. However, along the way we’d pass to the right of both Severn Bridges, and directly overhead Chepstow, which all provided helpful clues that we were on track. As I approached the old Severn Bridge, I changed frequency to Bristol Radar and told them we would be descending to 1,3000ft and requested a basic service. They gave us a squawk and I started the descent.
Cruising over the Severn felt a little weird at first, as I’d not flown over water before. I started to wonder whether I should have talked about life jackets in the pre-brief, or whether it’d have been better to route to the East after all, but it was too late for that now – I had to concentrate on flying! We were now down at 1,300ft on Bristol’s QNH and Avonmouth Docks were to our left. I could see a pier straight ahead of us – woohoo – and we were on time, too. When we were overhead, I turned right on to the next heading and we flew towards Newport. After a couple of minutes, we were safely outside Bristol’s airspace so I climbed up to 2,500ft. Visibility was great, and I could easily see the M4 J24 VRP and the Reservoir VRP beyond that.
Diversion time. As I pointed out that I was happy we were on track due to the reservoir being ahead of us, the examiner said to plan a diversion from the Reservoir to Ross On Wye. Excellent, I thought, as I was familiar with the area and had also practiced this exact diversion route when considering the possible options in preparation for my test.
Line drawn, true converted to magnetic, corrected for wind, heading calculated, distance measured and time calculated. I planned the diversion from directly overhead the reservoir, so I flew us towards it, waited to get overhead, then turned and started the stopwatch. I told the examiner the heading and estimated time of arrival, then talked through the hazards on route. Usk gliding site was reason to keep an extra good lookout, but apart from that were was nothing notable along the route.
One minute later than estimated, we were overhead Ross On Wye, with its distinctive church and the start of the M50 motorway. The examiner announced the navigation section was over, and that he’d now take charge of navigation and the radio. Phew! I had a big sigh of relief and enjoyed a celebratory polo mint!
After a minute or so to recompose myself, we started with the general handling section of the test. First up was steep turns. After completing a HASEL check, I started with a 45 degree turn to the left. All good. Next up, a HELL check, followed by a 60 degree turn to the right. All good. Next!
Then we did stall recovery. First up, I was asked to develop a full stall in the clean configuration and to recover on his command. All went to plan. For the next set of stalls, I had to recover at the first sign of the stall – eg when the stall warner starts sounding. Everything went well. Then the examiner took control, and put the aircraft into a sprial dive. I had to recover on his command. He waited until we got pretty close to VNE and you could really feel the G force. “Recover”, he announced, so I moved the throttle back to idle and rolled the wings level. Airspeed under control, power back on and I initiated a climb back to 3000ft. All good.
Next up, we ‘accidently entered IMC’ (well, I had to wear a pear of Foggles – foggy goggles!) so I had to do a 180 degree Rate One turn out of there. We were already above MSA, and the outside air temperature was well aboving freezing so no other actions were necessary. Immediately after completing the 180 degree turn, the examiner again took control and we flew for a couple of minutes. He then asked me to identify our position on the chart.
Using the Gloucester NDB and DME, I marked (after tuning and identing) our position on the chart, shown it to the examiner, who then said to take the foggles off. Sure enough, we were about 0.5nm away from where I had marked, which was good enough.
We then had an engine failure, and as we were 3,000ft I had plenty of time to run through the drill. Trim for 73, turn downwind and pick a field (I chose one on my left), then talked through my “Whats Up” checks. (Simulated) radio call made, then shutdown checks, followed by a turn for left base before turning on to final. At about 300ft AGL I was told to climb away, only to have an Engine Failure After Take Off (EFATO) shortly afterwards. I picked a field within 30 degrees of our heading, nose down for 73 and was told to climb away. All good.
Finally, I had to use the ADF to home back to the airfield, negotiating my rejoin on the radio with Gloucester Approach. As I had previously been using the NDB for the position fixing, I was already tuned and idented, so I could simply twist the OBS knob to my heading and then fly the heading shown. We were 6nm from the airfield, so I quickly obtained the ATIS and made the radio call requesting a rejoin.
Runway 04 was active, with a left hand circuit. Exactly the same as when we departed. By this time, we were 3nm and handed to Tower. This is where I started to go wrong… Maybe it was because I was getting tired (we’d been flying for just over 2 hours by this point), or maybe it was because I was rushing (I’d normally start planning the join from 10nm out – having the same work condensed in to 3nm is always going to be a squeeze), but whatever the reason, I messed up.
In my head, I had completely messed up the picture of the airfield and my overhead join. An overhead join for 04 should involve approaching the airfield, keeping it on your left hand side, and flying around it until you’re above the 04 numbers. Then, descend on the deadside to cross 22 at 1,000 ft, then you’re crosswind, ready to turn downwind, then base, then final for 04. Easy, obvious and a procedure I’ve done loads before without any problems. However, in the heat of the moment, I crossed the 22 numbers and started my descent, descending on the live side. What an idiot! Instead of doing an overhead join for 04, I did one for 22!
It wasn’t until I had descended to 1,000ft that I realised what I’d done. I told Tower I was mis-positioned and would climb out of the zone so I could reposition for another overhead join.
I climbed to 2,000ft and flew north for a couple of miles, straight and level. I wanted to regain my composure and explained to the examiner what I was doing. He was happy for me to do that, so after a couple of minutes I was speaking with approach again and negotiating my overhead join for 04. At 3nm I was handed back to tower, and this time I correctly joined overhead for 04, executing a good approach and touch and go.
Next up, I had to do a flapless approach. It went well. Then it was time for a glide approach. Again, went well. Finally, it was time for a bad weather circuit so after taking off I started a climbing turn to 500ft for an extra-close downwind leg. It all seemed to work out ok, so I was pretty quickly taxing off the runway and performing the landing checks. I then taxied back to the Apron and shutdown.
“I’m sorry to say you’ve failed”, those immortal words!
I knew I’d failed the moment I realised I had done the wrong join, but I suppose there was always a small part of me optimistacally hoping that I might still squeeze in a pass. No such luck. We went back inside and had a coffee, before debriefing.
He’d been really pleased with my navigation and general handling, and everything was looking good for a pass until I messed up the join. It was a mandatory fail item and there was nothing anyone could do about it. However, there was light at the end of the tunnel.
The reason he’d asked me to continue with the circuits was so that I could get what’s called a partial pass. The skills tests is divided in to several sections, and each section is passed or failed. By successfully passing every section except one, the positive way of looking at it was I had a “partial pass”. To get a full pass, I’d simply need to book another test and re-do the bit I messed up. That test only needs to consist of a departure, leaving the ATZ, then performing an overhead join with a succesful landing. I wouldn’t have to do everything else again.
Whilst this was good news, I still felt pretty crappy about the whole thing and went home feeling really annoyed at myself. I just couldn’t believe I had managed to mess up an overhead join – something so bloody simple!
The PPL Radio Exam / Practice Test is something I knew very little about before going in for it. Before you can be issued your PPL licence, you must have completed all 9 written exams, the skills test and the radio exam. Googling didn’t really find much, and the instructors and everyone I asked didn’t give much away either, just saying “you’ll be fine”!
Here’s what happened…
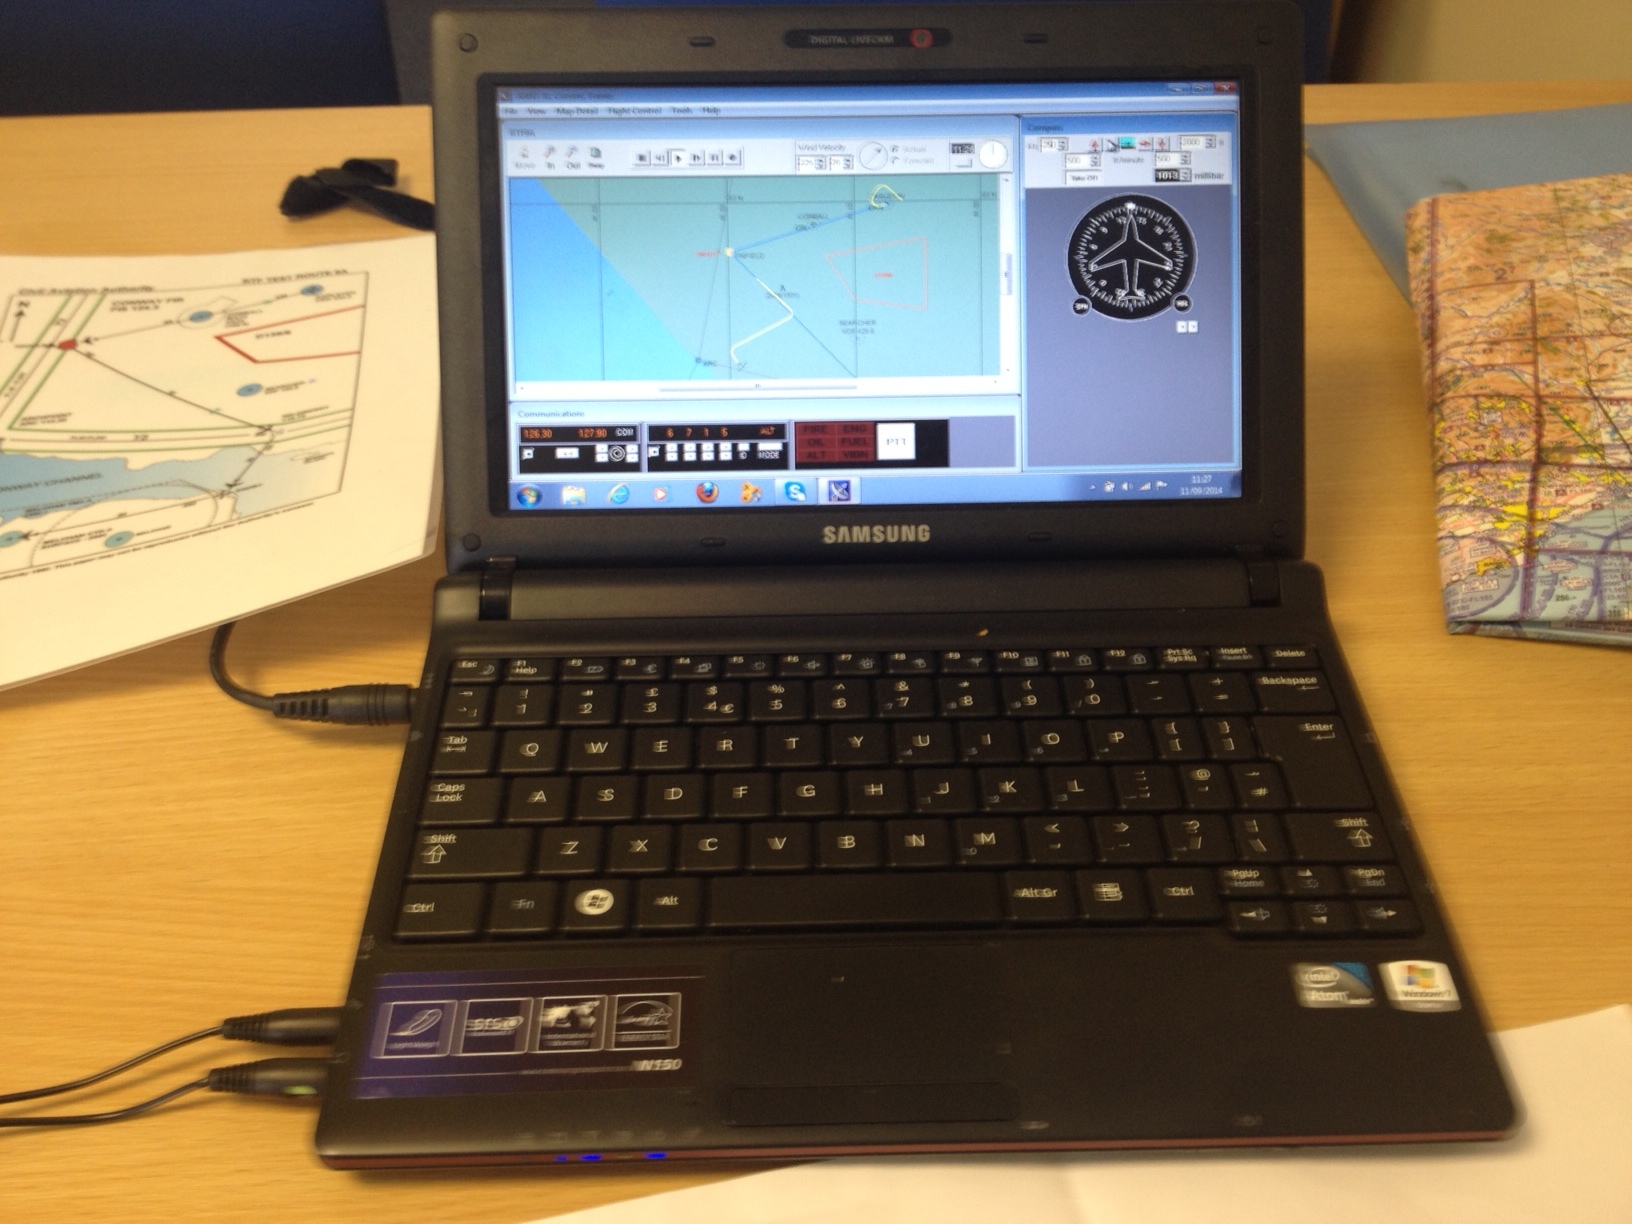
On arrival, I had a briefing with the examiner. He explained that we’d each have a laptop, with headphones and mic, and would be sat in different rooms. The laptop would show an aircraft flying along a predefined route. He gave me a couple of sheets of paper: a (made up) map showing a planned route, with airfields, danger areas, airways, CTRs, CTAs, and MATZs; a list of all the radio frequencies available that could be used along the route (airfields, LARS, MATZ penetration, FIR Information, etc); a PLOG for the ficticous route, complete with headings and estimated times; an instruction sheet, listing the sequence of events that would happen (eg, depart from airfield X, request MATZ penetration, obtain a traffic service, etc).
I then had half an hour to prepare on my own. I visualised the route and made notes of the things I’d want to do at key points along the route. As you’re allowed to make notes, I wrote a brain dump of the Urgency call order incase I became tongue-tied during the main event.
After the prep time, the examiner came back and asked if I had any questions. I didn’t, so he brought the laptop in to the room and gave me a quick demo of how it all works. On the screen is a moving map, with an aircraft. There are controls for heading and buttons to turn left and turn right. At each turning point of the route, I’d need to select the correct heading and click the turn button. This is the only control input for the flying that was necessary. He was keen to emphasise it’s not a flying test, nor is it a test of being able to accurately turn at the right places – it’s all about the radio, with the map being used as a visual aid to think about what calls are needed, and when.
The laptop used in the RT test
In addition to the moving map and aircraft controls, icons for transponder and radio are at the bottom of the screen. You click the knobs and the frequency/ident changes. Just like the real thing. The red/orange lights represent possible problems such as engine failure, oil pressure etc. If these light during the test then I am to report a Mayday or Pan Pan urgency situation.
I then had 10 minutes to play around with the controls and get used to it, before we started the real test. Everything seemed to work correctly and was easy enough to use, so I said I was happy to start. The examiner left the room and went next door. We did a quick test to make sure we could hear each other ok (through the headphones) and then the exam started.
I started on the ground in an ATC airfield. I had been given the ATIS information. I requested radio check, then called for taxy. I then called ready for departure, but had to hold position for a landing aircraft. I was then given a “line up and wait behind” clearance, followed by a clearance to take-off.
The airfield had a combined tower/approach, so no frequency change was necessary. I was given a basic service. This part of the route goes directly through a MATZ, so I had to call the MATZ Penetration service to request MATZ penetration and traffic service. I was given clearance through it, given a squawk and told to report on leaving the zone.
Upon leaving, I had various traffic reports given to me, which I had to acknowledge.
After turning at the first waypoint, I again had some more traffic reports. You have to be careful to listen out, as some messages are for you but some aren’t. There are lots of pre-recorded audio clips of other pilots, and the examiner (the radio controller) responds to them too, so just because you hear his voice doesn’t mean he’s talking to you!
I heard a MAYDAY call that wasn’t answered, so it was up to me to relay it. I relayed it, it was acknowledged, and then shortly later the originating aircraft cancelled their mayday, which again I had to relay. Emergency over.
The LARS service told me they were closing for the day, and to reset my squawk.
After resetting to 7000, I called the FIR Information service for a basic service.
The script at this point said that I must request a true bearing from a VDF service along the route, so I requested frequency change to them, obtained a True Bearing, then changed back to the FIR Service for a basic service.
At the end of this leg, I was approaching a Class A CTA, which meant I needed to obtain a Special VFR zone transit. I requested frequency change, and passed my message, asking for a Special VFR Zone transit. Again, another squawk and shortly afterwards they had identified me and cleared me to transit their zone.
Whilst in the zone, flying towards the destination airfield, I received a radio call informing me that my destination airfield had closed and would likely be closed for several hours. I acknowledged and requested to divert to their airfield, which was acknowledged. They handed me over to tower, who told me to join left base.
I made the various calls during landing, and was given clearance to land.
Shortly after, the test was over and the examiner came in to tell me I had passed 🙂
He was pleased with my performance. The only thing he took issue with was me getting a basic service from the FIR for only a couple of miles, before then switching for VDF, only to switch back again. Whilst not technically wrong, in real life the FIR service is so busy that it can be difficult to get your message in, so probably wouldn’t have been able to get the initial basic service.
Exam passed, paperwork signed, now all I need to do is the final skills test…
After my mock test, I decided to practice the different types of stalls and circuits that feature in the test, so that I could be freshly prepared on the big day.
We practiced:
recovery from a fully developed ‘clean’ stall (no flaps – nose down, full power, climb attitude)
recovery from the first signs of a stall with 2 stages of flap – (nose down, full power, climb attitude, wait for positive rate of climb then flaps away in stages)
recovery from the first signs of a stall with 3 stages of flap – (nose down, full power, drag flap away, climb attitude, wait for positive rate of climb then flaps away in stages)
recovery from the first signs of a stall whilst turning with 2 stages of flap (nose down, full power, wings level, climb attitude, wait for positive rate of climb then flaps away in stages)
After practicing these a couple of times, we headed back to the airfield for circuit practice. The radio was fairly busy with a couple of aircraft joining. 27 was active, but I wanted to practice on 36 (I hadn’t used 36 before the mock-test and I wanted to get a better feel of the visual aspects of the circuit, plus it would be good crosswind practice (wind was 270/10)). We were asked to join for 27RH and they would try to let us extend RH base for 27 to join downwind for 36.
As we approached the overhead, there were a couple of aircraft joining and in the circuit. It was pretty busy up there! Whilst descending on the dead side, one of the other aircraft joining the circuit was accidently going the wrong way around – doing a left hand circuit when the active was 27 RH. Tower spotted this and asked him to reposition, so he left the ATZ and came back to the overhead. Another aircraft joined direct on downwind, which we then had to follow. Here’s a clip of it all, to give you a sense of what was going on.
After that touch and go on 27, we were approved to turn left to join downwind for 36. My initial approach was too high, so I had to go around. Subsequent circuits (normal, flapless, glide and precision) were good – better than in the mock, so we called it a day and went inside for tea and biscuits.
Now I am ready to book my skills test. I also need to do the Radio Practical examination. It’s all coming together…
Completing my mock test was the final kick-up-the-backside that I needed to take my final two exams – Meteorology and Radio Communications.
Of all the nine exams, Met was the one I was dreading the most – I was never particularly great at science, and the sheer size of the PPL Met book was putting me off!
After a couple of weeks reading and re-reading it, things just weren’t sinking in. I understood the words but it just didn’t make sense. I decided I needed some extra help, and settled on the interactive course from CAE Oxford Academy. They have a range of DVDs – for each of the PPL subjects – and they are also available online. I signed up to the online version of Met, for 30 days, costing around £25. I watched the whole course (about 6 hours) over two evenings and, for the first time ever, Met finally started to make sense. The animations and diagrams brought the whole thing to life, in a way that the book never did.
I then spent a whole day watching the whole thing again, making notes, which I then revised from. Using the AFE sample question books, I took the sample tests and was getting an average of 85%. I learnt from my mistakes and was consistently getting 95-100%. I was ready for the test.
VFR Comms was a much easier one to prepare for. 2 hours reading and I was getting a consistent 100% in the sample tests. Fingers crossed.
Before my next lesson, I headed to the airfield and took Met, starting my fourth sitting. I passed with 95% – hoorah – so decided to take Comms. Another 95%. I have now passed all 9 written exams, with an average of 88%. I’m happy.
In preparation for the final skills test, my instructor suggested I take a mock skills test with a different instructor. It’d be useful to experience the same stuff that I’ll have to go through on the actual test, plus doing it with a different instructor will help make it feel more realistic. I can get feedback on what I need to practice, and find out if/when I will be ready to go for the actual test. Good idea, I thought, so my mock test was booked.
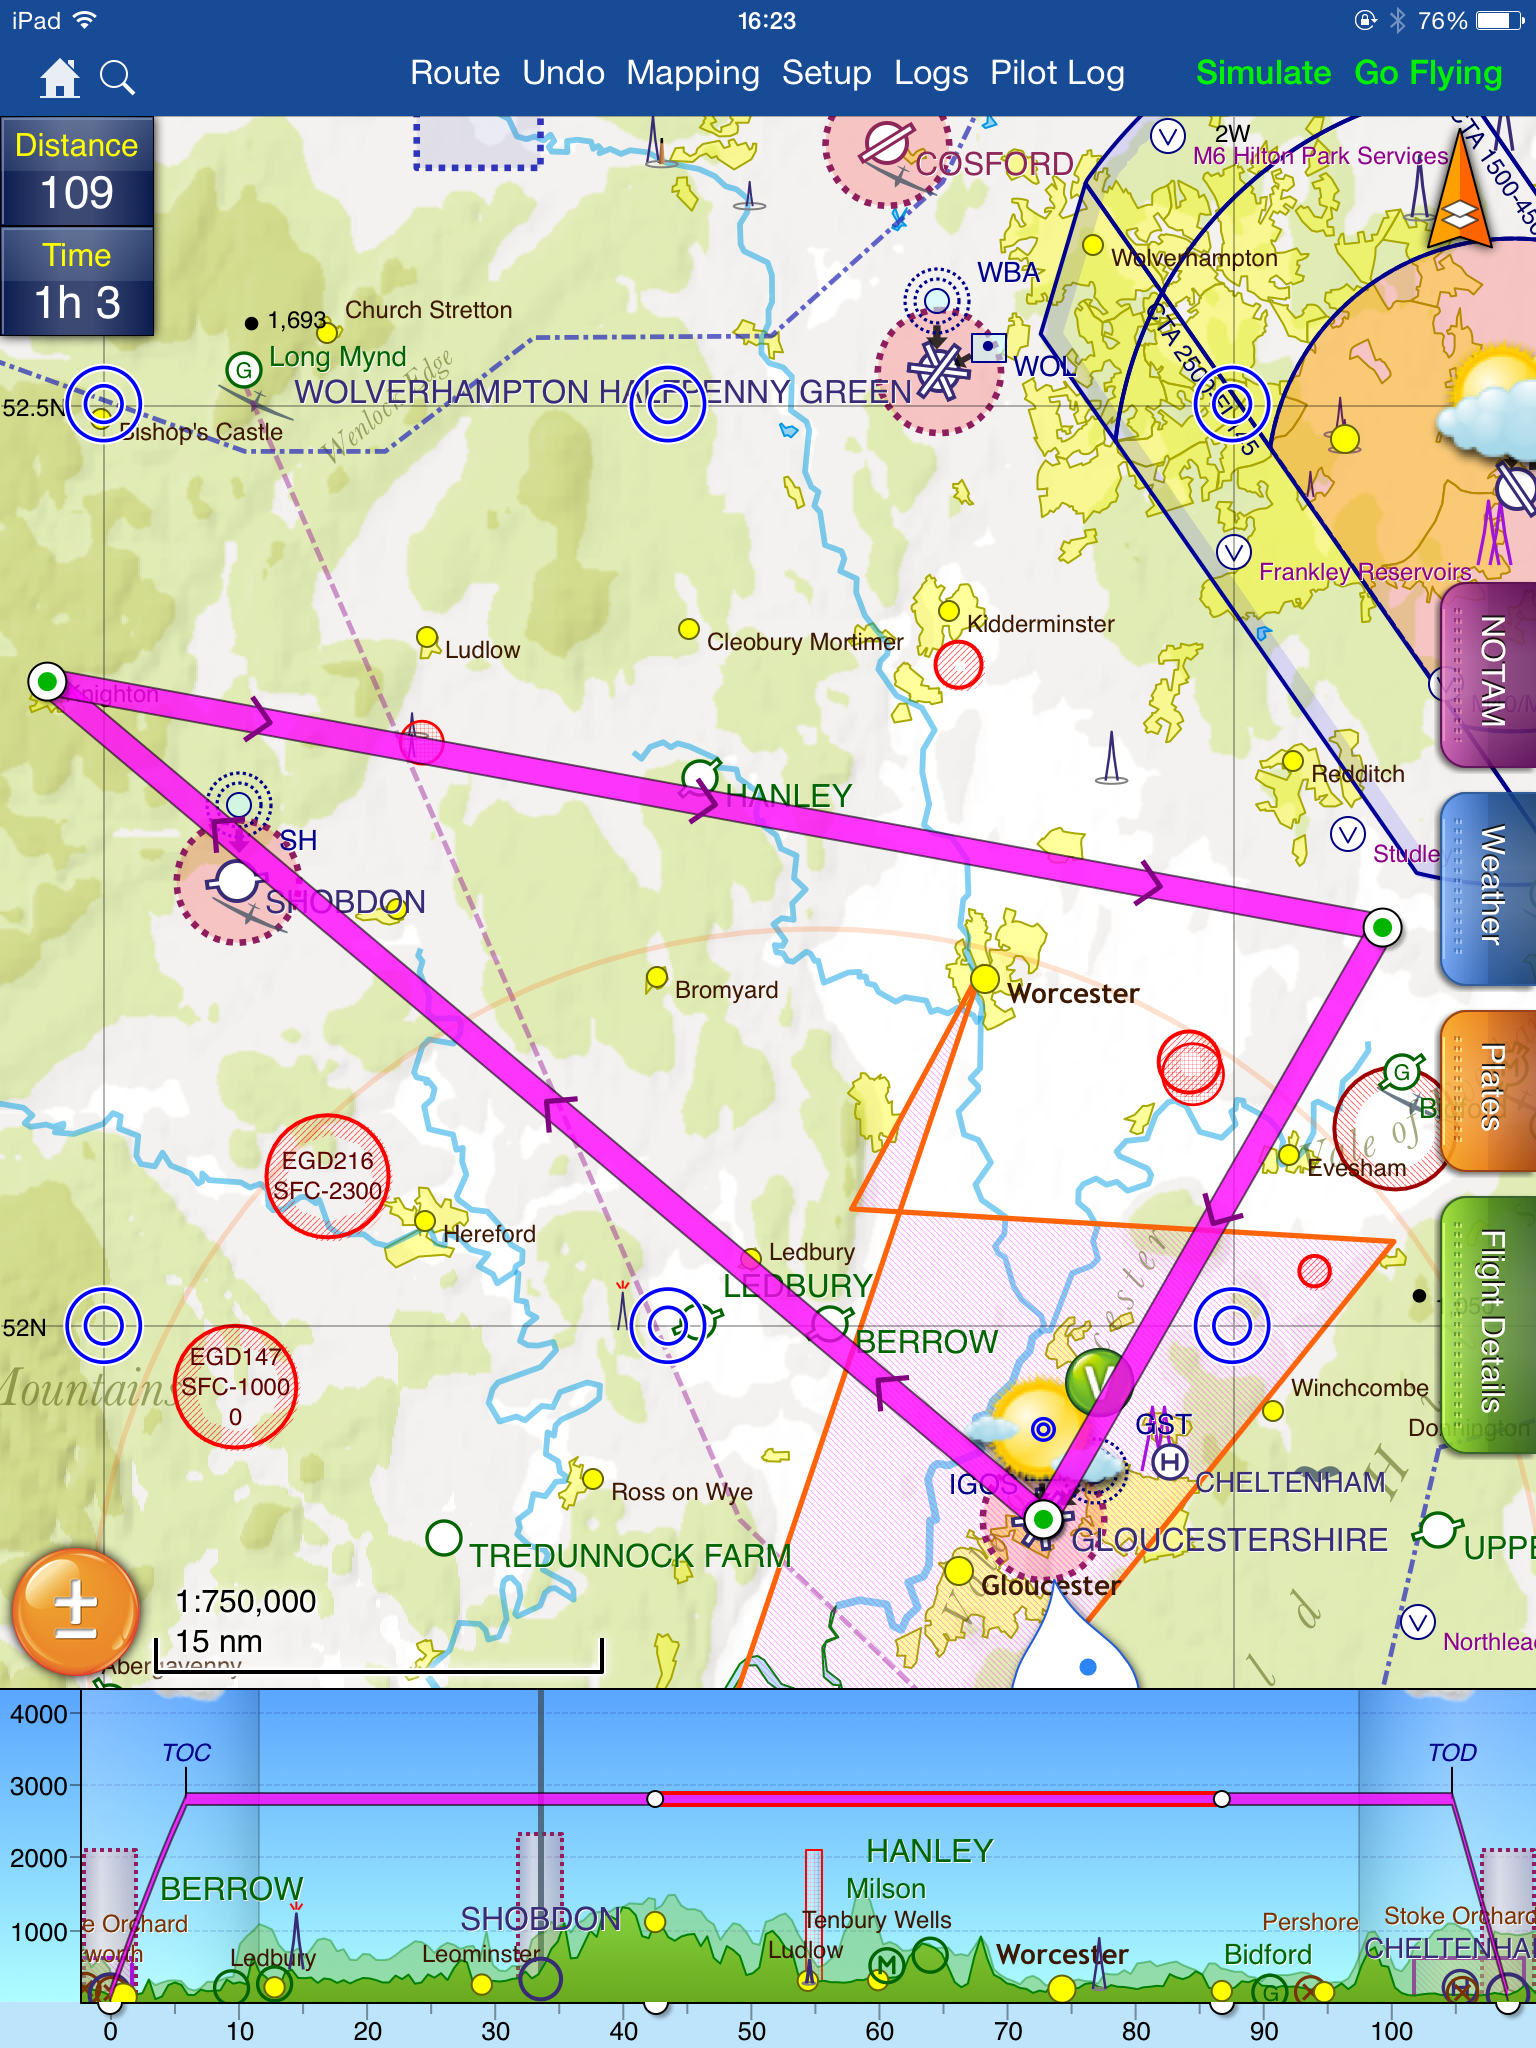
The night before the mock, my instructor gave me the route, so that I could do my planning before arriving at the airport. This was helpful as it meant I could do the PLOG, fuel planning, weight & balance and take-off/landing performance calculations in advance of the day, helping to lower my workload and calm my nerves! It also gave me a chance to really think through the route and consider the various issues along the way that might come up.
The route would be: Gloucester -> Knighton -> Alcester -> Gloucester. I could reasonably expect that on the Knighton to Alcester leg I will be asked to divert elsewhere, never actually ending up in Alcester, as this is what happens on the test.
The Gloucester -> Knighton leg takes us overhead Shobdon’s ATZ, so it’d be sensible to make radio contact with them in advance. On the Knighton to Alcester leg, there’s a HIRTA (High Intensity Radio Transmission Area) up to 2500ft. So long as we’re above then that shouldn’t be a problem. If the weather prevents us from reaching that altitude, I could easily dog leg around it.
My PLOG worked out at 1 hour 8 minutes for the entire trip.
On the morning of the mock test, I arrived at the airfield nice and early. I had the aircraft booked out all day, so I could get fuel and familiarise myself with it before the mock exam at 1pm. I filled up with fuel, then headed back inside so check NOTAMs and the Royal Flights/Red Arrows line. The only relevant NOTAM was a gliding competition around Alcester, which hopefully won’t be an issue as we don’t expect to actually get there as we will divert first.
At 1pm, I had the briefing with my (mock) examiner. I talked him through the planned route, PLOG, w&b calculations, performance calculations and he talked me through the order of the day. He’d act as a silent passenger, and would speak to me when he wanted me to do something or had a question.
I had already A-checked the aircraft before getting fuel. I explained this and to avoid needing to do it all again, I re-checked the oil and fuel and got in to the aircraft. Unbelievably, I couldn’t get the engine to start. On the way down to the fuel pumps, it had been pretty lifeless and took a few times to get it to start, but now it had finally decided to give up the ghost. We had a flat battery, and needed to get external power to get us started up. The examiner jumped out and got everything sorted. This had never happened before – bloody typical! Luckily once we finally got going, I didn’t feel too flustered and was able to carry on as normal.
Runway 27 was active, the perfect choice for my initial planned heading of 311. We were cleared for take-off pretty quickly and I was soon climbing out, turning to 280 for noise abatement before turning on to 311. Stopwatch started, I wrote the estimates in to the ETA column of each waypoint.
After doing the usual climbing lookouts, 300ft FEL and 1000ft RAF checks, I levelled off at 3000ft and performed the top of climb FREDA check. The weather to the west was worse than at the airfield, with cloud bases at around 3200ft. There were showers ahead but they appeared to be moving fairly quickly, so whilst discussing this on the ground we figured it was unlikely to be a problem.
After a couple of minutes, I could tell we were to the left of track, as we should have flown overhead Ledbury but were actually a couple of miles south of it. I told my instructor this and flew directly towards Ledbury to get on track. Whilst over Ledbury, I turned to the planned heading of 311. The halfway point is abeam Hereford, and again I could observe we were to the left of track. I corrected my heading and continued towards Shobdon. I changed frequency to Shobdon Radio and told them I would be flying overhead. No problem. As we got nearer to Shobdon, I again could see that we were too far to the left, so I changed heading so that we flew straight towards it. From there, I flew the original heading of 311 to get us to Knighton.
The weather at this point was pretty lousy. There were showers and the cloud was lowering in the west. I said to the examiner that if I was alone I wouldn’t feel comfortable continuing the final few miles to Knighton and that I would divert from here directly to Alcester. He said that for the purposes of this he would be happy for me to continue the final few miles to Knighton, so that’s what I did. I positively identified Knighton (phew!) and this time when I said that the cloud was too bad to fly on the planned route, he agreed so I diverted (dog-legged) around the weather. I flew 60 degrees north of the planned track for 4 minutes, then 60 degrees south of the planned track for another 4 minutes – this should have got me back on the original track. I confirmed this by looking at the chart, and was happy that it had worked and we were on back on track, about to fly over the HIRTA.
A couple of minutes later and the examiner said he was happy the diversion was working out well (perfectly, in fact!) so we could move on to the next part of the test. He asked me to use radio aids to identify our current position. The aircraft had VOR, NDB and DME and I elected to use the ADF and DME (tuned to Gloucester) to do it. No problems there – I remembered my TITS! (tune, ident, test, sensible). So next I was asked to track towards the HONITON VOR on the 220 radial. So, this meant I needed to fly TO the 040 radial. Again, for the VOR I used TITS and set 040 with the TO flag. We were more than 10 degrees off track, so I turned 60 degrees to intercept the VOR. After a couple of minutes of making little progress, the examiner asked me what radial we were currently on. So I twisted the OBS until we had FROM and the needle was aligned centre. It was 250. He then asked me to track along that radial instead (he originally thought we were closer to 220). I did that for a while without problems, so we moved on to the next part of the test…
He said to imagine we had entered cloud and had inadvertently entered IMC. I performed a rate 1 turn for 1 minute, turning 180 degrees back out. Then he asked me to climb above 3000ft so we could practice stall recovery.
I was asked to perform a series of stall recoveries – clean, with two stages of flap, and with all three stages. I did the HASEL checks before each one, and everything seemed to go ok.
Next it was the spiral dive recovery. He set up the dive and asked me to recover. Standard recovery technique is throttle to idle, wings level, then climb attitude. So far so good.
Finally, I had to use the ADB to track back to Gloucester, where we could do circuits. First, I did a normal circuit, then flapless, then a glide approach, followed by a bad weather circuit.
Runway 36 was active, which amazingly enough I had never used before so I was caught a bit off guard. The normal circuit went ok, but on the flapless circuit I was way too high and elected to go around. The second time it worked out better, and I was able to successfully touch and go, although I was still a bit high and it was a bit close.
The glide circuit was ok, as did the bad weather circuit, which was a ‘to land’.
After performing the after-landing checks, I taxyed back to Aeros and shutdown. My examiner said if it would have been the real test I would have passed. I couldn’t quite believe it!
We went inside and had a coffee, and I calmed myself down a bit. The adrenaline was pumping and I felt pretty exhausted from the 2.5 hour flight.
We then had a proper debrief together, in which he talked me through notes he had made for me to learn and improve on:
Passenger safety brief – make sure you offer to give the safety brief. This is something I’d never actually thought of before, even though it’s an item in the checklist because I’d been flying with an instructor we had never needed to do it. Obviously I will need to do it with normal passengers, so I was glad to have been picked up on this.
Brake test – make sure I test the brakes as soon as possible after first moving, and whilst still at low speed.
Taxy checks – whilst he was confident I had done them, it would be better to speak out clearly each check as I was doing it, to make it more obvious.
DME – initially the DME was in Frequency mode, it would have been more helpful to have it in Groundspeed mode.
Climbout – he asked me what speed I was climbing at, to which I replied I was initially climbing at vy – 79kts, and then elected to do a cruise climb. This was fine, but I should announce that is what I’m doing, so the examiner knows. Initially he thought I just didn’t know what speed to climb at!
Diversion – make sure you consider the MSA and announce it.
Simulated IMC – whilst the turn was fine, I should announce the other elements to consider: Pitot heat, Climb to MSA, Ask for Radar coverage. I explained that I thought he was going to ask me about these things, so there was some confusion. I think I will discuss this in the pre-flight briefing of the actual exam. (We had some discussions afterwards with my instructor about whether or not to actually climb to MSA, and concluded it was best to ask the examiner before hand)
VOR – consider wind corrections
Steep turn – careful not to climb on rollout, the first time I did one I climbed slightly, but the next turn was fine
HASEL – remember to turn the fuel pump on
Stall recovery – apparently I had “throttle aggression!”. Make sure you use the throttle smoothly. I blame the nerves.
Turning stall – make sure you recover by moving the nose down, then power, then level the wings.
ATIS – get the ATIS before making the rejoin call
Bad weather circuit – make one continuous turn from upwind to downwind, instead of the usual upwind, crosswind, downwind 90 degree turns. This helps keep you closer to the airfield. Same with the turn from downwind to final.
Whilst it looks like a long list (and it is!) he was keen to emphasise these were all just pointers for how to improve and perform even better on the big day, and he was generally really pleased with how I did.
I felt pretty pleased with myself, and headed back home for a celebratory drink…
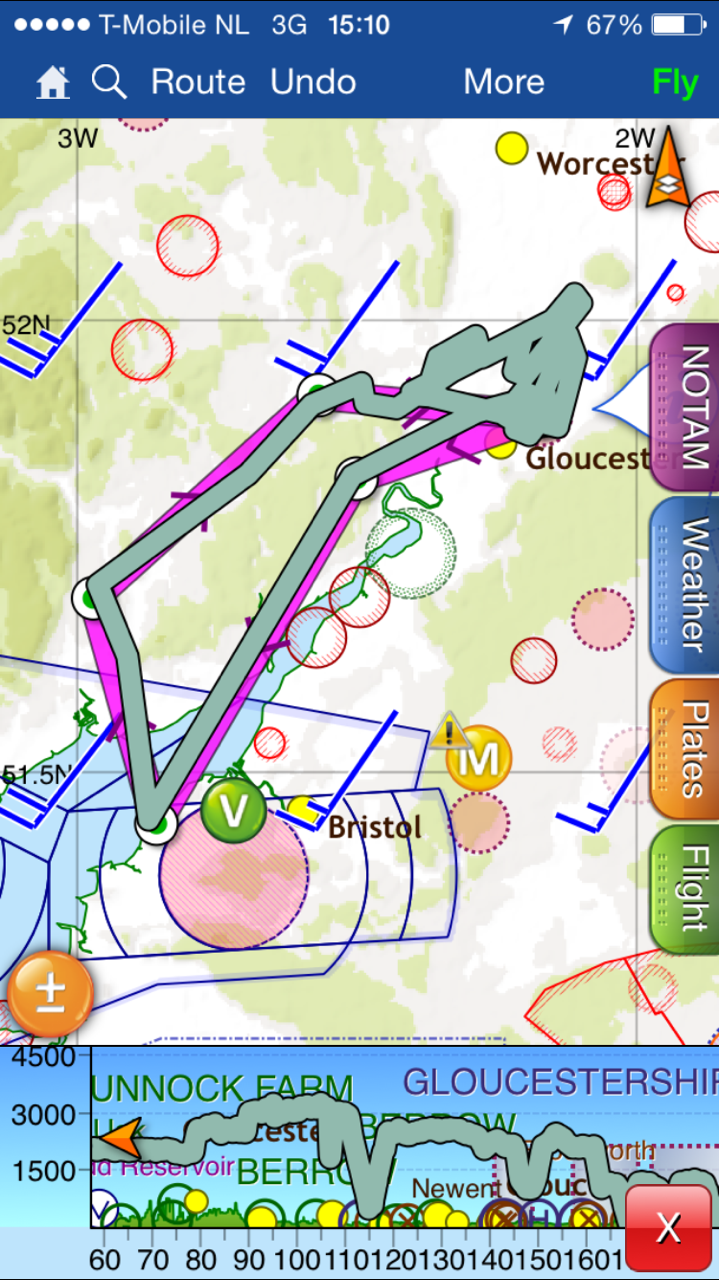
Here you can see the planned route, and the actual track:
Cross country complete, 43 hours logged, and my instructor says I’m nearly ready to take the skills test. To get ready, we’d spend a couple of lessons brushing up and practicing various things we’ve previously covered – such as stalls, steep turns, and PFLs.
It’s a requirement that each student has logged 1 hour of instrument flight (with screens up) before they can have a PPL, and so I needed to get that logged too . Although I had flown with screens up already, this was usually just for part of a flight and so hadn’t been logged specifically as instrument flight. So we’d do a whole lesson with the screens up and log it as such.
Practicing stalls (or rather, stall avoidance and recovery) went well – you need to remember the first recovery action is always to lower the nose. We then did a couple of 45 and 60 degree steep turns. I’d forgotten just how much you need to pull back on the yolk as you enter a steep turn, so the first one wasn’t exactly level, but after that they were all nice and consistent.
We practiced a couple of PFLs from around 2500ft, then an EFATO during the climb-away. Wind was reported as calm, which meant picking a field was super easy! If only I could order calm wind for the day of my test…
The instrument flight lesson went well. We had the screens up the entire time (my instructor was the lookout) – quite an interesting (and weird!) sensation taking off without being able to see the runway!
With the screens up, we practiced various methods of position fixing, as this is one of the things I’ll need to do in the test. The plane we were in didn’t have a VOR, but it did have an ADF and a DME, so we could use those.
As a recap, when using a nav aid you need to TITS (!) – Tune, Ident, Test, Sensible.
Position fixing using an ADF involves using the OBS knob to align your current heading to the top of the instrument. The arrow of the needle points to the heading to the station, so conversely the tail is pointing to the direction to the plane FROM the station. Remembering that ADF uses magnetic headings, we take the heading from the tail, convert from magnetic to true, and then plot a line on the chart. The DME gives us the distance along the line.
This worked out well. To confirm, we made a couple of radio calls. Firstly, we asked for a True Bearing – this was within 5 degrees of what I had calculated from the ADF, which allowing for the inaccuracies of both processes seemed pretty good.
We then practiced some rate one turns – turning 180 to simulate what you’d do if you accidentally flew in to cloud.
Finally, we used the ADF to home back to the airfield. We flew over the overhead so that I could see the ADF in its ‘cone of confusion’ – the area within about 0.5nm of the NDB where the ADF gets confused and spins around, not knowing which way to point. Once we’d flown past the airfield, we used the NDB to position us for a long final join…
Runway 22 was active, and we were flying East over the airfield. Therefore we turned to a northerly heading, set the OBS to 000 and waited until we were about 3nm DME. At this point I turned to 310 (heading of base leg), set the OBS to 310. We then know exactly when we are on the extended centreline, as it’ll be when the ADF is pointing at 220. We then turned to 220 and everything was lined up. The screens came down at about 1.5nm out and I landed visually as normal.
After the flight, we had a quick debrief and my instructor suggested I should take a mock skills test next time. As it happened, my instructor would be on holiday for the next two weeks, so this works out quite nicely – it means I can take the mock test with a different instructor, giving me a more realistic experience as the actual skills test will be with an examiner I have never flown with.
The day had finally arrived – it was time to do my Qualifying Cross Country (QXC) flight. The weather was great – sunny, good visibility and a high cloud base, so things were looking good.
I’d planned my route, Gloucester to Cardiff, Cardiff to Wolverhampton Halfpenny Green, Halfpenny Green to Gloucester using a direct straight line, as there were no NOTAMS, danger areas or airspace along the route that needed to be avoided.
Before leaving the airfield, I had a brief with my instructor, covering all the “what if’s”, such as radio failure, airfield closures, deteriorating weather, getting lost, etc. After he was satisfied with my responses, we signed the declaration form and it was time for me to head to the airplane.
I performed the A-check, everything looked good so I was soon inside the cockpit with the door latched and my harness tight. Runway 04 was in use today, so after departure I made a turn to the left to obtain my heading of 235 degrees. The navigation to Cardiff was straight forward, in part because I had flown the route twice before, and also because the route basically just hugs the shoreline the entire way down.
My initial radio call to Cardiff Approach went well. I was given a Squawk, they identified me and gave me a basic service. A couple of miles later and I was cleared to enter their controlled airspace via the Published VFR Cardiff Docks Arrival route – the same one as I’d used in my previous two trips. Runway 12 was active, and on transferring to Tower I was told to join downwind. The landing went well (there was a fairly strong cross wind, and I landed a metre or two from the centre line, but given the runway is so wide it wasn’t a problem) and I taxied to Aeros for a coffee and to get my QXC certificate signed.
When Aeros phoned Tower to check they were happy to approve my QXC form, Tower did say that I had forgotten to report Downwind but apart from that they were happy, so my form was signed. Not sure how I managed to forget that – must of been the heat of the moment – but at least they were happy with everything else.
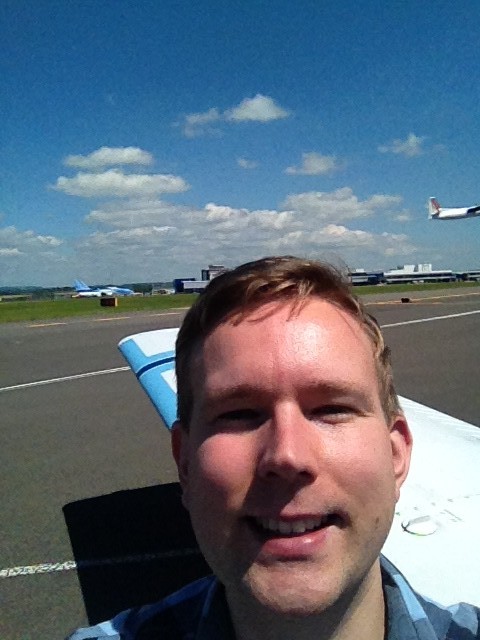
Selfie at Cardiff, see the departing plane in the background!?
Shortly after, I was back in the cockpit and preparing to depart for Wolverhampton. I was given the Published VFR Wenvoe Departure, as before, which is basically a reversal of the Docks arrival. Again, the en-route part of the flight went well and was non-eventful.
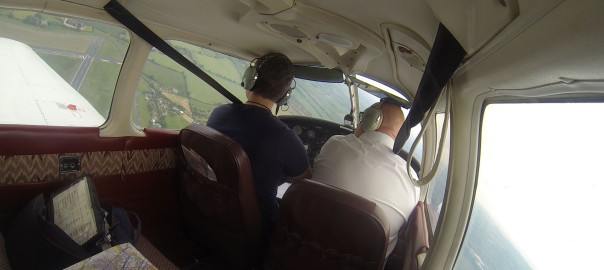
En-route selfie
I switched to Halfpenny Green Information about 20nm from the airfield, they then provided me a basic service until I was 10nm and asked for join instructions. They asked what join I’d prefer, and as runway 34 was active I took a direct join on long final. I was number 3, with the 2 ahead also joining long final. I was visual with them both so was happy to follow behind for a straight-in landing.
After landing, I went up to the cafe for some refreshments. They were as miserable and unfriendly as when I visited last, so I didn’t hang around very long! I walked up to the Tower, had a brief chat with the guys there and they signed my QXC form. No issues.
Wolverhampton Halfpenny Green Tower
The flight back to Gloucester went smoothly, I made a standard overhead join for 04 and was soon back on the ground. I managed to achieve my QXC flight without any issues, so it was time for celebration. As it was the end of the day, a bunch of us from the flying club went to the Aviator (the airfield pub/restaurant at Gloucester) for a drink and some food. It was also my birthday, so I had two excuses to celebrate 🙂
Celebratory pint 🙂
Unfortunately, my GoPro footage lacked any cockpit audio for the flight. It looks like the USB connection cable in to the GoPro must have bent in my last flight, so the signal isn’t making it through. Very annoying, as I’ll need to buy a replacement cable and they’re not cheap! Still, a really great day and one that I’ll remember for a long time to come…
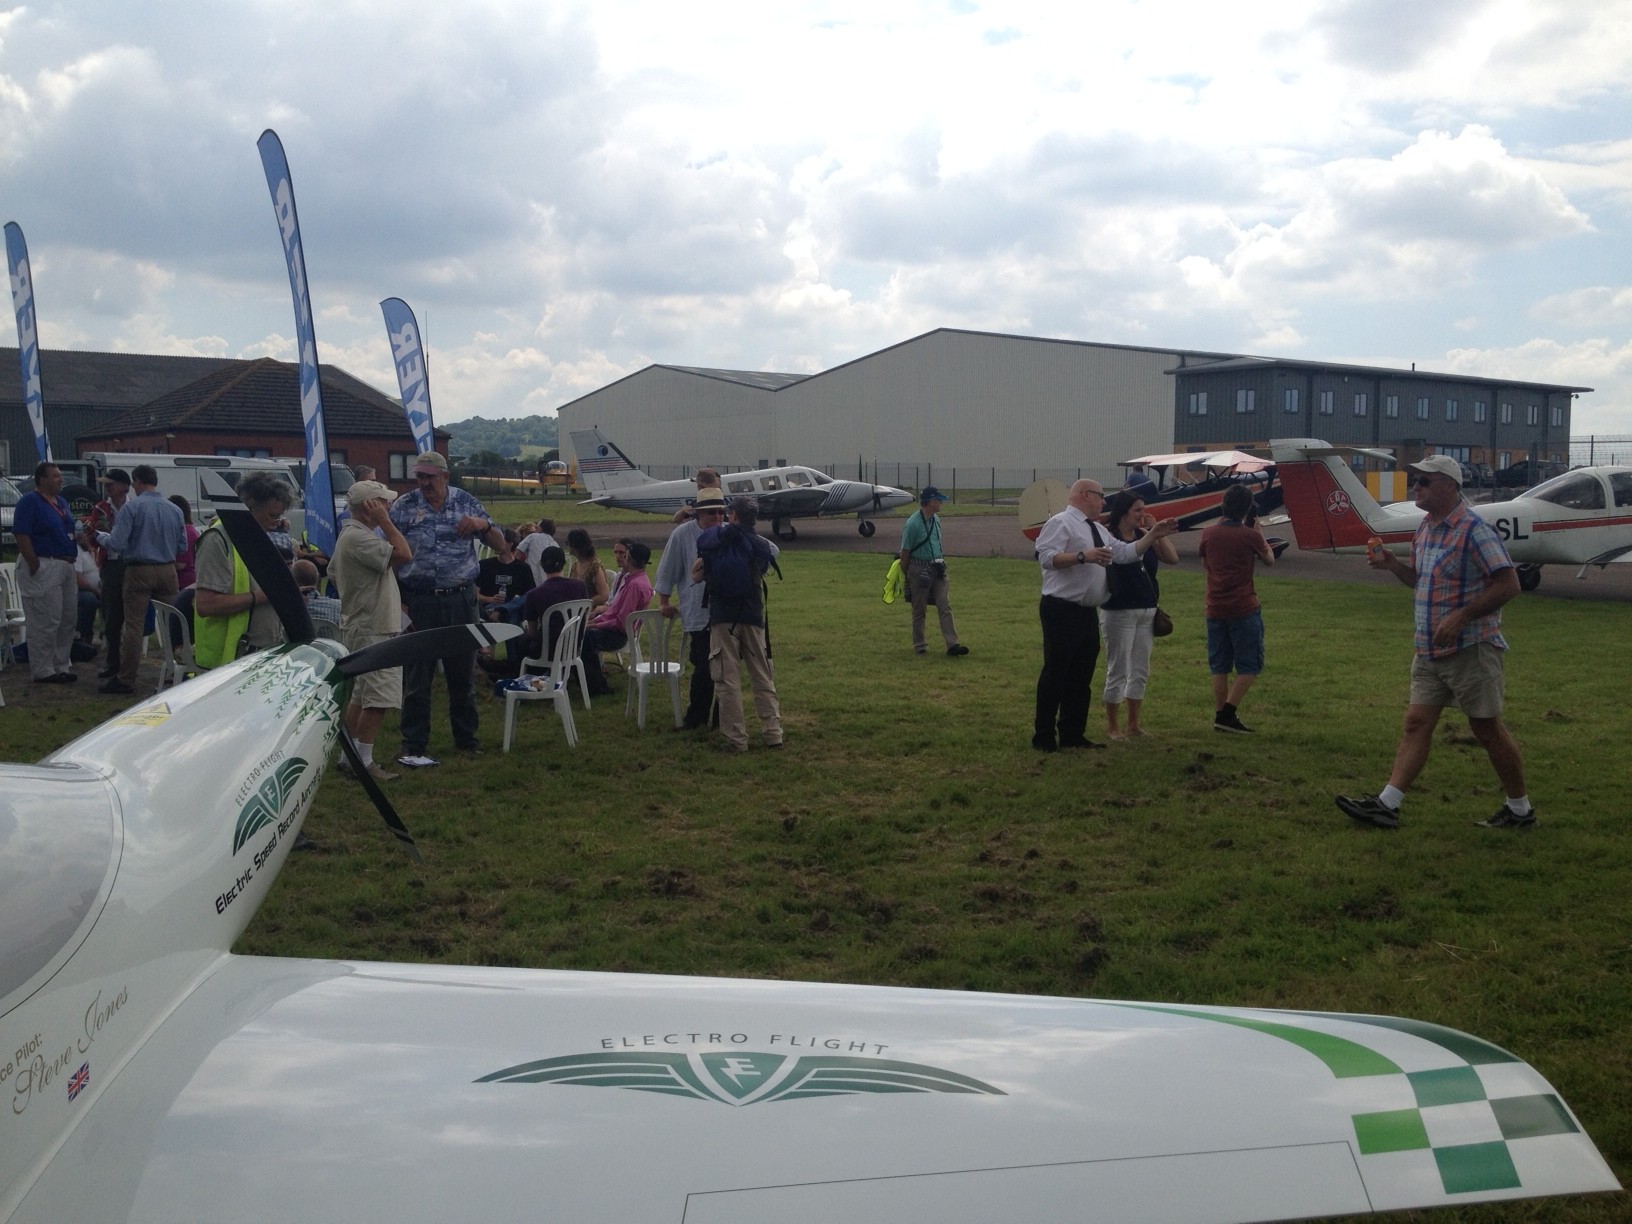
Today (June 14th) was a lovely sunny day, and it was also the day of Flyer Magazine’s 20th Anniversary Fly-In, which happened to be at Gloucester Airport and hosted by Aeros. So before my lesson, I arrived a little early to join in the celebrations. There were lots of people, lots of new planes on the apron, and – most importantly – a hog roast!
Whilst eating the rather lovely hog roast, I got chatting to a nice young chap called Will. He’s also learning to fly and has the same instructor as me. Despite having around 20 hours logged and being on the Navigation part of the PPL, he hadn’t yet flown solo. You need to be 16 before you can fly solo, so he was counting down the months until his next birthday. How frustrating must that be! He shown me some of the photos he’d taken whilst up in the plane, and they were really impressive. I said he should start a blog 🙂
Some of the people enjoying the hog-roast and a good old natter
After a second portion of hog roast, my instructor and I were talking through today’s lesson. We’d fly to Wolverhampton Halfpenny Green together, another new airport for me. The significance of flying here is that when I do my Qualifying Cross-Country flight, it’ll be from Gloucester to Cardiff to Wolverhampton to Gloucester, so it would be good to check out the place together first.
There were some NOTAMS covering Tewkesbury and the surrounding area, meaning the straight line route between Gloucester and Halfpenny Green would be no good. Instead, I planned to fly North West to Ledbury, turn there and head North East direct to Halfpenny Green. Estimated time in the air: 19 minutes.
Planning complete, time to check the aircraft. I hadn’t flown this aircraft before, and the interior decor looked a bit like stepping into a living room from the 1970s! I did the A-check and everything was fine, so very shortly after I had the engine running and requested taxi. The airfield was busy because of the Flyer fly-in, but after a short wait we were cleared to take-off and I was climbing out from runway 04.
I headed to Ledbury, turned, and then flew directly to Wolverhampton, changing frequency from Gloucester Approach to Hapney Green Information at Worcester. Runway 04 was active, with left hand circuits, and I joined by making a standard overhead join. The landing was relatively successful (although I was a little low towards the end) and we parked up and got out to have the obligatory coffee.
Here’s a clip of me downwind, turning base and then landing:
I don’t know if they were having a bad day or what, but the staff in the café seemed pretty miserable – the service was dreadful and so we didn’t feel like hanging around too long! We drank our drink, headed up to the tower to pay the landing fee and went back to the aircraft.
I’d planned our route back to be via Evesham, avoiding the NOTAM area previously mentioned and giving us some different scenery. The flight back was pretty uneventful, and by the time we were near Gloucester nearly all the fly-in traffic had left, so we were able to land without much waiting around.
I was back in Gloucester in time for the evening Flyer celebrations at the Jet Age Museum (located within the airfield). I hadn’t visited before, and am glad I did – it has some cool stuff in there and is definitely worth checking out next time you’re in Gloucester. You can even taxi and park there.
Ian Seager, the publisher of Flyer, gave a short speech (looking at the journey over the last 20 years) and there was plenty of bubbly and canapes. A great celebration. He looks nothing like the photo in the magazine!
Next lesson will be… my solo qualifying cross country flight!
Position fixing is one of the (many!) things that will be in the skills test, but is also an important thing to be able to do incase you become ‘temporarily uncertain of position’ (lost).
There are lots of ways to identify your position, including asking the radio service for a True Bearing (or QTE) or Magnetic Heading To Station (QDM). If you get a QTE, simply plot the line on the chart and you will be somewhere along that line. With a QDM, you first need to convert magnetic to true, then plot the reciprocal (as QDM is direction to station).
However today we would be looking at position fixing using radio navigation aids – the VOR, ADF/NDB and DME.
VOR is short for VHF omnidirectional range, and is technology that dates back to the 1940s but is still in wide use today. To use a VOR, you need a VOR receiver in your aircraft. You then need to be in range of a VOR station. There are many across the UK and they have a fairly long range so this shouldn’t be much of an issue. To use one:
Tune – the nav radio to the VOR frequency
Ident – listen to the morse to check you are receiving the right station, and that it is in service
Twist – check the warning flag is out, and twist the OBS knob 360 and check you get the FROM and TO flags accordingly, then set the desired radial
Sensible – does the indication seem sensible?
The direction flag is really important. If you wanted to fly along the 090 radial from a VOR, you’d make sure you had the FROM flag displaying. If the needle is to the left of centre, you turn left until the needle centres. If you want to fly TO a VOR, you’d make sure the TO flag is set.
So, we can use this to identify the radial we are over. Tune and ident, then twist until the flag is on FROM and the needle is centred. Lets say it is centred on 070. We are somewhere along the line of the 070 radio from the VOR. Most VORs also have a DME (distance measuring equipment) which gives us the distance from the VOR. We can then plot the distance along the line to get our exact fix. Alternatively, tune to any DME in range, get the distance and plot it on the chart, which should be somewhere along the line you’ve drawn.
We could also identify our position without a DME, but this would require to VORs. First, we’d plot the radial from VOR1 and then plot the radial from VOR2. Where the two radials cross, that is where we are.
On the other hand, the ADF (Automatic Direction Finder) is a simpler instrument that points towards the station (an NDB, non directional beacon). To use one, again use the TITS mnmemonic – tune, ident, test (there is usually a test button on the DME), sensible – is it pointing in the direction we expect?
To use an ADF for position fixing, make sure you’re flying straight and level. Then twist the heading dial on the ADF to match your current heading. The arrow on the ADF will be pointing to the heading you need to fly TO the NDB. To plot our current position, simply take the reciprocal (the tail of the needle) on the chart from the station. Again, with a DME we can then plot our exact position along that line.
I’ve covered Diversions before, but to recap – make sure you plan the diversion from a known point. Draw a line between the two points. Estimate (or ideally measure) the angle, convert from degrees true to magnetic, correct for wind drift, then fly the heading. Make a note of the time in your PLOG. Next, measure the distance and calculate how long it will take (allowing for wind). Update the PLOG with an ETA. Mark off the quarter/half/three quarter way points, and look for distinguishing features along the route. Keep looking out to make sure you are on track.
The flying went well – we flew out of Gloucester towards May Hill (West) then tuned to the Brecon VOR. I fixed our position using the VOR – we were on the 075 radial FROM brecon, at 32 miles. Then we flew along the 075 radial for a bit, by flying TO the 255 radial. After about 10 miles, we flew north. We wanted to intercept the 065 radial FROM the vor, so that we can track it towards Ross on Wye. Flying North, I tuned 065 FROM in the VOR and waited for the needle to center. Then I turned to a heading of 065 and kept it centered. After about 5 miles we were over Ross. Pretty cool.
I then had to divert from Ross to Bromyard, which required a heading of 010, and at 16 miles was estimated to take 10 minutes. I had the Ledbury aerial mast, and the towns of Hereford and Ledbury either side of me to confirm my position along the route, as well as the high ground, M50 motorway and a railway line. Sure enough, after 10 minutes we were right over Bromyard (or about 1 mile to the right of it, to be exact – but pretty darn close).
Diversion complete, we used the ADF to position fix and verify that we are actually over Bromyard. So I tuned to Gloucester’s NDB, ident and tested, then aligned the dial to our heading. The tail of the needle was pointing to 320, which I drew on the chart. Sure enough, that line goes straight through Bromyard. Our DME was out of service, so I couldn’t verify it exactly, but I was confident it was correct.
As if by magic, our engine caught fire (well, not really – the instructor pulled the throttle back to idle and told me to carry out a practice engine fire drill). First things first – fuel off, throttle closed, mixture ICO, fuel pump off, heater/demist off. Then carry on as if it was a normal PFL – trim for 73, identify a field, MAYDAY call, Squawk 7700, mags off, seat belts tight, door unlatched, master switch off, first stage of flaps when you are confident you’ll make it to 2/3rds along the landing point, second stage when you’re confident of reaching 1/3rd, then.. then we climbed away. All good except it took me a while to remember the initial steps. Must learn them some more.
We then put the screens up and I practiced instrument flight back to about 5nm from Gloucester, where I joined right base for runway 27.
Next lesson will be a dual nav exercise to Wolverhampton Halfpenny Green.