Medical, another exam and lesson 10 – all in one day!

Today’s been busy. First thing this morning I had my Class 2 Medical at Gloster Aviation Medicals Ltd – a really great chap called Dr Ian Ramsay. Friends had been winding me up all week about what would be involved so I was a little nervous. Suffice to say that it was all relatively straightforward and my pants did not need to come off!

The medical covered eyesight, hearing, height/weight, family medical history (didn’t take long!), my medical history (didn’t take long!), chest/breathing checks and a urine analysis. It was all over within 30 minutes and I walked out the proud owner of a Class 2 Medical Certificate, and £84 lighter.

I had 2 hours before my lesson, so I did some last minute revision for the Human Factors & Performance Exam before sitting the real thing. Biology was my worst subject at GCSE and whilst most people seem to find this exam the easiest of the nine, throughout my revision I had found it rather hard going. Basic GCSE Biology stuff like the parts of the ear, understanding how the eye functions (rods, cones, etc.) was something that never particularly sunk in for me.

As well as the biology stuff, it also covers areas like cockpit usability/design (ideally, the undercarriage lever should look like a wheel and the flap lever should look like a flap so that you can easily distinguish between them) and other more psychology-related and managerial style topics such as understanding how decision making can be influenced by groups etc. This kind of stuff was much more my comfy, familiar territory thanks to the day job so I sailed through those parts of the syllabus.

Time came for the exam, and luckily I found it fairly easy. I passed, had a coffee and then met my instructor for today’s lesson. My previous weekday instructor is off sick with back problems, so today was my first session with my new weekday instructor. We reviewed my progress and talked through the plan for today. More circuits and practicing go-arounds.

After A-checking the plane (probably the most detailed one I’ve done yet – learnt quite a lot of gotchas to watch out for that aren’t on the checklist) we got ready for departure. I’d be responsible for all the radio and checks today, so the workload has been shifted up a notch.

After taxying to the pumps and filling her up with fuel, we were soon lining up on the runway and taking-off. We were on runway 27 again today – right hand circuits – and wind was 320 at 8 knots. I’m not entirely sure why runway 36 wasn’t active, as it meant we had a crosswind on 27. Still, a first for me and a good opportunity to learn how to deal with it.

When landing with a cross wind, on final you need to aim in to the wind, to compensate for the wind drift. This means that when you come to the level-off and flare, the nose of the plane will be pointed to one side (rather than the usual straight ahead). To compensate for this, use rudder and opposite aileron to bring everything back in to line.  Today, this meant using left rudder and right aileron.

The first circuit was a little messy whilst I got in to the swing of things, then I started to settle down and improve. Last lesson I wasn’t flaring enough, so today – conscious of this – I was trying to get the flare right, but ended up pulling back too much. Too little last lesson, too much this lesson. Hopefully I’ll be somewhere in the middle next time!

The wind died down about by the fourth circuit but I was still executing a crosswind landing even though there was nothing to correct, which made for a slightly wonky landing, but nothing too disastrous.

We did two go-arounds (we planned to – they weren’t necessary), which basically involve applying full power, moving over to the dead side of the airfield (the left, in our case today as it was right hand circuits) and climbing at the usual climb rate, then join the circuit at normal circuit height on the crosswind leg.

I forgot to run my iPhone GPS so no tracks this time. Next lesson is tomorrow morning – either more circuits or practicing Engine Failure After Take-Off and forced landings.

Lesson 9 – exams and circuits

I had two lessons booked this week, but the first lesson was cancelled due to poor visibility. I took the opportunity to take my AirLaw and Operational Procedures exams, which I’d been revising for throughout the week. The content of the exams were different to what I was expecting. I’d been using the pplquiz and airquiz practice exams but the content didn’t really seem to align. I’d been practicing all sorts of marshalling signals, light signals and altimeter pressure calculations and none of that came up! There were 4 questions about wake turbulence in a 16 question exam! Luckily I passed both so I was very happy, even though I didn’t get to go flying.

The next day the weather was much brighter and my lesson was going ahead. This one would be more circuits. There was virtually no wind today, which made a pleasant change from the last two gusty circuit lessons. No wind drift corrections needed!

After getting in the airplane and completing the internal checks, my instructor asked how much fuel we had. I had forgotten to check – oops! This was the first time flying in a plane that had already had it’s daily A-Check, and I hadn’t done a ‘regular’ external check before. In fact, there’s nothing in the checklist that says what should be checked. So, after a brief chat with my instructor, we got out the plane and did a basic walk around checking the external surfaces, checked fuel in both tanks (between 10-15 gallons in each tank), and checked the engine oil. All good, so back in the plane and off we go…

All in all, we did 8 take-offs and landings in 1 hour and 5 minutes. During one of the circuits, ATC asked us to orbit left on downwind before turning final, to make way for a fast jet on final approach. Nice bit of variety to spice things up. This lesson I was doing the radio for the first time, which also added to the work load.

For the final circuit, my instructor asked ATC if we could land on a different runway, and they gave permission. Runway 18 has no visual approach indicators (unlike 27 – with PAPI lights – which we had been using for the other circuits), which means judging the rate of descent and glidescope would be all down to me. It required a lot more concentration.

One of the landings was a bit bumpy (approach speed was too fast) but apart from that they felt pretty smooth. Here’s a short vid of probably my best landing of the day:

Here’s the obligatory GPS track of the circuits. You can see the left orbit for runway 18, and the left orbit for runway 27 followed by an extended base to make way for the jet.

I’m now busy revising for Human Factors, which I’m hoping to take on Tuesday. I have my Class 2 Medical booked for Tuesday morning, followed by a double lesson – so it’s busy, busy, busy!

Lesson 8 – circuits

The weather was better than last lesson – a mixture of sun and clouds, but still with lots of wind. The clouds were fairly low at around 2000ft so not enough room for exercise 10B (stalling part two), which needs at least 3000ft AGL. So, this lesson would be more circuits, following on from last lesson. Despite the talk about wind drift last lesson, we didn’t pay much attention to it during the actual lesson, so this lesson we would focus more on wind correction, aiming to have much more circuit-like (90,90,90,90) GPS tracks. As you can see from last lesson’s tracks, the cross-wind and base legs were at more like 45 degrees rather than 90, due to the wind.

After a check of the aircraft, we were taxying to the runway. Runway 22 was active today, with a right-hand circuit. ATIS reported wind from 190 degrees at 15 knots. We can calculate the approximate headings using the max drift calculation…

Without any wind, we’d fly:

  • Takeoff: 220 degrees (runway heading)
  • Crosswind: 310 degrees (+90)
  • Downwind: 040 degrees (+90)
  • Base: 130 degrees (+90)
  • Final: 220 degrees (+90, back on the runway heading)

To make calculations easier, lets assume we’re travelling with an air speed of 90 knots.

Max drift  = (60 / 90) * 15 = 10 degrees

Whilst flying crosswind, wind will be hitting us from (310 – 190) /2 = 60 degrees to our left, blowing us right. Using the clock code, this tells us to apply max drift.

Whilst downwind, wind will be hitting us from 30 degrees to our right , blowing us left. Using the clock code, this tells us to apply half the maximum drift.

Whilst flying base, will will be hitting us from 60 degrees to out right, blowing us left. As with crosswind, apply max drift.

Headings corrected for wind drift:

  • Crosswind: 300 degrees
  • Downwind: 045 degrees
  • Base: 140 degrees

After a couple of circuits, the wind was blowing faster, and the weather was closing in. At one point – on finals – our indicated air speed was 80knots, and our ground speed was 20 knots. The instruments were probably a bit lagged (we didn’t have a 60 knot head wind), but it was pretty strong!

I had memorised my pre-landing checks and ran through them whilst downwind, although I need to add an L on the the end for Landing Lights to On. So now I’m using BUM-FFF-ICHHL.

Here’s a little clip of me on base through to landing (this is the second circuit of the day):


With such a strong head wind, I tended to flare too early when landing, instead of flying level above the runway for a short while. Something to work on next time.

After the sixth takeoff, it started to rain, and visibility to the west was pretty poor. We decided to make this our last circuit, so we could head back to the hangar without getting too wet! See how the weather has changed:

A pretty wet finish to the lesson

As you can see, the GPS track of my circuits this lesson are an improvement on last lesson. That extended downwind leg you can see was a result of ATC asking us to extend due to an incoming aircraft on long finals.

BUM-FFF-ICHH or pre-landing checklist

Aviation is full of acronyms and mnemonics. This one is particularly odd sounding and not particularly memorable, but it’s also one of the most important checklists to memorise.

When preparing to land, whilst downwind you should carry out the pre-landing checklist. Here’s what we need to check:

  • Brakes – parking brakes should be off, and toes clear of the toe brakes
  • Undercarriage – should be down (we’d have a big problem if it wasn’t in our fixed-gear Piper Warrior!)
  • Mixture – should be rich
  • Flaps – as required. Normally up in downwind.
  • Fuel pump – on
  • Fuel – on fullest tank, is the contents sufficient for a go-around?
  • Instruments – is suction within limits, are engine t’s and p’s green? Is QFE/QNH set? Are the compass and DI aligned?
  • Carb heat – turn on for at least 10 secs, turn off, check rpm drop within limits
  • Hatches – closed and secured?
  • Harnesses – on and tight?

Flying in the circuit and preparing to land is such a busy stage of flight that it is definitely not the time to be reading these from a written checklist. My instructor gave me a good tip for learning these. Write them on a post-it note, and stick it on the back of the sun visor in the car. When you’re nearly home, recall the checklist. When you get home, check against the list to make sure you didn’t miss any. This has been helpful for two reasons – helping to remember the content, but also the act of remembering to do the checks before getting home is similar to doing them before landing.

I feel pretty confident that I’ve memorised them now, but lets see how I get on in tomorrow’s lesson with the added pressure of flying at the same time!

Lesson 7 – circuits

After a couple of cancelled lessons, followed by a week on holiday, it had been a while since my last lesson. Too long! The weather forecast was for light cloud and plenty of wind, which isn’t exactly what you’d hope for. Luckily enough, although the weather wasn’t great, it was good enough for circuits, so I headed to the airport and had the pre-flight brief.

The standard circuit direction is left hand, meaning you’d take off, turn to the left, left again, fly parallel with the runway before turning left and left on to final approach:

standard left hand circuit

The active runway today was 22, with a right-hand circuit, so we’d be doing the opposite. Right hand circuits are harder than left-hand, primarily because as the pilot (in the left hand seat) has a restricted view whilst turning right (you are up high). Surface wind was fairly strong, coming from 210degrees at 18knots, gusting higher.

Whilst talking about the wind, I was introduced to the max drift calculation. When flying with wind, unless the wind is directly behind or ahead of you, it will be blowing you off-course. Without correction, the stronger the wind blows, the more off-course you’ll be from your desired heading.  The maximum drift correction calculation enables you (unsurprisingly!) calculate the maximum angle you’ll drift, given your air speed and wind speed. To calculate:

max drift = (60 / air speed) * wind speed

For example, if we were cruising at 90kts, with a wind speed of 21:

max drift = 60/90 * 21 = 14 degrees

Maximum drift applies if the wind is blowing at 90 degrees to the plane (eg if it is blowing at you directly sideways). We know that if the wind is blowing head-on (or directly from behind), no correction is required. Therefore we need a way to calculate the correct drift correction amount (which could vary between 0 and the max drift) for when the wind is between 0 and 90 degrees to the plane.

There are various ways to calculate this, although for me I think the easiest will be using the clock rule:

Max Drift Correction Clock Code
15º = quarter past therefore ¼ the drift
30º = half past therefore half the drift
45º = quarter to, therefore ¾ the drift
60º or more –  apply all the drift


When on final approach, the standard approach is 3º. To roughly calculate the descent speed required for a 3º approach, we can use:

ft/min descent = 5 x ground speed in knots

So, if we are on final approach at a ground speed of 50 knots, we’d need to descend at 5 x 50 = 250 ft/min to be on a 3º glidepath.

Note that this is ground speed – not airspeed!

Another thing I learnt today is that airfield windsocks are typically calibrated to show wind speed, as well as direction. When fully extended (eg blowing 90º parallel to the ground) the speed is at or above 25 knots. You can therefore approximate the speed if it’s between 0 and 25 by looking at the angle to the ground.

For my first lesson of circuits, I’d be concentrating on flying the aircraft. My instructor would handle the radio and the checklists.

After the pre-flight briefing, we went out to the hangar and performed the usual pre-flight inspections. Everything ok, so we taxyed out and got up in the air.  It was very bumpy up there with the wind, and it was fairly hard keeping straight and level. My first circuit was pretty wonky to say the least, but it did seem to improve with each touch and go.

After 6, I was pretty exhausted so we decided to call it a day. A lot happens in a very short space of time (it’s about 5 – 7 minutes per circuit) so it can be quite stressful! I was lucky I didn’t have to worry about the radio and checklists this lesson – no doubt that will be even more difficult when I’m ready to try that.

My other instructor is off work with a bad back (ouch!) so my next few lessons have been cancelled. Weather-depending, my next lesson will be a week today and we’ll either be doing more circuits or stalling part 2.

Unfortunately, the GoPro decided to stop recording before we’d taken off, so I didn’t capture any video from this lesson. However, I did capture our flight using the GPS in my iPhone, so here are my first circuits:

Using my iPhone GPS to record flight data

Another spot of geeking-out. After seeing a couple student pilot blogs with embedded maps of their flights (like this one), I wanted-in on the action. After some searching around, these maps have been created by SpiderTracks – a piece of hardware that provides live flight tracking facilities. At over £1000, I wasn’t exactly ready to hand over my cash, so I’ve been looking at cheaper solutions.

After lots of searching and thinking, I decided to try using my iPhone (with built-in GPS) and an app called MotionX-GPS, a £1.99 iPhone app with track recording features. I already had the app and had been using it for recording my hiking and walking in the hills, so I was familiar with how it worked and the accuracy had always been good, even when walking through dense forests without a clear line of sight to the GPS gods in the sky.

So, last lesson (lesson 6) I opened up MotionX-GPS and started recording my track as I got in to the plane. Lesson over, I pressed the stop button and saved my track to a GPX file. When I got home, I was able to import the GPX file in to Google Earth, which gives a pretty swanky visualisation of my route:

GPS route of Lesson 6

Google Earth even has a fancy ‘Play Tour’ option, which uses the timing data from the GPS file to recreate and play-back the entire flight in real-time (or speeded-up) using the usual 3D Google Earth style view.  Finally, it also has a ‘Show Elevation & Speed Profile’ option, which generates this pretty cool interactive graph:

Speed and elevation profile from lesson 6


I’ve always been a data fan (my inner geek calling!) but I think this will be particularly useful during later lessons when practicing the circuit, and then reviewing my cross-country routes…

Filming longer with the GoPro – Anker battery pack

I’ve been pleased with the quality of the GoPro and have been replaying my lessons at home to revise what I’ve learnt in the air (and to identify any mistakes or things to do better next time). My biggest disapointment has been the battery only lasts around 1 hour 10 minutes fully charged, which isn’t enough time to capture the entire lesson.

To improve this, I looked around at various power options. Here’s what I considered:

  • Extra GoPro rechargeable batteries – at only £20, one of the cheapest options. However it involves physically swapping the batteries over, something which I don’t want to be distracted with mid-flight.
  • GoPro BacPac – at £50, this pricey option connects directly to the back of the GoPro and provides another battery (without needing to swap anything over). The website doesn’t say how much extra time/power this provides. I didn’t choose this option because when attached to the GoPro the GoPro is too big to fit within the cover, meaning I’d need to also buy new mounting kit.
  • Veho pebble 5000mAh portable battery’ – inspired by the setup used by the excellent GoProFlying, I was tempted to buy this £30 external USB battery pack. It provides nearly 5 times more power than the built-in GoPro battery, so should keep filming for around 6 hours. I decided against this option in the end because of its size and weight. I’m currently mounting my GoPro using the suction cup mount, and this would need to be fixed somewhere nearby – complicating the mounting setup.
  • Anker Astro Mini 3000mAh Ultra-Compact Portable Lipstick-Sized External Battery Charger – I picked this up for only £10 from Amazon. I settled on this solution because of it’s tiny size and light weight. It’s slightly larger than a lipstick and is light enough to leave connected & dangling without danger of it pulling down the suction cup mount.

So far, so good. I filmed two lessons in a row and the GoPro was still fully charged, and the Anker still had charge left. It was fine dangling from the GoPro and didn’t cause any problems with the suction cup mount.

Here’s a snapshot of the installed setup:

GoPro Hero3 mounted inside Piper Warrior using the suction cup mount

The Anker is dangling down out of sight – you can see the USB cable. The other cable dangling down is the audio connector going in to the plane’s rear headphone socket.

Here’s a pic of the Anker at home alongside the GoPro, to give you a sense of scale:

GoPro and Anker Astro Mini battery pack

Lesson 6 – slow flight, and stalling part one

I’d booked a double-lesson slot, so I just about had time for a quick drink after lesson 5 and then we went straight in to the pre-brief for lesson 6.

The first part of the lesson will be about slow flight. It’s not designed to encourage slow flight, but rather make you aware of symptoms of flight at critically low airspeeds, and being able to control the aircraft safely at a slow airspeed whilst accelerating to faster airspeed (such as when recovering from an unintentional loss of airspeed).

Before attempting the flying exercise, I had to learn (another!) acronym, which we’ll use as a checklist in the air – HASELL:

  • Height – we must be sufficiently high enough to recover by at least 3000ft AGL
  • Airframe – trim and flaps as required, brakes off
  • Security – seat belts secure, no loose items
  • Engine – temperatures and pressures, mixture rich, carb heat hot, fuel pump on
  • Location – clear of airspace, built-up areas, cloud, danger areas
  • Lookout – turn to check area is clear (especially below), do a 360 or two x 180 turns

After the first HASELL checks, subsequent checks can be reduced to HELL.

The intro to the stalling exercise in my learning to fly book has this great quote:

A well-known aviation writer was once asked what he considered the three most important factors in flight safety. He replied “Airspeed, airspeed and airspeed”; and he’s got a point.

The standard stall recovery is to lower the nose and apply full power. If one wing drops, do not attempt to use the ailerons to level the wings – this will make things worse. Use opposite rudder whilst keeping the control column centralised.

You don’t even need to use power to recover from a stall – pushing the nose forward is enough. However, power can be used to accelerate the recovery and reduce height loss. Power should always be a secondary measure (to lowering the nose).

I’ll be doing some more radio in this flight too.

So, pre-flight briefing complete, it’s back out to the apron and in to the plane, and another round of checks.

Startup checks complete, and it was time to make my first ever radio call to request taxi. I’ve been doing a lot of reading on RTF (radio telephony) in preparation so I was clear in my head what needed to be said:

“Gloucester Tower, Aeros 52 at Apron with Information Hotel, QNH 1020 request taxi”

I waited for a suitable gap in the radio, pressed transmit and made my transmission – saying everything correct except the QNH. In the heat of the moment, for some reason I said “Q-N-H ten-twenty”. What I should have said (and I do know this from all the revision I’ve been doing) is “Q-N-H one-zero-two-zero” but I got it wrong. Luckily they understood what I meant and the response clarified I had the correct QNH by saying “Aeros 52, Gloucester Tower, QNH one zero two zero, taxy alpha one”.  Ten twenty – it’s as if I was telling the time. What an idiot!

After taxying to near the holding point, we did our pre-take off vital actions and power checks. Everything good, so I was back on the radio saying “Aeros five two, alpha one, ready for departure”. Soon after that, we were cleared to take-off, we were on the runaway and I was pulling back on the yoke.

I forgot to switch on the GoPro until mid-flight, but from memory we did our HASEL checks, several exercises at slow speed (remembering to turn with a very small angle of bank – 10 degrees or so, we don’t want to stall!) and then moved on to the stall exercises after doing a FREDA check. 

We experienced quite a lot of turbulence around the Malverns, making for a rather bumpy and unpleasant flight until we turned away and in to some better space. This was a fairly short lesson so after the instructor was happy that I’d done everything correctly, we headed back towards the airfield and joined the circuit on right base. I turned to final, set full flaps and altered attitude to maintain 65kts, using power to control the descent. I was too low this time – four reds on the PAPI – so increased power to correct things. Height corrected, the wind was blowing (12 kts) which made for a trickier landing than any I’ve done before. I was ok down to about 50 feet then the instructor took over as I had lost a bit of airspeed – I think the wind was distracting me (or causing some effect I have not yet learnt about!?).

Flying over GCHQ before turning on to final approach for runway 27
Flying over GCHQ (donut shaped building, bottom right of the windscreen) before turning on to final approach for runway 27

Back safely on the ground, we taxyed to the fuel pumps, refuelled and had a quick de-brief. The instructor was happy with my performance in the exercises but reminded me again to keep my hand on the throttle during take-off. Must really try not to make this mistake again next time.

Next lesson will be stalling part two, then we’ll be moving on to circuits!

Lesson 5 – turning

I thought it was a little weird to be learning turning in lesson 5, as we had already been turning in previous lessons. This lesson is more of a revision lesson to cover everything that we’ve learnt so far, so it covers climbing, descending and turning – including turning whilst climbing and turning whilst descending.

I arrived a little early for my lesson, so I made a coffee (or, more accurately, Alice, the wonderful office manager) made one for me, and I had a chat with a chap called Adam who was in on work experience whilst studying for his GCSEs. He wanted to be a commercial pilot so was really keen to discover what goes on in flight training. He asked if he could sit in the back seat for my lesson, which I had no problem with – so he was happy.

This was my first lesson with a different instructor. My regular instructor up until now only works on Saturdays, and today’s lesson was mid-week. I was a bit apprehensive after getting on so well with my instructor and worried about potentially re-covering old ground but I needn’t have worried. In my learners file, my instructor had left good notes about what we had covered so far, and what he suggested should be next.

In the pre-flight briefing, I learnt that when turning straight and level, it’s normal to use 30 degrees angle of bank. It’s also ok (and expected) to use 30 degrees of bank in descending turns, except when turning on to final, which should be limited to 20 because of the slower airspeed and increase stall speed (more about that later).

Climbing turns should be limited to 15 degrees of bank to maintain airspeed.

Before starting a turn, it’s critical to have a good lookout. This involves looking across the full 180 degrees, starting from behind your shoulder on the opposite side to where you’re turning, across to end up looking at where you’ll be turning in to. If it’s all clear, start the turn.

Whilst in a climbing or descending turn, just like when climbing or descending when straight, it’s important to DABLE every 500ft.

I taxyed from the apron to the holding point, then ran through the pre-flight checklist. I missed the fuel pump check (it needs to go on) – exactly the same mistake I’d made last lesson. I must make a mental note to double-check this from now on! I also made the mistake of braking whilst power was on. Just like we don’t brake with our foot on the accelerator in a car, we should always reduce power to idle before using the brake. I’d not picked up on this in previous lessons, so I’ve noted it ready for next time.

I made the ‘ready for departure’ radio call, and we received clearance to take-off.

Then we ran through the ‘on runway’ part of the checklist, which is something the instructor had been doing for me up until now. There are four elements in this list:

  • Anti-collision lights – on
  • Transponder – set to ALT
  • Pitot heat – as required (from what I can remember reading, pitot heat is used to prevent icing of the pitot tube, which is used to measure air speed. Only needed if it’s cold outside)
  • Landing light – on

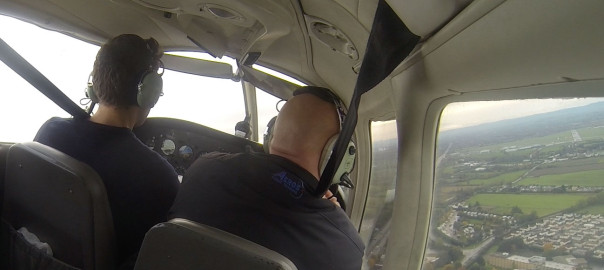
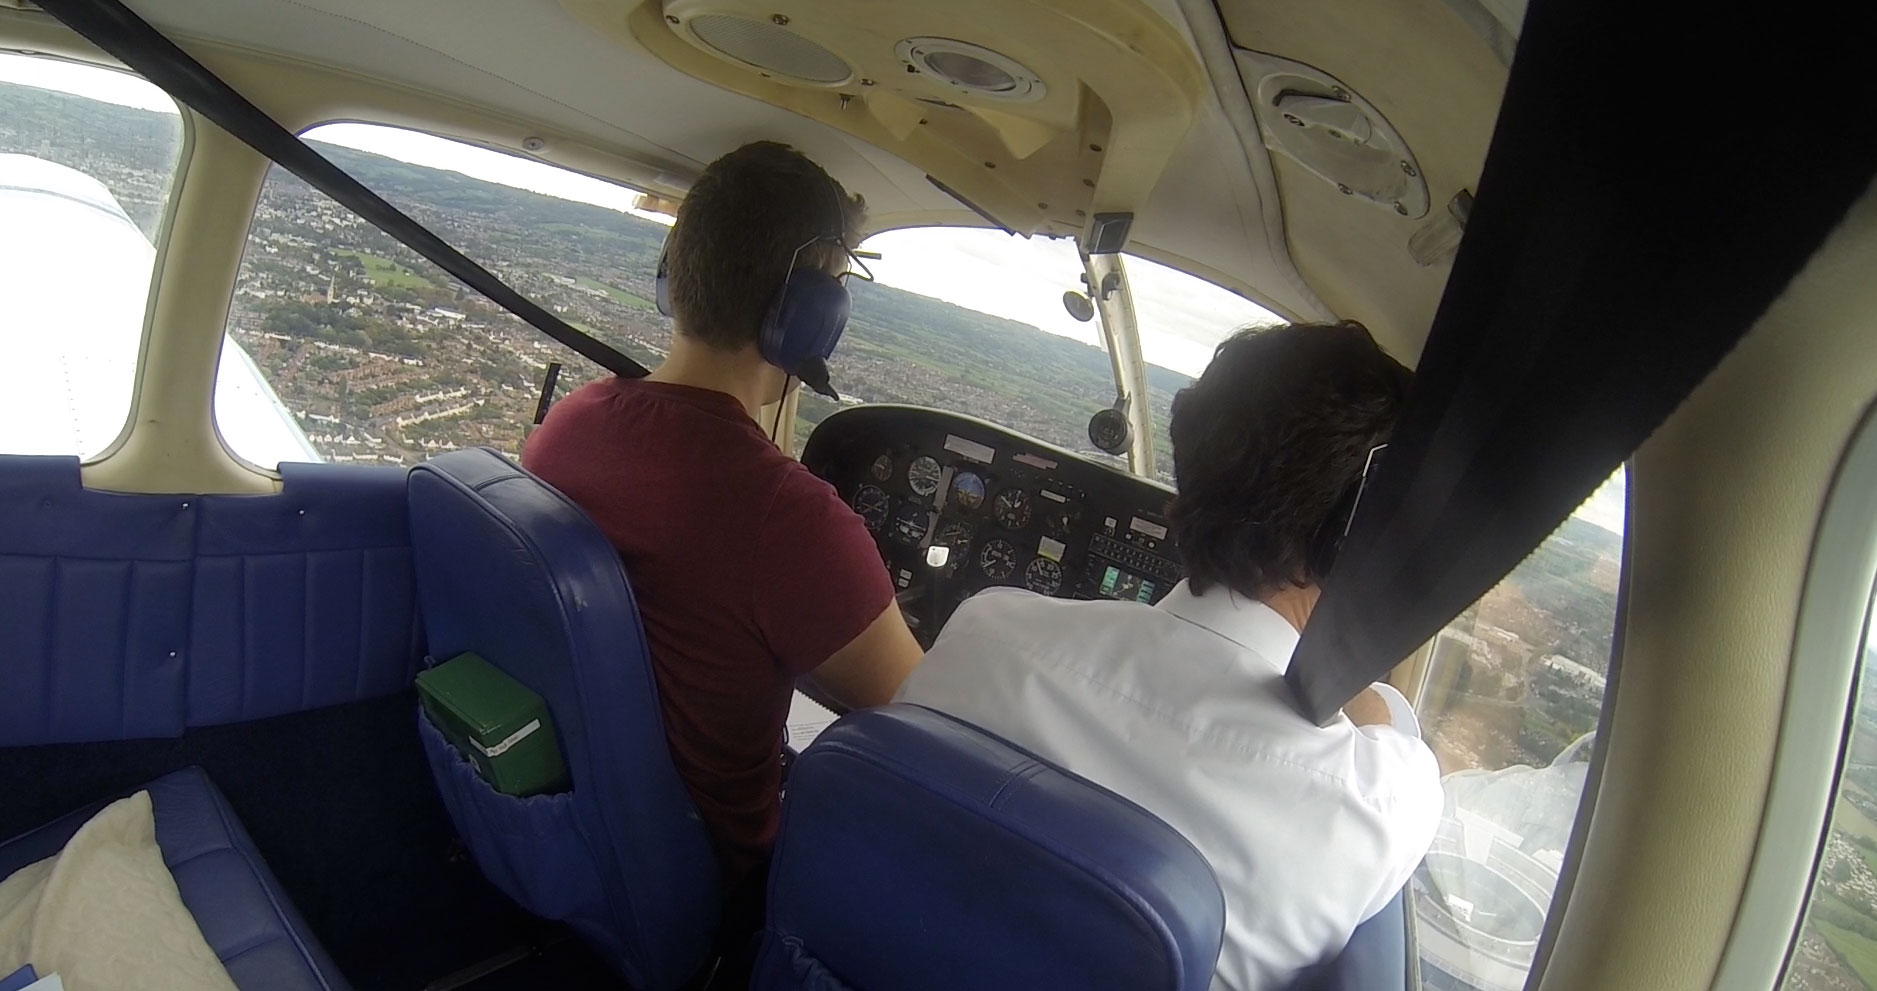
Checks done, and it’s time to take-off. We rotated at 60, climbed at 80 and then (because we were on runway 27) turned to the right for noise abatement. Up until now, I’d been turning right using the specified heading (of 280 degrees) but hadn’t been able to look down below to see what we’re avoiding. So we took this opportunity for the instructor to take control, giving me a chance to have a look down. There’s a housing estate to the left, and a village to the right. By turning this way, we avoid flying over either, and hopefully do our bit to keeping the neighbours happy. My instructor reminded me that noise abatement procedures aren’t something you legally have to follow – so if in an emergency situation we needed to head in that direction then that would be ok – but obviously normally it’s good airmanship to take obey them. Here’s a grab from the GoPro showing the housing estate on the left, and the village church on the right. Notice how we’re avoiding them both:

Photo from inside the cockpit after departing runway 27 and turning for noise abatement at Gloucester.

I also learnt that I should keep my right hand on the  throttle until we reach at least 300ft AGL. I have a tendency to put both hands on the yoke as soon as we’ve rotated, which is a bad habit I need to get out of. It’s important to keep one hand on the throttle incase it accidentally slips back (it could be loose) as a quick reaction would be necessary to re-apply full power to prevent a nasty ending.

After a couple of level turns, I did a couple of climbing and descending turns. Nothing too different from when when I’d turned in previous lessons, although I was trying to improve my lookout technique, which did seem to improve.

We’d now been up in the air around 15 minutes and so I did a  FREDA check, which first came up in lesson 2. I learnt that I’d been missing a couple of checks, specifically:

  • Fuel – is the fuel pump on? should it be? (Above 1000 ft, it can normally be off. When switching it off, check that fuel pressure is maintained. If it goes down, switch it back on. Switch fuel pump on before changing tank & off after changing – checking pressure is maintained.)
  • Engine – carb heat check – turn to hot for around 10 seconds, check the drop in rpm and make sure it returns to normal after switching it back to cold.

We should always do a FREDA check at the top of a climb, and every 15 minutes or so. My instructor recommended switching fuel tank every 30 minutes.

After practicing some more turns, the instructor demonstrated a stall in preparation for next lesson. A lot of people dread the word ‘stall’ and fear can strike upon hearing it. The purpose of the demonstration was to show that stalling doesn’t feel like some torturous experience and can be recovered from relatively easily. Sure enough, as we airspeed decreased and edged towards 50kts, the stall warning alarm sounded. Normally that would be the sign to prevent the stall, but for the purposes of this demonstration we continued to lose airspeed and went in to a stall. We recovered and noted that we’d lost about 200ft altitude in the stall. It didn’t feel that bad – it certainly wasn’t anything like being on the Tower of Terror at Disney!

Finally, we headed back towards the airfield and requested a standard overhead join, a first for me as up previous joins have been direct on to final approach. I’ve been reading up on circuits and rejoining the circuit and had the theory in my head, but was keen to see it in practice.

When joining the circuit with a standard overhead join, you fly towards the airfield at 1000ft above circuit level (standard circuit level, and at Gloucester, is 1000ft, so fly at 2000ft AGL) looking for the active runway. A right-hand circuit was in operation, so I had to keep the airfield on my right at all times. My instructor said something which I found really helpful – imagine the airfield is a roundabout (if you were in a car), and you need to go around it looking for your exit – the active runway. So that’s what I did, I found runway 27, flew over the ’27’ numbers and entered the dead side. Whilst on the deadside, we need to descend down to circuit height at the end of the dead side leg, ready to turn crosswind. I used 1500rpm and a fairly wide arc to turn us, flying over the ’09’ numbers at the other end of the runway at 1000ft. At 1000ft, I increased power back to the cruise setting of 2350, flying at 95kts. After flying straight for a bit, I made a 90 degree turn (level, so 30 degrees of bank) and flew downwind – parallel to the runway.

When turning in the circuit, it really helps to use outside references for turning so that we can focus on lookout and flying the plane rather than spending too much time looking at the direction indicator. Circuits can be very busy and demand total attention and concentration. I then turned (level, with 30 degrees of bank) on to base leg and as soon as the wings were level, checked we’re below Vfe (max flap speed) and selected 2 stages of flap (25 degrees), adjusting attitude for 75kts.

As you approach being 90degrees to the runway, turn on to final remembering to use a maximum 20 degrees of bank (because of flaps and the lower airspeed) then select full flap and adjust attitude for 65kts.

Another acronym: TCP checks:

  • Toes – clear of the brake pedals
  • Carb heat – cold
  • Permission – do we have permission to land?

The landing went well – really smooth in fact – the instructor said “I didn’t even notice we touched the ground”.  Beginners luck? We’ll see. After landing, we had permission to backtrack (turn around and go back up the runway to vacate it), which the instructor did whilst I got my checklist and prepared for the after landing checks. So many checks!

Something I’ve tripped up with a couple of times now is the confusing terminology around flaps. In the closing down checklist, it says Flaps Up. In the Warrior, flaps are controlled using a lever that’s a bit like a handbrake in a car. When the lever is up, the flaps are down (eg. extended). When the lever is down and touching the floor, flaps are up. Flaps Up in the checklist sense means make sure the flaps are up and the lever is down – which makes sense when you think about why we are doing this as a post-landing check. However, for the second time I read “flaps up”, saw the lever was up and said “flaps are up”, before being corrected by my instructor. Silly mistake to make and something else to watch out for in future flights. In my day job, I spend a lot of time talking about usability (of websites) and a big part of that is about designing-away ambiguity. I get the impression that User Centred Design wasn’t a big part of the Piper Warrior design process back in 1970.

Here’s a video clip of me doing the landing, starting from the overhead join:

Next lesson (I’d booked a double lesson, so next lesson starts almost immediately) is slow flight & stalling part one.