Category Archives: lessons

Lesson 4 – climbing and descending part two

Following on from last week’s lesson, this time we’re looking at climbing and descending in various configurations of power and flap.

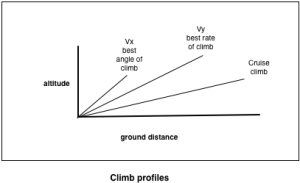
For climbing part two, in the pre-flight briefing we talked about the best angle of climb. Note the difference between best rate of climb (from part one) and this new concept of best angle. As you’ll remember from last lesson, the best rate of climb will get you to the highest altitude in the shortest amount of time. The best angle of climb will get you to the highest altitude in the shortest ground distance.

I’ve tried to draw two climb profiles to represent the difference:

Graph showing altitude and ground distance at Vx best angle of climb, Vy best rate of climb, and cruise climb

In the Warrior, the best angle of climb is achieved when climbing at 65kts. When would it be useful to use the best angle of climb, I hear you ask. It’s useful if you have a short runway with an obstruction at end of – maybe some tall trees or electricity pylon. In this instance, you want to gain as much height as possible whilst travelling the least horizontal distance, so that you can clear the obstacle. Once you’re at a safe height, you’d then pitch the nose down to the best rate of climb attitude (or a cruise climb, at around 90kts if you’re happy to climb slowly).

For descending part two, we talked about the effect of flaps. Flaps can help to increase lift, but can also increase drag. This means that you can use flaps to increase your rate of descent. We drew up a table for logging the effects of flap, power, and flap & power, then went out the plane. I performed my first A-check (it was the first flight of the day) and worked my way through the checklist. All went well (once I had found where everything was!).

We pretended the take-off was on a shortfield, and therefore climbed at 65 (the best angle of climb) until we reached around 300ft which was well clear of any obstacles. Everything went as expected, although looking down at the runway it looked longer and thinner than normal – because of the higher nose attitude.

We then measured the effect of descending in various configurations. Here’s the data I logged:

Effect of descending with power (at 75kts)

Power Ft/min
idle -550
+200rpm -450
+200rpm -400
+200rpm -300
+200rpm +100

Effect of descending with flap (at 75kts)

Flap Ft/min
Clean -550
10 degrees -650
25 degrees -750
40 degrees -950

We then experimented using power and flaps for descent. To achieve an airspeed of 75kts and a descent of 500ft/min with 25 degrees of flap, 1500rpm of power was required. Obviously the required power setting will vary depending on the plane, the weight of the passengers, fuel etc but the point of this was to get used to the standard landing profile.

One of the most important things to come from all of this is to remember:

  • Attitude controls  speed
  • Power controls descent

We then headed back to the airfield and I used my new knowledge to fly the final approach down to the runway. Runway 27 at Gloucester has PAPI lights (more info below), which show you whether you are too high or too low. This made judging the correct ‘picture’ of the airfield easier for me, although I mustn’t get used to relying on it as many runways don’t have visual indicators. I actually found judging the right descent profile to be fairly instinctive – perhaps from the many hours of playing on flight sims, or maybe just beginners luck.

Our lesson had run-over a bit so the de-brief was pretty brief, but essentially it was re-affirming the golden rule of attitude controls speed, power controls descent.

Next lesson will be turning.

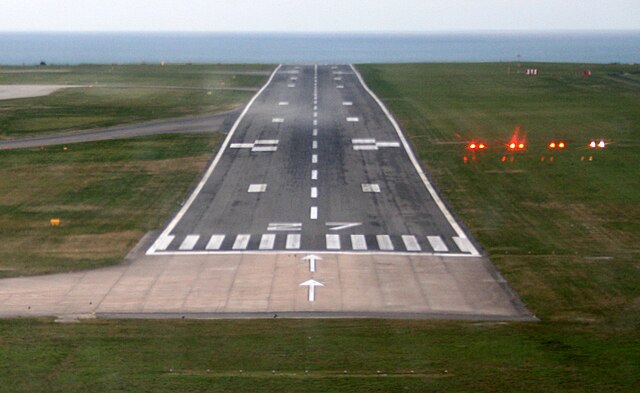
PAPI stands for Precision Approach Path Indicator. Here’s a photo showing PAPI lights to the right of the runway:

PAPI Lights

The lights are angled along the vertical glidescope, so that the colour changes depending on your height. If you are on the correct glidescope, you’ll see two red and two white lights. If you’re too high, you’ll see all white. Too low, and they’ll be all red (and you had better gain some height pretty quick!). Three red, one white = a little low. Three white, one red = a little high.
Lesson 3 – climbing and descending part one

After a fair few cancellations of this lesson, the weather conditions were finally good enough for me to get back up in the sky. During the pre-flight briefing, I was told we would be practicing climbing (and conveniently) descending. In the syllabus, climbing is exercise 7 and is in two parts (with exercise 8 being a two part descending exercise). However, it makes more sense to do climbing and descending part one as one lesson, then climbing and descending part two next lesson.

Before entering a climb, we have to lookout (around and up in to the airspace we’ll be climbing in to). We then do our standard PAT (power, attitude, trim). In the Warrior, the best rate of climb (known as Vyis 79kts. So:

  • Power – FULL – maintain balance, will yaw left so be prepared to right rudder
  • Attitude – climb attitude, looking for airspeed of 79kts
  • Trim – to maintain climb attitude

During the climb, we need to DABLE – every 500 ft:

  • Direction – are we heading in the right direction?
  • Attitude – are we still in the climb attitude, and is our airspeed correct?
  • Balance – are we in balance? Correct with the rudder if we’re not.
  • Lookout – roll with 15° bank in one direction, looking out, then roll back in the other direction, looking out. (Alternatively we can temporarily push the nose down and then back up again)
  • Engine – are the temperatures and pressures within limits?

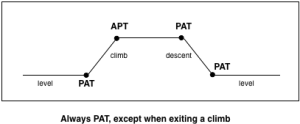
Exiting the climb is the one place where we DON’T PAT. Instead, we APT:

  • Attitude – level attitude, wait for airspeed to reach cruising speed of 95/100kts
  • Power – at cruising airspeed, adjust power to normal cruise (which is 2350 RPM in the Warrior)
  • Trim – for level flight

The reason we don’t PAT when exiting a climb is because of the difference in airspeed. As we saw in an earlier lesson, the engine RPM is linked to airspeed. So, if we set 2350 RPM at 80kts and changed to a level attitude, airspeed would increase to the cruise speed of 100kts and then we’d notice the RPM was higher than 2350 and we’d need to repeat the process all over again. So, instead, when exiting a climb, APT.

Always PAT, except when exiting a climb

Before descending, first lookout, then PAT. In the Warrior, the glide descent speed is 73kts. This means this speed will keep you in the air for the longest possible time. Therefore if we were to experience engine failure we’d want to trim attitude to maintain a glide descent at 73kts. To descend, the procedure is fairly similar:

  • Power – to idle, carb heat hot
  • Attitude – glide descent attitude, to maintain 73kts
  • Trim – to maintain glide descent

As with climbing, during the descent we should DABLE every 500 ft. Exiting the descent is a standard PAT, remembering to turn carb heat back to cold before putting on full throttle. More on carb heat in another blog post.

All in all, I found this lesson relatively straightforward and it sure felt good to be back in the air after those few weeks being grounded by the weather. The glide descent resulted in an altitude loss of around 500ft per minute, which felt surprisingly slow. Very reassuring that we’d actually have quite a lot of time to prepare for an emergency landing if the need ever arises (assuming we’re at a sensible height).

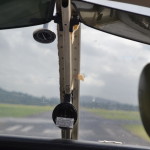
I also used this lesson as an opportunity to try out my new GoPro video/audio recording kit. Once I got home, I reviewed the footage and was pretty happy with how it turned out. I’d manage to position it so that you get a good view of the instruments, me, and can see out to the left and right of the aircraft. Here’s a snapshot from in-flight:

Screenshot taken from GoPro recording in-flight

Here’s a clip of me taking off:

To view it full-quality, you need to select HD from the settings menu and then click full-screen.

One annoying thing about the GoPro was the battery life. It recorded 1 hour and 7 minutes before running out of juice. Not enough to capture the landing.

Next lesson – in a week’s time – will be climbing and descending part two.

Lesson 2 – Straight and level

A couple of months had passed since my first lesson, whilst I was saving up money for my PPL course. As my trial lesson was in June, and it was now September with the terrible British Winter approaching, I was in two minds whether to wait until Spring or to start straight away. My head was telling me to be patient – wait until next year with the better weather – but my heart was having none of it. I had to start as soon as possible.

I called up my instructor from my first lesson and told him I was ready to start my PPL. He booked me in for next weekend and I only had 7 days to wait until I next got to fly.

This time, as you’d expect, the pre-flight briefing was considerably longer than my trial lesson. We talked in more detail about the control surfaces of the plane, and how I’d be learning to fly straight and level. Straight means that you’re heading in the right direction and not veering off from side to side, whilst level (I’d be worried if you couldn’t already guess this) means you’re flying at the same altitude – you’re not going up or down.

I was also introduced to the FREDA checks, which I’d need to get in to the habit of doing every 20 minutes or so we’re in the air:

  • Fuel – do we have enough fuel? Are we using fuel from the fullest tank?
  • Radio – is it tuned and operating correctly? is the transponder set correctly?
  • Engine – are the engine gauges in the green?
  • Direction – is the direction indicator aligned with the compass?
  • Altitude – is the altimeter set to the correct QFE/QNH (we’ll come on to what that means later..)

We walked out to the plane – still the Piper Warrior PA28, but a different plane to last time (this one was blue!). I soon noticed that some of the instruments that were in the previous plane weren’t in this one (the other plane had a moving map) and that the instruments inside the cockpit were in different places. After a couple minutes of reorientation, we were taxying to the fuel pumps. Filling up a plane is not much different to filling up your car – except there are two tanks (one in each wing) and before filling you must ground the plane by connecting a long wire cable to the static discharge point of the plane (beneath the tail in the Warrior).

My instructor pointed out that the Piper is an American plane, so the stickers on the fuel tank, the instructions in the pilot operating handbook (the manual) and the instruments were all measuring in US Gallons. The Warrior burns approximately 10 US gallons per hour, and has a usable capacity of 50 US gallons, giving a maximum flight time of around 5 hours. The fuel pumps measure in litres. US Gallons are different to Imperial Gallons. When we come on to learn about maximum take off weights (of which fuel is a vital component), calculations are made in pounds. You can see the potential for confusion and dangerous miscalculations.

After filling up, we taxyed to the runway and I performed my first take-off. The full power of the propeller causes the plane to drift to the left, so to keep the plane straight on the runway you need to apply right rudder. Speed increases pretty rapidly and it’s only a couple of seconds before you’re at 65kts and pulling back on the yoke. Once we’re in the air and clear of obstacles, we lower the nose slightly and allow the airspeed to increase to 80kts and continue to climb.

It was a lovely sunny, clear day, and we climbed to around 3500ft before the instructor took control and levelled us off. He demonstrated the level exercise – how to fly the plane level at various speeds. To fly level, nose attitude must increase as power decreases. For example, if you’re cruising at 100kts the level attitude has the nose on the horizon. To fly level at 90kts, the nose must be higher. To fly level at 80kts, the nose must be higher again.

We control the nose attitude by pushing back or pulling forwards on the yoke. Once you’ve selected the right attitude and can see that you’re level, you should trim the airplane to maintain the attitude. Whenever you change the power, you should change your attitude and trim. This can be remembered as PAT:

  • Power
  • Attitude
  • Trim

From this point forwards, whenever I hand control to my instructor, he wants the airplane to be in trim. I’ve been told.

To fly straight, we identify a visual reference in front of us, note its position in the picture out the windscreen, and then a short while later we re-check its position. We’re looking to make sure it is in the same place – that means we’re heading straight. If it’s moved to the left, we’re heading to the right and need to correct our course by flying left. Similarly, if it’s moved to the right, we’re flying to the left and need to correct our course by flying right. Of course, we can also confirm we’re flying straight by looking at our heading and watching out for any changes.

After lots of practice at trimming at various speeds (PAT, PAT, PAT) and lots of turning and pointing at random things on the horizon, we headed back towards the airfield and requested to rejoin the Air Traffic Zone (ATZ) to land. My instructor told me to fly us towards the runaway (moving us left and right) and he’d control our descent. We touched down smoothly and in the middle of the runaway. My instructor said he couldn’t believe how well I’d controlled it – he probably says that to everyone. I just aimed for the runway – it really didn’t seem that hard!

In our de-brief, I was reminded that it was my responsibility now to make sure the plane is in trim when handing over control in subsequent flights. Next lesson will be climbing and descending.

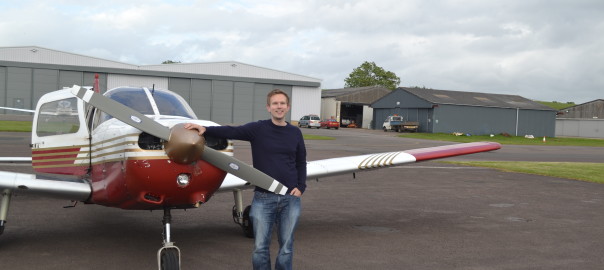
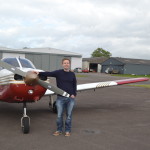
Me posing with the Piper Warrior after my first lesson

Lesson 1 – Trial lesson

After researching different flight schools within easy reach of home, I settled on Aeros Gloucester and gave them a call to book a trial lesson. 5 days later and I was at the airport, having my pre-flight briefing.

My instructor brought out a model plane, and demonstrated its key functions – the elevator/stabilator to control climb and descent; the ailerons to roll left and right; the rudder to yaw and a basic intro to flaps, which help increase lift and drag. All seemed pretty straightforward. After filling out some paperwork, we left the building and walked over to the apron. I hadn’t heard the term apron before – it’s basically an area in the airfield for parking, fuelling, loading/unloading, etc.

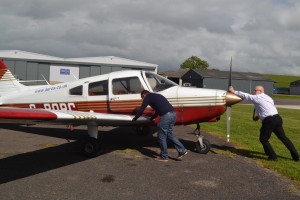
We pushed the plane back from the grass and on to the tarmac, then climbed aboard.

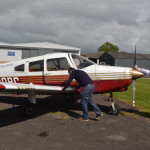
Pushing the plane back from the grass

Time seemed to go so quickly – after a blur of radio calls and taxying, my instructor had performed the take-off and we were climbing in to the sky. I was grinning from ear to ear, and I hadn’t even touched the controls yet.

We levelled off at around 2,000ft and my instructor said “You have control”. I did a few turns, some climbing and descending, all the while laughing with excitement. I was then shown how to trim the aircraft, which means adjusting a wheel to allow you to fly at a desired attitude (eg pointing up, down or straight) without touching the yoke. Hands-off flying, if you like.

Next thing I know, we’d been in the air for almost an hour, and it was time to head back to the airfield and land. I took us back towards the airfield and then aimed at the runway, whilst my instructor dealt with the radio and a million and one other bits and pieces. At about 300ft from the ground, my instructor took over (I was beginning to wonder!) and executed a perfectly smooth landing.

After taxying back to the apron, I posed for a couple of cheesy pictures and went back inside for a de-brief. It must have been pretty clear that I had a good time. The instructor didn’t need to ask – he simply said “so you liked it then!” and I smiled. The hour had gone so quickly. I’d loved every second and I knew I had to book some more lessons.