Cross country complete, 43 hours logged, and my instructor says I’m nearly ready to take the skills test. To get ready, we’d spend a couple of lessons brushing up and practicing various things we’ve previously covered – such as stalls, steep turns, and PFLs.
It’s a requirement that each student has logged 1 hour of instrument flight (with screens up) before they can have a PPL, and so I needed to get that logged too . Although I had flown with screens up already, this was usually just for part of a flight and so hadn’t been logged specifically as instrument flight. So we’d do a whole lesson with the screens up and log it as such.
Practicing stalls (or rather, stall avoidance and recovery) went well – you need to remember the first recovery action is always to lower the nose. We then did a couple of 45 and 60 degree steep turns. I’d forgotten just how much you need to pull back on the yolk as you enter a steep turn, so the first one wasn’t exactly level, but after that they were all nice and consistent.
We practiced a couple of PFLs from around 2500ft, then an EFATO during the climb-away. Wind was reported as calm, which meant picking a field was super easy! If only I could order calm wind for the day of my test…
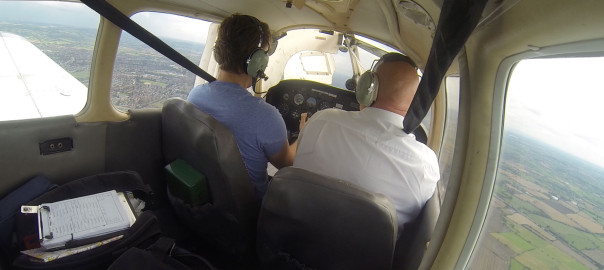
The instrument flight lesson went well. We had the screens up the entire time (my instructor was the lookout) – quite an interesting (and weird!) sensation taking off without being able to see the runway!
With the screens up, we practiced various methods of position fixing, as this is one of the things I’ll need to do in the test. The plane we were in didn’t have a VOR, but it did have an ADF and a DME, so we could use those.
As a recap, when using a nav aid you need to TITS (!) – Tune, Ident, Test, Sensible.
Position fixing using an ADF involves using the OBS knob to align your current heading to the top of the instrument. The arrow of the needle points to the heading to the station, so conversely the tail is pointing to the direction to the plane FROM the station. Remembering that ADF uses magnetic headings, we take the heading from the tail, convert from magnetic to true, and then plot a line on the chart. The DME gives us the distance along the line.
This worked out well. To confirm, we made a couple of radio calls. Firstly, we asked for a True Bearing – this was within 5 degrees of what I had calculated from the ADF, which allowing for the inaccuracies of both processes seemed pretty good.
We then practiced some rate one turns – turning 180 to simulate what you’d do if you accidentally flew in to cloud.
Finally, we used the ADF to home back to the airfield. We flew over the overhead so that I could see the ADF in its ‘cone of confusion’ – the area within about 0.5nm of the NDB where the ADF gets confused and spins around, not knowing which way to point. Once we’d flown past the airfield, we used the NDB to position us for a long final join…
Runway 22 was active, and we were flying East over the airfield. Therefore we turned to a northerly heading, set the OBS to 000 and waited until we were about 3nm DME. At this point I turned to 310 (heading of base leg), set the OBS to 310. We then know exactly when we are on the extended centreline, as it’ll be when the ADF is pointing at 220. We then turned to 220 and everything was lined up. The screens came down at about 1.5nm out and I landed visually as normal.
After the flight, we had a quick debrief and my instructor suggested I should take a mock skills test next time. As it happened, my instructor would be on holiday for the next two weeks, so this works out quite nicely – it means I can take the mock test with a different instructor, giving me a more realistic experience as the actual skills test will be with an examiner I have never flown with.