All posts by nicrodgers

Turning overhead Chepstow

Lesson 22: Navigation introduction

After many weeks of cancellations due to the terrible weather, I finally got back up in the air recently for my first navigation lesson.  A couple of weeks before hand, because of the bad weather we decided to spend a couple of hours doing ground school in preparation for the upcoming navigation lessons. The majority of the remaining lessons focus on navigation and as you’d expect, it’s not something you’d want to be crap at.

There are so many elements of flight planning to consider before the flight. At first it can seem quite daunting. Here are just some of the things to consider:

  • Weather – at departure airfield, destination airfield and en-route
  • NOTAMs  (Notice To AirMen) – temporary notices and restrictions, you must check for any notams along your planned route
  • Royal Flights – you need to phone the royal flight information line to ensure your planned route doesn’t pass near any planned royal flight (royal flights create temporary restricted airspace you have to avoid – otherwise face an interception by an  F/16)
  • Fuel – how much fuel is required for your journey, including a contingency amount
  • Weight and balance – are you able to fly the planned route with the fuel, passengers and luggage that you are planning to take?
  • Alternatives – what airfields can you divert to if the weather turns bad?

As well as all this, you have the job of planning which route you want to take. This sounds like a fairly straightforward process – and can be – but can get very complicated very quickly if your route is surrounded by complex restricted airspace.

In principle, to plan your route, take your aeronautical VFR chart (map) and draw a straight line from your departure airfield to your destination. This will be the shortest route. Next, look along the route to see if it passes through any controlled airspace, danger areas, restricted areas, gliding sites, parachute drop zones and other potential hazards. You then need to alter your route to accommodate all these things.

Then you need to measure the distance of each part of your route, as well as the angle between each point. Once you have the distance (in nautical miles) and the true heading, you plot them in a PLOG (which is essentially your route, written down on paper). You then need to calculate the heading to fly, and the estimated time taken to each fly each leg. Both these things very much depend on the wind. To do this, you use a flight computer. A flight computer sounds very fancy and technical, but in reality is 1950’s technology – a simple slide rule.

flight calculator
The Flight Calculator – no batteries required!

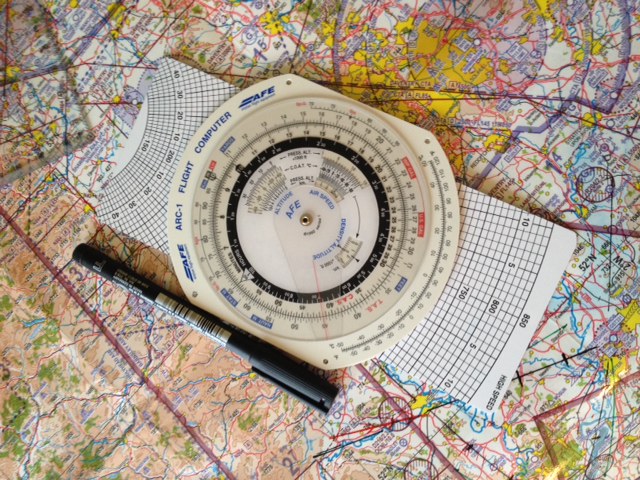
The flight calculator uses the triangle of velocities to give you a ground speed and wind correction angle, given the wind speed and direction and your intended heading and air speed. You plot the heading on your PLOG, then flip the flight calculator over to calculate how long it will take to fly the distance at that speed. Write the estimated time in the PLOG. Finally, you need to convert from true heading to magnetic heading and compass heading. Magnetic heading is true direction adjusted for variation (you learn more about this when studying for the nav exam), whilst compass heading is magnetic heading adjusted for the deviation of your aircraft’s compass. Got all that? Simple.

So now we have a route, with headings to fly, distances and times for each leg. What about altitude? How do you decide how high to fly?  Firstly, you go back to your chart and  look along each leg of your route. You need to look 5nm either side of the planned track for the highest feature – terrain or obstruction – shown on the map. For example, you may see a wind turbine with an indicated altitude of 1,235ft above sea level.  Or it may be a hill that peaks at 1,354ft. Now we calculate the minimum safe altitude. Round the highest point up to the next 100ft, eg (1235 to 1300). If it’s terrain, you need to allow for a potential obstacle on the top of it (as VFR charts don’t show obstructions below 300ft). So take the rounded height and add 300ft. Finally, add 1000ft to give us our MSA.

Because the UK VFR 1:500,000 chart doesn’t depict terrain below 500ft and obstructions below 300ft, even on what appears to be a clear patch of land you have an MSA of 1,800 ft. This is because you could potentially have an obstruction of 299ft on terrain of 499ft. When rounded up, this gives us 800ft, plus the 1000ft = 1800ft.

We don’t have to fly at or above the MSA, we can safely fly below the MSA in good visibility with clear sight of the surface and of 10km or more ahead. So, why do we calculate it? It’s a safety net, there for us if we inadvertently fly in to instrument meteorological conditions (IMC) for which our licence doesn’t allow us to legally fly. This would be a bad place to get to, but it can happen. If it does, the first thing you should do is ensure that you are flying at or above your MSA. So even if you cannot see the ground or terrain, you know that you are above the highest terrain around you and therefore are not at risk of controlled flight in to terrain.

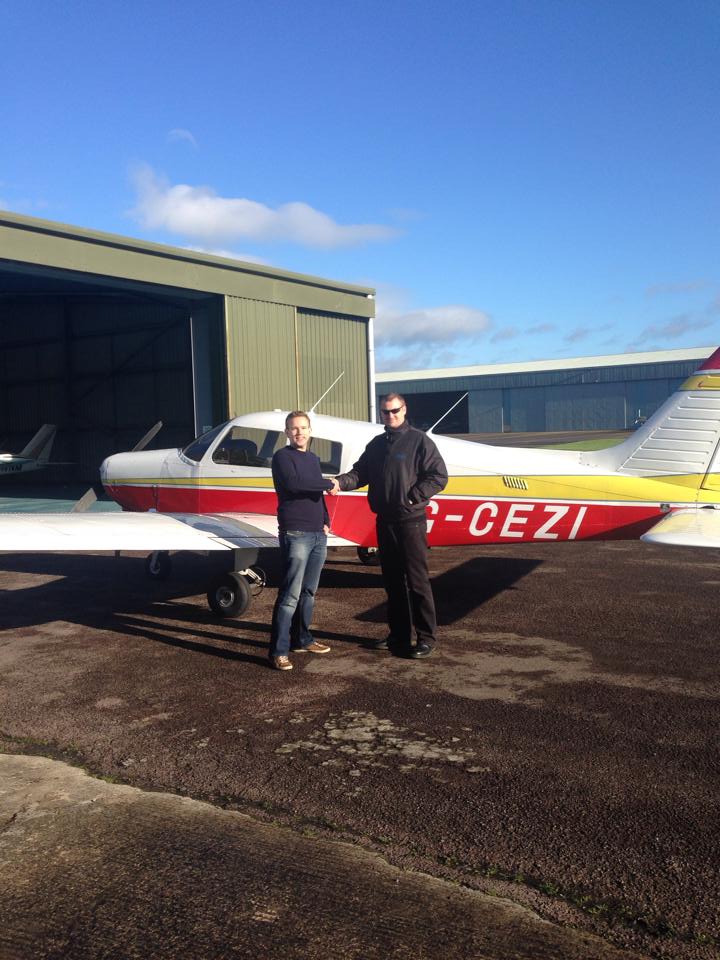
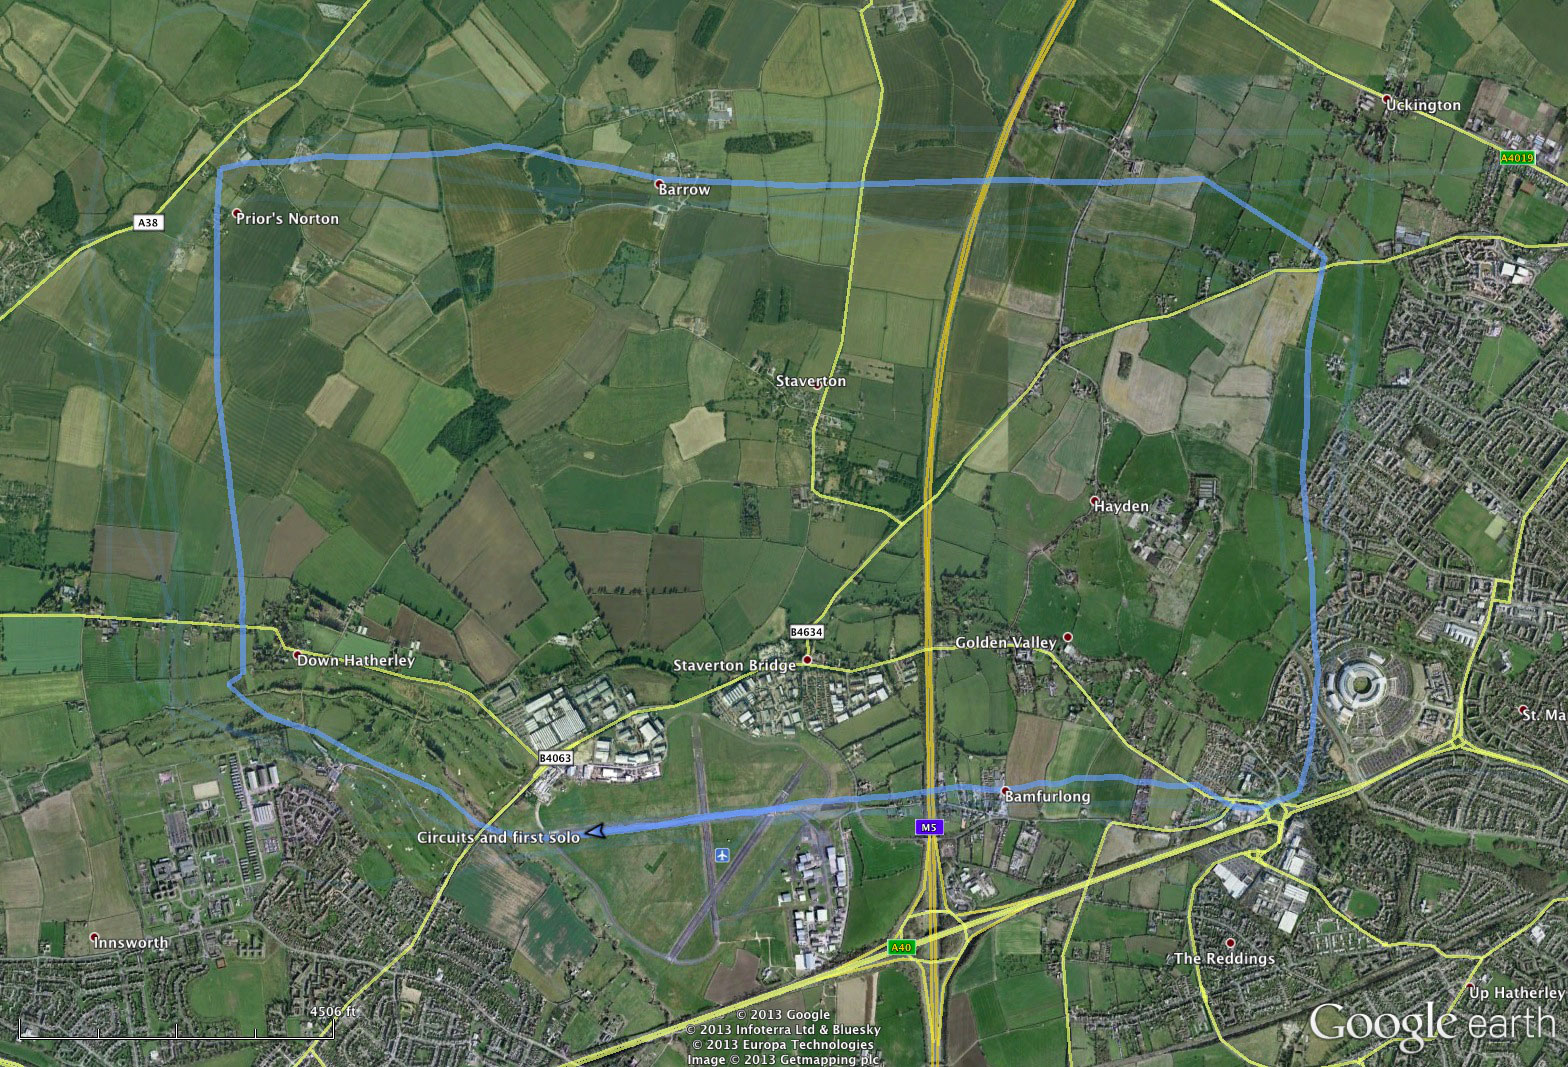
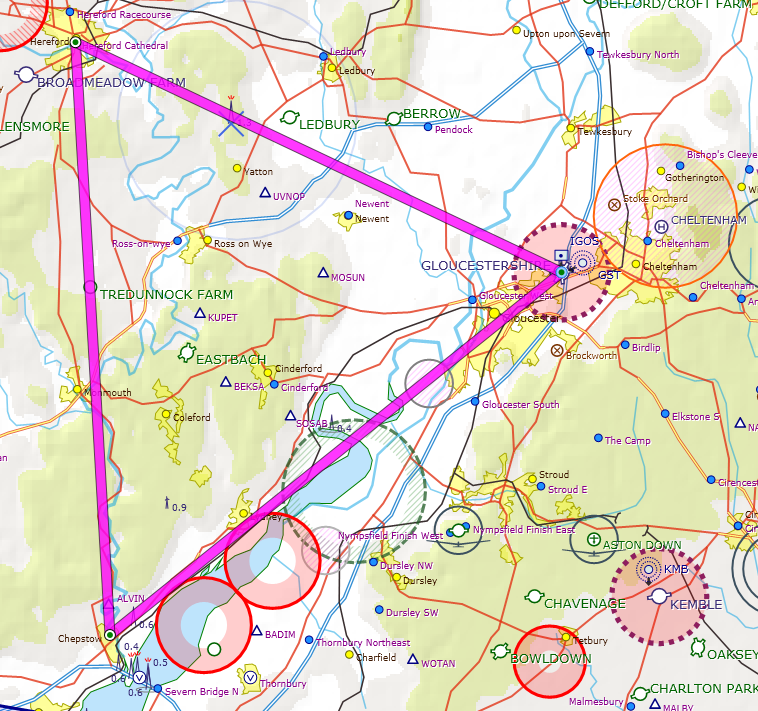
After learning all this, I planned my first route. We’d be flying in a triangle, from Gloucester down to Chepstow, up to Hereford and back down to Gloucester. Each leg is about the same distance, but with today’s wind they would take 18 minutes, 13 minutes and 11 minutes respectively.

Navigation triangle: Gloucester to Chepstow to Hereford to Gloucester


The principles of navigation rely on dead-reckoning, not GPS. It’s all about timing. Before setting off, you mark the quarter, half and three-quarter way points of each leg on your map. Then when in the plane, you start a stopwatch at the beginning of each leg. Because you have calculated an estimated time for each leg, when you have been flying for quarter of the estimated time, you look on the chart to see what you’d expect to see on the ground. Then you look on the ground and determine whether you are where you expected to be.

You could be somewhere different to where you were expecting to be for numerous reasons – the wind could be stronger, lighter or in a different direction to forecast. You may have accidentally been flying the wrong heading. There are a bunch of things you can do to make corrections but I’ll cover this in another post.

When you arrive at each waypoint in your PLOG, you’re expected to do the four T’s (in order):

  1. Turn – to your next heading
  2. Time – note the time of the turn, reset your stopwatch, update your PLOG to reflect actual and revised estimates
  3. Talk – give a position report on the radio (“Gloucester Approach, G-GFCA, Position Report, turned Chepstow time 44, 2500ft on 1019, Estimate Hereford time 55”)
  4. Task – carry out any other tasks such as changing pressure settings, FREDA checks etc

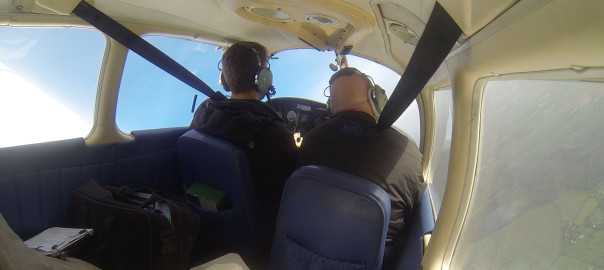
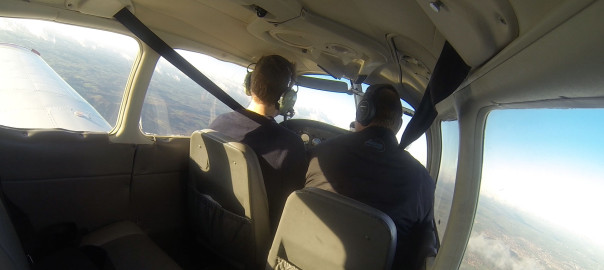
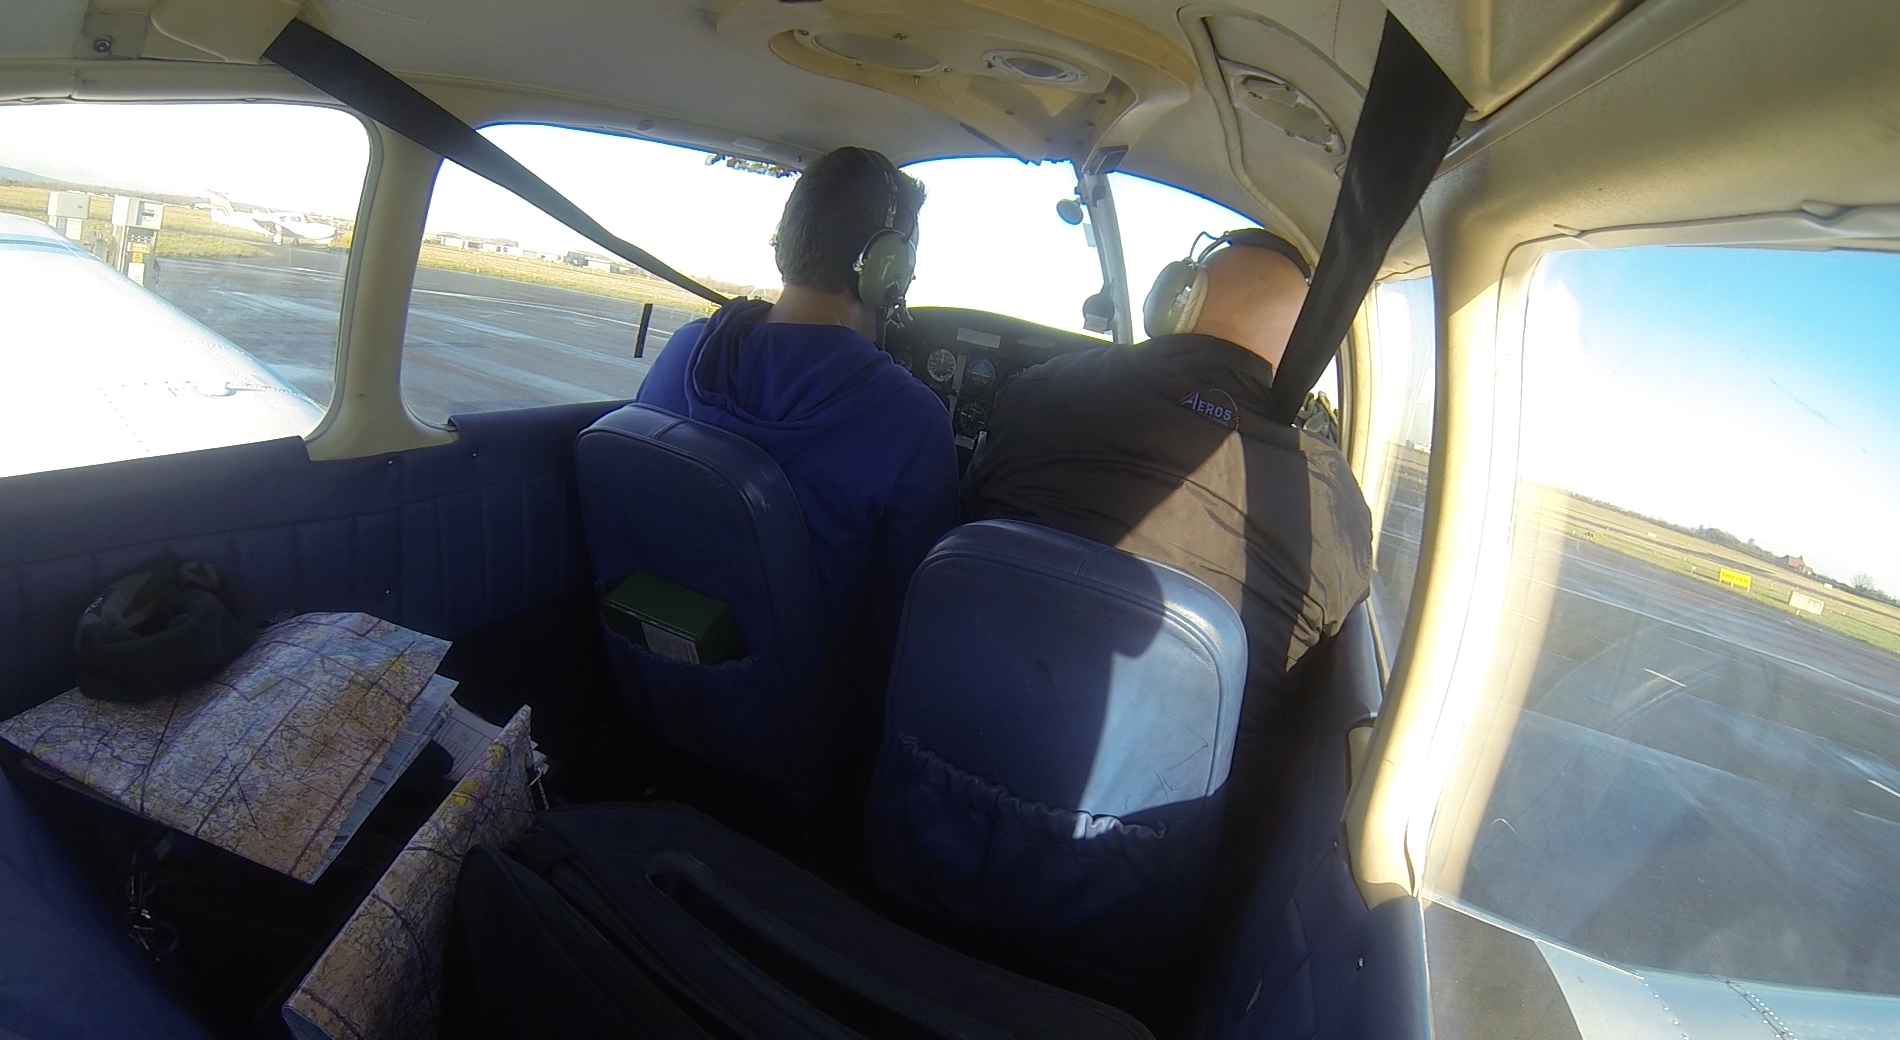
So after all that theory, time to fly. After checking the airplane (yet another element of pre-flight planning!) we were soon taxying out to the runway…

The sun was shining and the sky was clear - at long last
The sun was shining and the sky was clear – at long last…

After being cleared for take-off, as I entered the runway I had another task to add to my ATPL runway checks (Anti-Collision Light, Transponder, Pitot Heat, Landing Light) – start the stop watch! Soon we were climbing away.

My instructor introduced me to some more checks:

At 300ft – FEL checks:

  • Flaps retracted
  • Engine temperatures and pressures
  • Landing light can go off

Then at 1000ft, RAF checks:

  • Radio
  • Altimeter
  • Fuel pump off

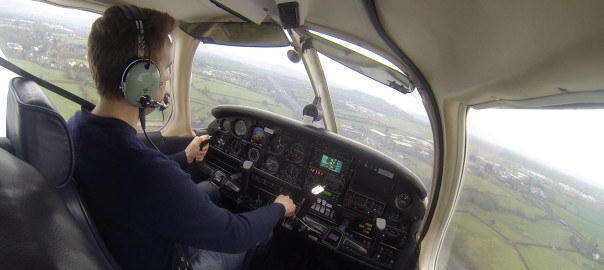
At around 1000ft it’s time to turn to your first heading. After turning on the heading, perform a gross error check to make sure you’re flying in roughly the right direction. Look at the map and the ground to make sure you’re heading the right way.

Everything happened so quickly. Before I knew it, we were at the quarter-way time. I looked at the chart and I looked down below, and we were in the right place at the right time. Same with the half way point. Three-quarter way point was on time too. Finally we reached Chepstow with the Severn Bridges off to our left. I turned to the new heading, noted the time and filled out the ‘estimate’ time for Hereford. I then got on the radio to give my position report.

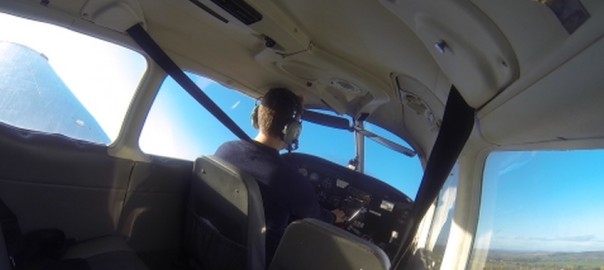
So far so good, and on it continued until Hereford. We arrived there on schedule and turned back towards Gloucester. However on this leg, we appeared to be to the right of our intended track, so I had to correct for this by turning left. Back on the ground after some reflection, I concluded that I turned too early. I could see Hereford but we were not flying above it. Looking at my GPS log, I actually turned about 2nm too early, so even though we were flying the correct heading, we ended up 2nm south of where we wanted to be. Not a biggie – and useful learning for the future. Make sure you’re overhead the place – being able to see it is not the point to turn!

I then made a standard overhead join and joined a fairly busy circuit. Landing went well.

Here’s a 30x faster video of the entire flight:

Next lesson we’ll be doing the same route, but in reverse.

A quick update

Since my last post, the weather has been terrible. I’ve managed to have one lesson (which I’ll write up soon) in 9 weeks 🙁

I’ve been using that spare time to study for the remaining ground exams. I took (and passed) Aircraft General Knowledge last month, and plan to take Navigation, Principles of Flight and Flight Planning & Performance within the next fortnight.

The weather forecast for Saturday (my next scheduled lesson) looks promising, so fingers and toes crossed…

Lesson 21: Practice Forced Landings

Practicing emergency landings is a bit like paying for car insurance. You really hope you’ll never need to use it, but you’re bloody greatful for it if and when the time comes.

I’d be flying with a new instructor today (this’ll be the 4th!) as my schedule meant I couldn’t make it with my usual ones without waiting another week. Thankfully, the PFL lesson is fairly self-contained so it doesn’t matter too much. In fact, as I’ve found when flying for the first time with my other instructors, it’s normally a beneficial experience as I pick up new tips and learn things I hadn’t already been taught.

Before the lesson, we had a fairly lengthy pre-flight briefing talking through what we’d be doing. There are many different ways of executing a forced landing – my learning to fly book has 2 methods, and there are plenty of other ways too. My instructor explained how when doing his PPL he had struggled with field selection during PFLs, and it was only when doing his instructor training that he learnt a method that felt much more intuitive to him. So today we’d be learning that method.

He calls it the seven step method. In the event of an engine failure:

  1. Stay calm, don’t panic and fly the aeroplane! Adjust attitude and trim for best glide speed (73 knots in the Warrior)
  2. Assess the wind direction & turn downwind. Lookout for smoke to give an idea of wind direction, failing that use the most recent wind direction you have been given (eg from the ATIS on departure).
  3. Pick a suitable field (more on choosing a field later) and nominate a 1000ft point.
  4. What’s up – check to see what might be wrong.  Carb heat on, fuel – change tank, check magnetos, check primer is in and locked, throttle open, mixture rich, fuel pump on, check engine t’s and p’s. Obviously at this stage if you can restart the engine then you can continue to fly normally and don’t need to proceed to the next steps.
  5. Maydall call – Mayday x 3, Station you’re calling, Your callsign, Aircraft Type, nature of problem (eg Engine Failure), Attempting Landing in Field, Position, # of POB, Squawk 7700. Eg:  Mayday, Mayday, Mayday, Gloucester Approach, G-GFCA is a PA28, Engine Failure, Attempting Landing in Field,  10 miles north west of airfield, 2 POB. Squawk 7700.
  6. Engine shutdown. As we can’t restart the engine, we need to shut it off. Fuel – off, magnetos – off, throttle – closed, mixture – ICO.
  7. Crash checks. Seat belts – tight, door unlatched, passenger safety brief, master switch off.

The beauty of doing it this way (eg turning downwind) is that it makes field selection easier. Whilst flying downwind, you know that any field to your left or right is a potential landing site, as you can turn base and then on to final and be flying in to wind. Landing in to wind is important, as it enables you to land with the slowest possible ground speed.

When you’re confident that you can reach 2/3rds along the designated landing site, extend the first stage of flaps. Extend the second stage of flaps when you’re confident you can make it to 1/3rd along.

This all assumes you’re at a fairly reasonable height – say at or above 2500ft above ground level. If you’re lower than this, you’ll have less time in the air and may not be able to complete all those steps. Only attempt the checks that you have the capacity for. Below this height, to maximise available time, you may be better turning directly base (instead of turning downwind) and limiting your field selection to fields that are in to wind (eg on your left or right – not left and right).

So what makes a suitable landing site? Ideally, it’d be an empty long length of tarmac, in perfect condition, with emergency services located onsite and a well-stocked pub. But if you don’t have an airport in range, you’ll probably be picking a field.

Things to consider when selecting a field include:

  • Size – is it big enough to land and stop safely, allowing a reasonable margin for error?
  • Shape – a wider field is better than a long, narrow one as it gives you a wider range of approach paths
  • Surface – ideally unobstructed, short grass. Avoid tall standing crops. If you have to land in a ploughed field, aim to land parallel to the furrows – not across them
  • Slope – ideally flat
  • Surroundings – clear of power lines, phone cables, obstructions, etc on the approach path. Ideally the under and overshoot areas would make good landing sites too.

After the briefing, I went out and did the A-check and got myself settled in to the plane. A couple of minutes later, we were taxying out to the runway. One thing I learnt today is to move throttle to idle before taking off the parking break. (When parked, we move the throttle to around 1200rpm.) Makes sense when you think about it – something I hadn’t picked up on before.

We were soon up in the air and climbing to 3500ft. During the climb, I initially forgot to do the climb lookout (either by lowering the nose, or moving to the right and back to the left) – something I need to remember for future.

During the first FREDA check, I completely forgot to check for carb icing until I was reminded by my instructor. Duh! 

Apart from that, everything was going well. My instructor demonstrated a PFL and then I had a go at doing one. Here’s a clip of me doing my thing:

We practiced quite a few PFLs at 2500ft as well as some lower level ones, where you really don’t have much time. Selecting a field and running through the steps felt ok to me. The hardest task was trying to explain which field you had picked, whilst surrounded by fields that all pretty much look the same!

When we were happy that I’d practiced enough, we headed back to the airfield. I requested rejoin instructions from about 10nm out, and was told to report again at 3nm. I planned the approach so that I’d arrive at the airfield above the numbers of the active runway, with the runway on the right hand side (it was right hand circuits). After reporting at 3nm, we were transferred from approach to tower and given clearance to descend on the deadside. The next few minutes went pretty quickly – there were 3 aircraft behind us and 2 ahead. At one point, an aircraft requesting rejoin was told the circuit was full and to wait in the overhead. I hadn’t heard that before!

After a stressful couple of minutes (doing lots of lookout and adjusting our track to fit in) we were had landed and were coming to a halt. Tower asked us to report runway vacated (the plane behind was on 1nm final) so we kept our speed up as we continued down the runway waiting for the exit on the left. After turning left (on to runway 18/36) I was about to report vacated, but my instructor corrected me. Even though 22 was the active runway and we had turned off it, we don’t “vacate” the runway until we cross the yellow lines, which using this exit meant after leaving 18/36. Another new one for me. All good learning.

A quick de-brief back in the office and that was it for today. I’ll revise PFLs later on in the course as we get nearer to the final test. Next-up: navigation!

Lesson 20 – Advanced Turning

After all the circuit lessons I’ve had recently, I was really looking forward to doing something different. Today’s lesson would be on advanced turning. “How can turning be advanced?”, I hear you ask. Well, essentially, it’s a fancy way of saying steep turns.

We’d be looking at two different steep turns today:

  • 45 degrees of bank
  • 60 degrees of bank

These are steeper than the climbing turns (15 degrees of bank) and standard turns (30 degrees of bank) that I’ve been doing up until now. In the pre-flight briefing, I learnt that in normal flying we wouldn’t normally do any steep turns. The reason we learn them is primarily to practice it as a collision avoidance technique. I’m hazarding a wild guess that even without this lesson, if I saw a plane coming straight towards me I wouldn’t instinctively have done a ‘normal’ turn anyway – but hey.

As the angle of bank increases, the wings have to create greater lift. You create greater lift by increasing the angle of attack. Much more back pressure is required when doing a 60 degree turn than when doing a normal turn.

For a given airspeed, the angle of attack in the turn is greater than during level flight. This means the stalling speed is higher during the turn. You wouldn’t want to be doing a steep turn when flying slow (like turning on to final, for example) or low.

During normal straight and level flight, the wings create sufficient lift to support the weight of the plane.

Lift = weight   and the load  factor is 1g

During a turn, load factor increases. In a 60 degree turn, you’ll experience 2G. Fighter pilots can experience up to 9G. Aircraft are certified to withstand up to a specified load factor – typically around 3.8g for a light aircraft. The Va airspeed is the maximum airspeed at which full and abrupt control movements can be made, without risk of over-stressing the aircraft. If you’re above Va, you need to be very careful not to make any sharp control movements or you’ll risk breaking the plane, and nobody likes to watch a wing fall off.

To do a steep turn to the right:

  • HASEL checks
  • Roll right
  • As you go through 30 degrees, increase back pressure, full power, and use right rudder to keep in balance
  • Roll off, using rudder to balance
  • Power
  • Positively select straight and level attitude
  • Trim

A steep turn to the left is slightly different, but to keep in balance you need to rudder right and left (because of the yaw effect from the increased power).

When doing a steep turn, if you don’t apply enough back pressure you risk entering a spiral dive. The natural instinct is to pull back to try and stop the descent, but this is the wrong thing to do. Instead, you should move the throttle back to idle and roll the wings level (out of the turn). Then gradually pull back to reduce airspeed. Once airspeed is lower than Va, apply power and climb as normal.

After checking the aircraft, we taxied out and were soon up in the air. We climbed to 3500 feet and carried out a HASEL check,  having a good lookout to make sure nothing else was nearby. My instructor demonstrated a 60 degree turn. Wow. Feel the g-force! My cheeks felt pinned back and it was a struggle to move my arms. I wanted – no, needed – to have a go at this! My first 60 degree turn went ok. I underestimated just how much back pressure is required to stay level, but eventually worked it out. When rolling out of the turn I didn’t release enough back-pressure and we ended up about 300ft higher than when we started.

After a couple more, I had the technique nailed and was able to do a level steep turn to the left and the right.  45 degree turns feel rather sedate compared to the 60 degree turns, whilst the 30 degree turn feels positively balmy after all that steepness. If only all turns could be at 60 degrees, it would be such fun (probably not for the passengers in the back though!).

We intentionally entered a spiral dive and recovered using the correct technique. Like stalling, in the Warrior it’s a bit of a non-event really, so long as you follow the appropriate recovery technique.

After a few more practices, we decided that we’d done everything we’d needed to for this lesson, so we headed back towards the airfield. On the way, my instructor put up the Instrument Screens – essentially big sheets of plastic that literally block the pilots view so that you can’t see out – to give me a taste of the IMC (instrument meteorological conditions) lesson coming up.

When you qualify as a PPL, you’re only allowed to fly in VMC – visual meteorological conditions, which are a set of rules specifying visibility, distance from cloud, etc in different classes of airspace. Essentially, you need to be able to see the ground so that you can navigate based by the features of the ground.  To fly in worse weather conditions (eg. fly in IMC conditions) you need to be either Instrument Rated or have an IMC licence. The PPL syllabus includes an hour of IMC instruction designed primarily (I think) to scare people from wanting to intentionally try a flight in IMC.

So, with the screens up (and my instructor acting as the lookout – he had full visibility) I had to perform a series of manoeuvres like flying straight and level, regular turns, climbing and descending. I’ll go in to this more after having the full IMC lesson, but basically you need to learn to trust the instruments and ignore your human instincts. Your inner ear easily gets confused and gives you the sensation that you’re climbing or descending when in fact you could be doing neither. There’s a certain order and frequency you need to monitor each of the instruments, and the workload is insane.

I think I managed to fly pretty well using the instruments and didn’t find it very scary. My instructor seemed to agree as he said “you’ve obviously spent way too long on flight simulators”. A fact, sadly, I can not argue with.

After a while, we took the screens down and planned our approach. I was introduced to yet another mnemonic, CARPACER, as a template to use in radio communications:

  • Callsign (eg. G-GFCA)
  • Aircraft type (PA28)
  • Routing (Flying Gloucester to Coventry)
  • Position (5 miles north of Tewksbury)
  • Altitude (2000ft on 1020 QNH)
  • Course (Heading North)
  • Estimate (Estimate Coventry at 55 (minutes past the current hour))
  • Request (Request basic service)

Apparently that format can be used pretty much in any situation where you’re unsure of what to say.

So, to request our rejoin, we used:

  • G-GFCA, Tewksbury, 2000ft on 1001, heading south, request rejoin

(You don’t have to say all elements – use your discretion. Not much point in giving an estimated time, as ATC will have a pretty good idea how long it takes to get to them from Tewksbury. No need to say aircraft type as we were already on a basic service with them.)

Another week, another mnemonic to learn.

I wanted to practice overhead joins (I’ve only done one) so I asked for one, even though we were flying south towards the airfield and the active runway was 18. ATC obliged and asked us to report 3 miles from the field. We did so, and were handed over from Approach to Tower. Tower then asked us if we would mind taking a direct join on final so we agreed and after a relatively smooth landing, it was all over for another few days.

Here’s a little video clip of me doing a 60degree turn. The audio didn’t record for some reason, so excuse the crappy dubstep. Look at how steep everything looks out of the window – it really was like that!

Lesson 19 – final circuit consolidation!

The Aeros PPL syllabus requires around 3 and a half hours of solo flight before finishing the solo consolidation and moving on to advanced turning, PFL and navigation. I made a mistake whilst adding up my time last lesson and had overestimated how much time I had flown solo – it was 2 hours 55. So today would be another (hopefully final) lesson of circuit consolidation to build up my solo hours.

Out to the apron, I did the A-check and prepared to get going. The ATIS reported 6knot wind from 160, and runway 18 was active with left hand circuits. I was excited at the thought of finally getting to do some left-hand circuits. However my excitement didn’t last long! After completing the start-up checks and getting ready for taxi, the time was now 11.25 so I had to re-check ATIS (it updates at 25 and 55 minutes past each our). The active runway had changed to 22, with right-hand circuits, so I’d be flying the same pattern as last lesson. Nevermind!

I did three circuits with my instructor: one normal, one flapless, and a glide approach. Everything seemed to go well – I made the glide approach ok although it was fairly close. I put the first stage of flap in a little earlier than ideal, but it worked out ok. The idea with a glide approach is that you should be sure that you can reach two thirds up the runway before using flap. Then, with one stage of flap, you should be able to make it to one third up the runway. Only when you are absolutely sure you will make it to the threshold should you use the final stage of flap. Without any power, you don’t have the option of regaining height so you must be super careful to keep as much altitude as possible (by maintaining best glide speed).

We landed after the glide approach, and my instructor jumped out, leaving me to go solo.

I flew five circuits. The first couple were quiet (I had one ahead) but then things became progressively busier – at one point I was number 5. A couple of left orbits were necessary for spacing (one of which I requested when the Technam in front was a little close for comfort) which sorted everything out. Although the reported ground wind was only 6 knots, it seemed to be much stronger at circuit height. On the upwind leg (after take off) the nose attitude needed to be lower than normal to attain the standard climb speed of 79. Equally, on downwind the airspeed went up to 125 at one point (it’s normally 100) which gives you even less time than normal to do all the downwind checks and radio call.

After the five circuits, I called it a day and taxied back to the Aeros apron. I have now completed 3 hours and 40 minutes of solo flight time, enough to move on to the next stage of training. Wahey!

Here’s the GPS tracks:

Here’s a clip of one of my circuits:

Lesson 18 – more circuit consolidation

Another day of circuit consolidation. I had a different instructor to last lesson, so we started off doing 3 circuits together. I decided to go-around on my first landing as my speed was a little high and I thought we risked a rather large balloon. My instructor said (afterwards) he thought I could have landed just fine, but was good to see I was able to make the decision myself. It’s always better to be safe than sorry!

We did 2 touch and gos together, before stopping for the instructor to jump out. We were on runway 22 today, which I had not done circuits on before, so I was quite glad to do the first few with the instructor whilst I got used to the ‘feel’ of it. Whilst there’s not a huge difference between 22 and 27, 22 doesn’t have a noise abatement procedure on right hand circuits, so the initial upwind leg felt a bit different.

I then did a further 7 solo circuits, which took about 55 minutes, before heading back. The circuit became busier and busier – there were 5 remaining in the circuit at one point – so there were lots of orbits and extended downwind legs. On my second solo circuit I had to extend downwind and ended up doing a 3.5m final. For a couple of seconds I felt a bit disorientated – I couldn’t see the airfield (I could, I just wasn’t focusing at the right distance) but I trusted the instruments (the ADF was tuned) and the general timing of the pattern and found myself pretty much lined up on the extended centreline at 3 miles. Goes to show how easily/quickly it can happen though, without the familiarity of the visual reference points (GCHQ for runway 27) you’re used to.

Here’s a clip of that circuit:

I forgot to start the GPS recorder, so no tracks this time.

Next lesson should hopefully be either advanced turning or practice forced landings (PFLs). Both of which require considerably better visibility than is needed for circuits, so I may have a longer wait for my next flight than usual…Fingers crossed.

More circuits..

Since the last post, I’ve had a further 3 lessons doing circuits.

During which time, I’ve clocked up a further 2 hours of time with my instructors, and 1 hour 45 minutes solo.

I’m working on becoming more consistent and trying to perfect my landing technique. In my last solo, I completed 8 take-offs and landings. The first 6 seemed pretty good to me, but then the last two were a bit ropey. I was probably getting tired. Or hungry. Or both. Probably both.

My next lesson will be about an hour or so of me entirely on my own. This is a new milestone, as up until now I’ve always done a few circuits with the instructor at the start of the lesson before he hops out and leaves me to go solo. Next time it’ll be me – from start to finish!

Here’s a clip of a couple of my circuits from the latest lesson. I moved the GoPro forward a bit, which I think gives a better view than the previous clips.

Here’s the GPS tracks from lesson 15. Notice how I had to extend the upwind leg twice, due to the aircraft ahead of me in the circuit practicing a fan stop. It was getting pretty busy up there, so I had to do a couple of left orbits before turning on to right base.

Compare them with the tracks from lesson 17, which I think look more consistent. This time, I extended the crosswind leg a couple of times for spacing before turning downwind – I was following a plane in front of me. ATC asked me to do a left orbit mid-downwind, which was a first for me. All seemed to work out pretty well!

I'm flying - alone!

Lesson 13 – circuits and first solo!

We started off the lesson in much the same way as the previous circuit lessons. By now, I’m used to the routine of checking the aircraft, starting up, taxying and flying the circuits. I flew 5 unassisted circuits (there was a 6 knot crosswind) and things seemed to be going well. The sky was a beautiful blue colour, you could see for miles and there wasn’t much traffic in the circuit.

After the fifth touch and go, during the downwind leg my instructor said we should land after this one. I thought nothing of it, and carried on with the circuit and landing. We vacated the runway, ATC gave us taxy instructions back to the apron, and then my instructor replied with the immortal words “request crew change, for student first solo” and suddenly my heart started racing. After waiting for – and thinking about – this moment for so long, my head had a mixture of emotions ranging from excitement through to trepidation.

We taxyed up to holding point alpha 2, and my instructor gave me a few words of encouragement and advice. When I’m alone in the plane, my callsign would be Student Aeros 51 instead of the usual Aeros 51. I had to say it out loud a few times to myself, just to practice and to try and break the now-instinctive habit of saying just Aeros 51. Then, with a smile, my instructor said “enjoy it – have fun!” and he climbed out. Door closed and locked, there I was, at the edge of the runway, engine on and for the first time ever – alone in the cockpit!

I got myself settled in, completed the pre take-off checks and made my first solo radio call: “Student Aeros 51, ready for departure”. My heartbeat had calmed and it felt like any other circuit. After waiting for a while, I received clearance to take-off and I took off the brakes and started rolling on to the runway. It was only at that point that it truly sank in. I was about to take off, fly around the airfield and land again – on my own. Entirely alone. Nobody for advice, nobody to takeover in the event of me messing something up. It was all down to me.

Full throttle, final take off checks, and pull back. I am in the air – flying – alone. From this point onwards, my mind entered a kind of “auto pilot” mode and I was reliving – almost subconsciously – the steps we’d been rehearsing in all the circuit practice lessons I’d had. My memory is a blur of what actually happened during the flight, so I’m grateful for the GoPro, which captured the whole thing. Everything seemed to go smoothly and I made a safe landing. I touched down a little later than normal and took a second or two before applying the brakes, which meant that I was quite a bit faster than we’d normally be when turning to the left to exit via runway 18/16. I started to turn left (left rudder) and soon realised we were moving too fast to be able to safely take the exit, so straightened up and headed down towards the end of the runway. Runway vacated, I taxyed back to the Aeros apron via a holding point whilst a vintage plane took off from the grass 22 runway.

Back in the apron, power-down checks complete and the engine off. Headphones off. Deep breath. I was shaking. After a high-five from my instructor, we posed by the plane for the obligatory ‘congratulations’ photo, then headed back inside for a coffee and debrief.

Handshake with my instructor outside the plane after completing my first solo

I’m writing this post the day after my solo, yet I still have a huge grin on my face from yesterday. I keep telling myself that I have flown a plane – alone – but it hasn’t yet sunk in… The excitement – and sense of achievement – from that first solo is massive, and it re-enforced (not that it ever needed to!) my decision to finally learn to fly. It’s given me a taster of what’ll be possible when I get my licence. I realise I’m still at the very beginning of a very long (never ending) journey of learning, which will continue long after obtaining my PPL. Bring it on.

Here’s a video of my solo:

My GPS track isn’t geometrically perfect, but it’s not bad – and hey, it was my first ever solo after all!

The GPS track of my first solo circuit

The next five lessons will be ‘consolidation circuits’, wherein we have a mixture of dual and solo circuits. Hopefully this will build confidence a little more and make the whole experience seem a bit more normal and, hopefully, shake-free!

Lesson 12 – stalling part 2

The sun was out, the sky a vivid bright blue, and the wind calm. One of the best weather days since I’ve started training. Perfect conditions for stalling part 2, which requires altitude (at least 3,000ft above ground level to recover). In stalling part one, we practised stall recovery from a clean configuration – eg. flaps retracted, no power. So this lesson, we’d be exploring the different stall characteristics in various configurations, and learning to how to recover.

The aircraft had already been A-checked and fueled, so we taxyed and headed straight out. We climbed to 5,000 ft (QNH) and found a nice, clear area of countryside outside Worcester which was perfect for our needs and complies with the ABCD requirements of the Location part of the HASELL checks – clear of Airspace; clear of Built-up areas; clear of Crowds; clear of Danger areas. The view today really was glorious – we could see for at least 100miles all around, including the towerblocks of Birmingham, the Severn Bridges and beyond. Beautiful and a nice change from the now familiar view within the circuit.

First off, we revisited the stalling characteristics in clean configuration. The stall warner starts to sound at around 55kts, followed by buffeting at 50kts, followed by the nose dropping and the actual stall taking place shortly thereafter.

With two stages of flap (25 degrees), the stall warner sounds with a lower nose attitude and at the slower airspeed of around 45kts. There’s less buffeting (because of the slipstream effect) and the nose doesn’t drop until around 40kts – quite a bit lower than the plain config.

With two stages of flap and a low-ish RPM setting, the stall warner sounds at around 50kts but with a much higher nose attitude and the buffeting is all but masked by the slipstream. 

As usual, the standard stall recovery is to lower the nose. Apply power as a secondary measure to minimise height loss during the stall.

Next, we practiced stall recovery whilst in the approach configuration – 1500rpm, 25degrees of flap, turn and extend full flap. Then we stalled in a simulated turn to final approach. When the drag flap is down, the standard stall recovery still applies – lower nose, power, carb heat, followed by drag flap away. Then once a positive rate of climb has been established, retract the remaining flaps in stages.

All done and dusted – fairly straightforward so we headed back to the airfield. I used the opportunity to practice the standard overhead join, where you fly over the active runway at 2,000ft above airfield elevation (QFE) and descend on the dead-side in a turn, so that you cross the other end of the active runway at the normal circuit height of 1000ft. From then on, you’re in the standard circuit pattern.


Lesson 11 – more circuits, practice forced landings

The weather was lovely today – clear blue sky and the wind was calm. We’d be practicing more circuits and practicing forced landings in the event of engine failure after take-off (EFATO for short).

If the engine fails after take-off, if at all possible you should aim to land on the runway you have just taken off from. Do not try to turn around to as you probably wouldn’t make it! If there’s not enough runway left for you to land, you need to change attitude for best glide (73 knots in the Warrior) and then select a landing site somewhere between 30degrees to the left and 30 degrees to the right. Landing site selected and sure that you’ll make it, maintaing best glide attitude, extend flaps, then start engine shutdown – throttle closed, mixture to idle cut-off, mags off, unlatch and open the door in preparation for landing.

My first EFATO practice wasn’t quick enough – thank goodness it wasn’t real! – but the next one was much better. Circuits went well this lesson – I’m starting to use the rudder more on final to keep the runway aligned, which seems to be working out well.

During one circuit, as we were on base about to turn final, my instructor spotted a plane above us (he was behind us!) and quickly radioed tower to ask their intentions. Tower immediately asked the aircraft to go around, leaving us to land. Scary few moments – and goes to show the importance of good lookout. Here’s a clip:

If I’m consistent again in the next lesson (and weather conditions are favourable) then with any luck I should be doing a solo circuit. Gulp!